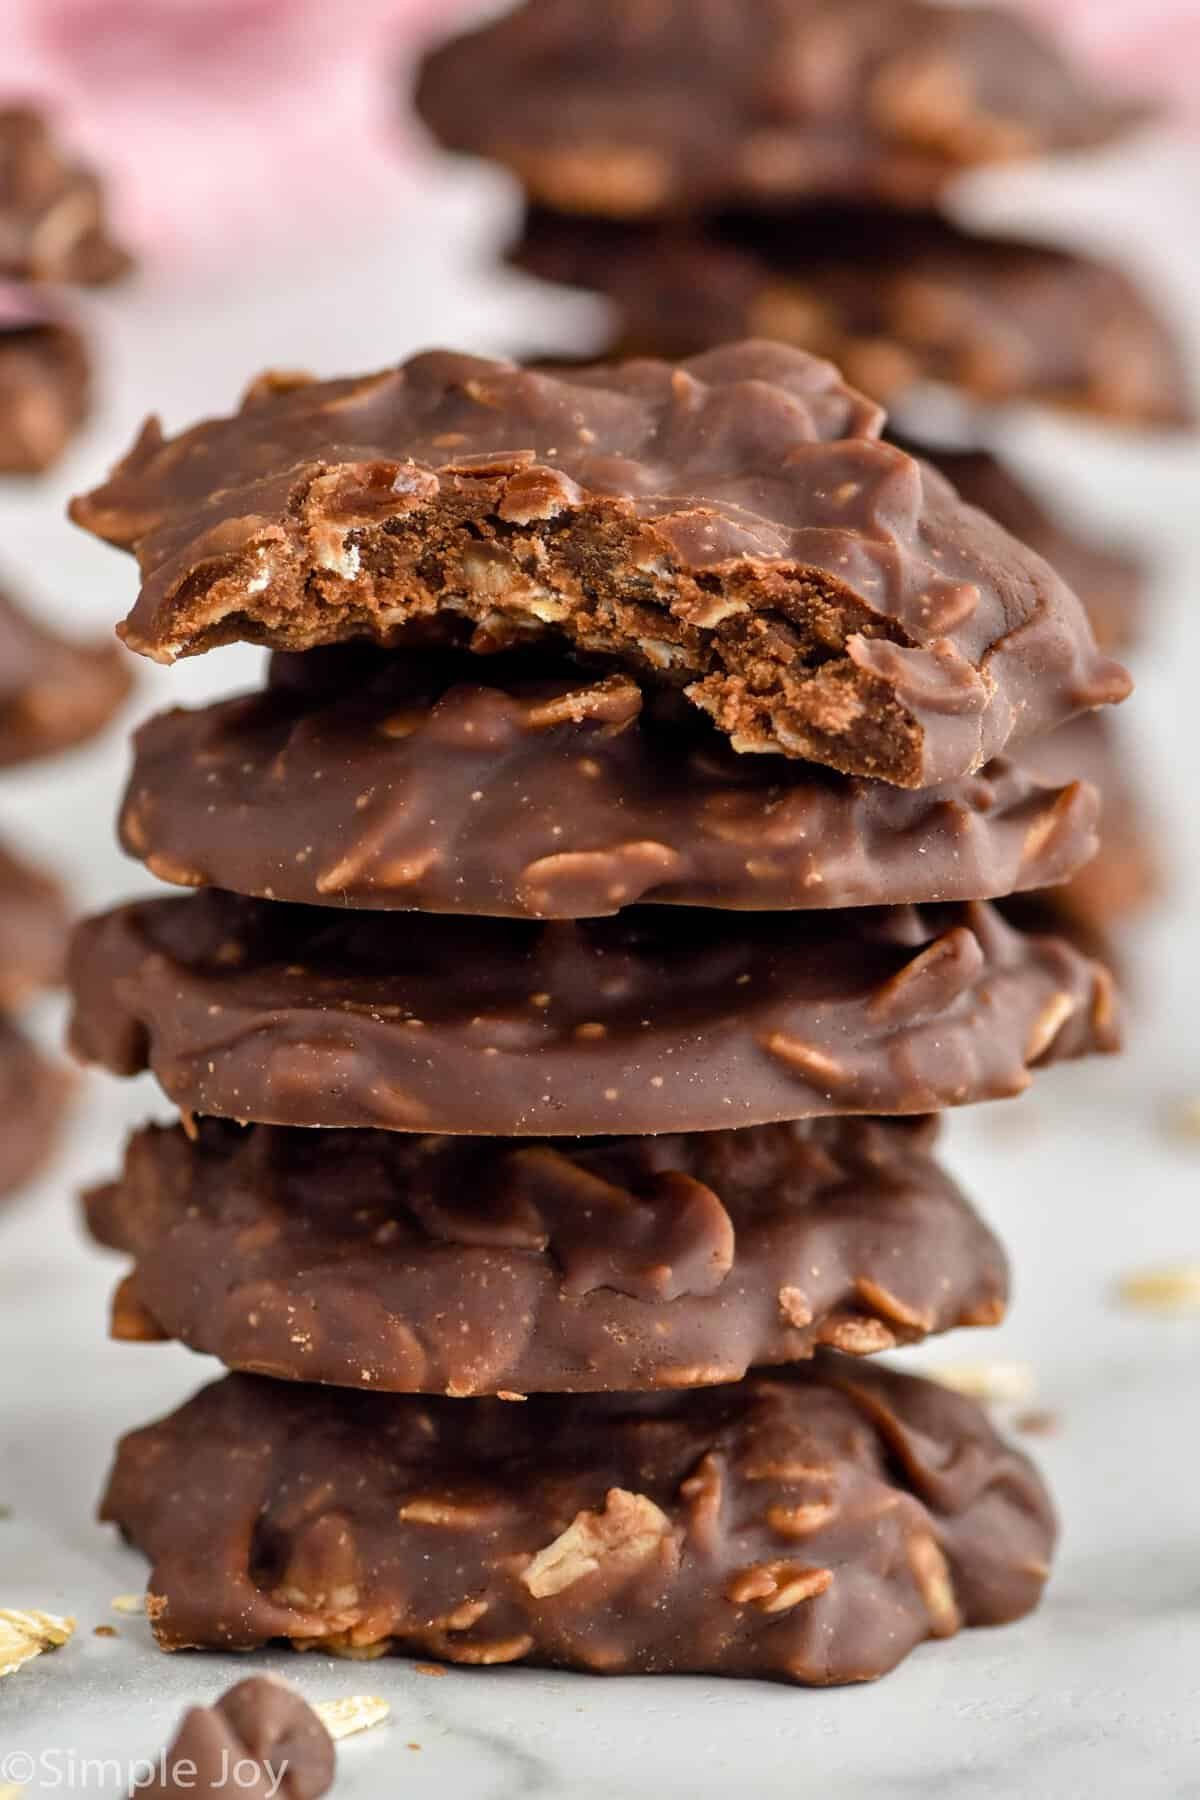

No-bake chocolate oatmeal cookies are a simple homemade treat for busy days when you want something sweet without turning on the oven. Made with oats, cocoa powder, sugar, butter, milk, and peanut butter, these cookies combine a rich chocolate flavor with a chewy texture. They are especially useful when you need a quick dessert for family gatherings, an afternoon snack, a lunchbox treat, or a last-minute sweet craving.
Unlike traditional cookies, this recipe does not require baking trays or a preheated oven. Instead, you prepare a chocolate mixture on the stovetop, stir in the oats, and let the cookies cool until firm. The process is straightforward, but a few details—especially how long the chocolate mixture boils and how quickly you work after adding the oats—can make the difference between cookies that set properly and cookies that remain too soft.
This guide explains how to make no-bake chocolate oatmeal cookies at home, including the ingredients, exact method, common mistakes, ingredient substitutions, storage advice, and variations for different tastes.
For visual inspiration, you can also explore photos of no-bake chocolate oatmeal cookies.
1. What Are No-Bake Chocolate Oatmeal Cookies?
No-bake chocolate oatmeal cookies are sweet, chewy treats made by combining oats with a cooked chocolate mixture. The mixture commonly contains butter, milk, sugar, cocoa powder, and peanut butter. Once everything is combined, spoonfuls are placed on parchment paper and left to cool until they become firm enough to handle.
Traditional cookies usually depend on an oven to cook the dough and create their texture. No-bake cookies work differently. Their texture develops as the chocolate mixture cools and firms around the oats. This means that the balance of ingredients and the cooking process are particularly important.
These cookies are popular because they are:
- Quick to prepare: The active preparation time is usually short.
- Oven-free: You do not need to heat your kitchen with an oven.
- Easy to customize: You can add coconut, chopped nuts, vanilla, or other ingredients.
- Convenient for busy schedules: They can be prepared ahead of time and stored for later.
- Made with common pantry ingredients: Many households already have most of the ingredients available.
Although they are easy to make, no-bake cookies are not completely effortless. The chocolate mixture needs to reach the right consistency, and the cookies need enough time to cool. Following the method carefully helps produce a batch that holds together instead of becoming crumbly or sticky.
2. Why This Recipe Is Perfect for Busy Days
A homemade dessert does not always need complicated ingredients or a long preparation process. This recipe is ideal when you want a chocolate treat but do not have time to prepare traditional cookie dough, chill it, shape it, and bake multiple trays.
No oven required
The main advantage is that you do not need an oven. This is convenient during hot weather, in kitchens with limited equipment, or when your oven is already being used for another dish.
Simple preparation
You only need a saucepan, a spoon or spatula, measuring tools, and a flat surface covered with parchment paper or a suitable nonstick liner.
Easy to prepare in advance
You can make a batch earlier in the day and allow the cookies to set before serving. They are also convenient for preparing a dessert for guests without having to bake immediately before everyone arrives.
Flexible ingredients
If you do not have peanut butter, you can explore alternatives. If you prefer a less intense chocolate flavor, you can adjust the cocoa slightly, although major ingredient changes may affect the final texture.
Suitable for different occasions
These cookies work well for afternoon tea, casual family desserts, picnics with appropriate food storage, and homemade snack boxes. They can also be made in smaller portions when you want a quick sweet bite rather than a large dessert.
Keep in mind that these cookies are still a sweet treat. Oats provide fiber, but the sugar and butter mean that they should not automatically be considered a low-sugar or low-calorie snack.
3. Preparation Time, Yield, and Difficulty
Here is a practical overview of the recipe.
| Recipe detail | Information |
|---|---|
| Preparation time | About 10 minutes |
| Cooking time | About 5 minutes |
| Setting time | Around 30–60 minutes |
| Total time | Approximately 45–75 minutes |
| Yield | About 18–24 cookies |
| Difficulty | Easy |
| Cooking method | Stovetop, followed by cooling |
| Main texture | Chewy, chocolatey, and slightly firm |
The exact yield depends on how large you make each cookie. Smaller spoonfuls produce more portions, while larger mounds make fewer but thicker cookies.
The setting time also depends on room temperature, cookie size, humidity, and the proportions of the ingredients. Allow additional time if the kitchen is warm or the cookies are particularly large.
4. Ingredients for No-Bake Chocolate Oatmeal Cookies
The following quantities make one medium batch. Measure the ingredients before you start because the mixture can begin to thicken quickly once the oats are added.
Main ingredients
- 2 cups rolled oats: The main ingredient that gives the cookies their chewy structure.
- 1 cup granulated sugar: Adds sweetness and helps create the syrup that firms as it cools.
- ¼ cup unsweetened cocoa powder: Provides the chocolate flavor.
- ½ cup unsalted butter: Adds richness and helps bind the ingredients.
- ½ cup milk: Helps dissolve the sugar and combine the chocolate mixture.
- ½ cup creamy peanut butter: Adds flavor, richness, and binding power.
- 1 teaspoon vanilla extract: Adds warmth and improves the overall flavor.
- A small pinch of salt: Balances the sweetness and enhances the chocolate.
Choosing the right oats
Rolled oats are usually a reliable choice because they provide a pleasant chewy texture and absorb the chocolate mixture without disappearing into it.
Quick oats can also work, but they often produce a softer and more compact cookie. Steel-cut oats are not recommended for this recipe because they are too firm and require a different cooking method.
Choosing cocoa powder
Unsweetened cocoa powder is the easiest option for controlling the sweetness. If you use sweetened drinking chocolate powder instead, the flavor and texture may change because it can contain sugar, milk powder, or other ingredients.
Choosing peanut butter
Creamy peanut butter blends smoothly into the chocolate mixture. Crunchy peanut butter can be used if you enjoy small pieces of peanut in your cookies.
If you have a peanut allergy in your household, do not simply replace peanut butter with another nut butter without checking allergies and product labels. Sunflower seed butter may be an option for some households, but its consistency and flavor can differ.
5. Equipment You Will Need
You do not need special baking equipment for no-bake chocolate oatmeal cookies.
Prepare the following:
- A medium or large saucepan
- A heat-resistant spoon or silicone spatula
- Measuring cups and spoons
- A mixing bowl for the oats, if desired
- Parchment paper or a suitable nonstick surface
- A spoon or small cookie scoop
- A cooling rack or flat tray
A candy thermometer is optional. Most home cooks can make this recipe without one, but a thermometer can help when troubleshooting repeated problems with cookies that do not set.
Use a saucepan large enough to hold the chocolate mixture and oats comfortably. A very small pan makes stirring difficult and increases the chance of spilling hot syrup.
6. Step-by-Step Instructions
The most important part of this recipe is preparing the chocolate mixture correctly. Read through the steps before beginning so that you can work efficiently once the mixture is ready.
Step 1: Prepare your work surface
Line a flat tray, baking sheet, or countertop-safe board with parchment paper. Make sure the surface is stable and large enough to hold all the cookies without crowding them.
Measure the oats into a bowl and keep them close to the stove. Measure the peanut butter and vanilla as well.
This preparation matters because the mixture can thicken as it cools. You do not want to search for ingredients after the hot chocolate mixture is ready.
Step 2: Combine the sugar, cocoa, butter, and milk
Add the sugar, cocoa powder, butter, and milk to your saucepan.
Place the saucepan over medium heat. Stir slowly while the butter melts and the sugar begins to dissolve. Scrape the bottom and corners of the pan with your spatula so that cocoa powder does not remain stuck in dry patches.
Continue heating until the mixture becomes smooth and begins to bubble.
Avoid using excessively high heat. Rapid heating can make the mixture boil unevenly or scorch around the edges before the sugar dissolves properly.
Step 3: Bring the mixture to a controlled boil
Once the mixture reaches a full, steady boil, let it boil for approximately one minute, stirring as needed to keep it from scorching.
This timing is important. If the mixture does not cook enough, the cookies may remain too soft or sticky. If it cooks too long, the mixture may become too thick and produce dry or crumbly cookies.
Because stovetops and pans vary, the exact behavior of the mixture may differ. If your cookies have repeatedly failed to set, a candy thermometer and a reliable recipe-specific temperature can help you improve consistency. For a first batch, follow the stated cooking time and avoid making several ingredient changes at once.
Step 4: Remove the saucepan from the heat
After the controlled boil, turn off the heat and move the saucepan away from the burner.
Add the peanut butter, vanilla extract, and pinch of salt. Stir until the peanut butter has melted into the chocolate mixture and everything looks smooth.
Adding these ingredients after removing the pan from the heat helps prevent unnecessary cooking and makes the mixture easier to control.
If you prefer a stronger vanilla flavor, do not add excessive vanilla extract. Too much liquid flavoring can slightly change the consistency, and the chocolate and peanut butter should remain the main flavors.
Step 5: Stir in the oats
Add the rolled oats to the chocolate mixture. Stir thoroughly until the oats are evenly coated.
Check the bottom of the pan and scrape up any chocolate mixture that has settled there. The goal is to distribute the chocolate throughout the oats so that each cookie holds together.
Work promptly but carefully. Do not rush to the point of spilling the hot mixture, and keep children away from the saucepan because hot sugar mixtures can cause serious burns.
If the mixture looks unusually loose, do not immediately add a large amount of extra oats. First, consider whether it has been cooked for the recommended time. Too many oats can create dry, crumbly cookies. Small adjustments are best made cautiously.
Step 6: Shape the cookies
Use a spoon or cookie scoop to place small mounds of the mixture onto the prepared parchment paper.
Leave a little space between the mounds. These cookies do not spread like ordinary oven-baked cookies, so you can place them relatively close together as long as they do not touch.
For consistent results, try to make each portion approximately the same size. Smaller cookies generally set more quickly, while large cookies may need additional cooling time.
If you want a flatter shape, gently press each mound with the back of the spoon while the mixture is still warm.
Step 7: Allow the cookies to set
Leave the cookies undisturbed at room temperature until they become firm. This commonly takes around 30–60 minutes, although the timing depends on the temperature of your kitchen and the size of the cookies.
Do not move them too early. The outer surface may appear firm while the center is still soft.
If the kitchen is particularly warm, you can place the tray in the refrigerator after the cookies have cooled enough to handle safely. Chilling can help them firm more quickly, but it is not a substitute for preparing the chocolate mixture properly.
Step 8: Check the texture
Once the cookies have cooled, gently lift one from the parchment paper.
A properly set cookie should hold its shape. It may remain slightly chewy, but it should not behave like loose chocolate oatmeal or leave a wet coating on your fingers.
If the cookies are still too soft, chill them longer before deciding that the recipe has failed. If they remain sticky even after chilling, the chocolate mixture may not have been cooked long enough, or the ingredient proportions may need adjustment next time.
Step 9: Serve or store
Serve the cookies once they are set. They pair well with milk, tea, coffee, or a glass of cold water.
If you are not serving them immediately, place them in a clean, airtight container and store them according to the guidance below. Avoid stacking them while they are still warm or soft, as they may stick together.
7. The Secret to Cookies That Set Properly
The biggest challenge with no-bake chocolate oatmeal cookies is achieving the right consistency. Since the cookies are not baked, they depend on the cooked sugar mixture cooling around the oats and other ingredients.
Understanding a few basic principles will help you get better results.
Cook the chocolate mixture for the right amount of time
The mixture needs enough heat to dissolve the sugar and reach a consistency that firms as it cools. Boiling it for too little time may leave excess moisture, producing soft or sticky cookies.
On the other hand, boiling it too long can remove too much moisture. The resulting mixture may become thick before you have finished shaping the cookies, leaving them dry or crumbly.
Use the same saucepan, heat setting, ingredient quantities, and cooking time for your first few batches. Once you understand how your equipment behaves, you can make small adjustments if necessary.
Measure the ingredients carefully
Adding too much milk can make the mixture softer. Too little milk may make it difficult to combine the oats evenly.
Similarly, adding too many oats can make the cookies dry, while using too few may leave them sticky or weak.
For consistent results, measure your ingredients rather than estimating them by eye.
Work quickly after adding the oats
The mixture gradually thickens as it cools. If you leave it sitting in the saucepan for too long, shaping the cookies becomes more difficult.
Prepare the parchment paper before cooking, keep your spoon ready, and begin shaping as soon as the oats are evenly coated.
Give the cookies enough cooling time
Warm cookies are naturally softer than fully set cookies. Avoid judging their final texture immediately after shaping them.
Allow them to cool completely before transferring them to a storage container. This helps them retain their shape and reduces the chance of sticking together.
8. Common Mistakes and How to Fix Them
Even an easy recipe can produce disappointing results if a few important details are overlooked. The following troubleshooting guide explains common problems and practical solutions.
| Problem | Possible cause | What to do |
|---|---|---|
| Cookies do not set | Mixture was undercooked or contains too much liquid | Chill the cookies and cook the mixture slightly longer next time |
| Cookies are dry and crumbly | Mixture was overcooked or too many oats were added | Reduce the cooking time and measure the oats carefully |
| Cookies are too sticky | Excess moisture or insufficient cooking | Allow more cooling time and review the boiling step |
| Cookies taste grainy | Sugar did not dissolve properly | Stir thoroughly while heating and ensure the mixture reaches a steady boil |
| Chocolate tastes burnt | Heat was too high or the mixture scorched | Use medium heat and stir the bottom of the pan |
| Oats are unevenly coated | Mixture was not stirred thoroughly | Scrape the sides and bottom of the pan while mixing |
| Cookies harden too much | Mixture was cooked too long | Shorten the boiling time slightly on the next batch |
| Cookies stick to the paper | They were moved before setting or the mixture is too soft | Allow more time to cool and firm |
What if the mixture becomes too thick before shaping?
If the mixture becomes very thick while you are still spooning out portions, work carefully and shape the remaining cookies as soon as possible.
Avoid pouring extra milk into the mixture without considering the cause. Adding liquid may make it easier to stir temporarily, but it can also change the final consistency and prevent the cookies from setting correctly.
What if the cookies remain soft after refrigeration?
Refrigeration can firm the butter and help the cookies become easier to handle. However, if they remain extremely soft, the mixture may not have reached the right consistency during cooking.
You can still enjoy them as a spoonable chocolate oatmeal dessert, but for the next batch, pay closer attention to the boiling time and ingredient measurements.
9. Easy Variations for Different Tastes
One of the best things about homemade no-bake chocolate oatmeal cookies is how easily you can customize them. Once you understand the basic recipe, try one variation at a time so that you can see how each change affects the flavor and texture.
Classic chocolate peanut butter cookies
The original recipe already combines chocolate and peanut butter, creating a rich and familiar flavor.
For a slightly stronger peanut flavor, use a peanut butter that has a pronounced roasted taste. Avoid adding too much extra peanut butter, because changing the fat balance can affect how firmly the cookies set.
Chocolate coconut oatmeal cookies
If you enjoy coconut, replace a small portion of the oats with unsweetened shredded coconut.
Coconut adds a pleasant texture and mild sweetness. Start with a modest amount rather than replacing all the oats, since oats provide much of the structure.
You can also sprinkle a little coconut on top of each cookie before the mixture firms.
Chocolate walnut cookies
Finely chopped walnuts add crunch and a slightly earthy flavor that complements cocoa.
Stir a small quantity into the mixture along with the oats. Chop the nuts into small pieces so that they distribute evenly and do not make the cookies difficult to shape.
You can also use chopped pecans or almonds if they are suitable for your household.
Chocolate raisin oatmeal cookies
Raisins provide chewy fruitiness and natural sweetness. Add a small handful to the mixture along with the oats.
Because raisins are sweet, this variation may taste sweeter than the original recipe. You can experiment with reducing the sugar slightly in a future batch, but make changes gradually because sugar also affects the texture.
Double chocolate oatmeal cookies
For an especially chocolatey version, add a small amount of finely chopped dark chocolate after removing the saucepan from the heat.
Allow the residual heat to soften the chocolate, then stir it through the oats. Too much additional chocolate may make the mixture richer and change how firmly it sets, so keep the amount moderate.
Chocolate cookies with a hint of cinnamon
A small pinch of ground cinnamon gives the cookies a warm flavor. Cinnamon pairs well with both cocoa and oats, particularly during cooler weather.
Start with a small amount. The cinnamon should complement the chocolate rather than overpower it.
Chocolate espresso oatmeal cookies
For adults who enjoy coffee-flavored desserts, dissolve a small amount of instant espresso powder into the hot chocolate mixture.
Coffee can deepen the perceived chocolate flavor without making the cookies taste strongly like coffee when used sparingly. Avoid adding brewed coffee in large quantities, as extra liquid may affect the texture.
10. Ingredient Substitutions
You may not always have every ingredient available. Some substitutions work well, while others require more care because they change the balance of moisture, fat, or sugar.
Can you use quick oats instead of rolled oats?
Yes. Quick oats can be used in place of rolled oats, but the texture will usually be softer and more compact.
Rolled oats are a good starting point for a chewy cookie. If you use quick oats, avoid changing other ingredients at the same time so you can evaluate the difference.
Can you replace butter with coconut oil?
Coconut oil can sometimes be used as an alternative to butter, but the flavor and texture will change. Coconut oil may also make the cookies firmer when chilled and softer when warm, depending on the room temperature.
Use a measured amount and expect some experimentation. A plant-based butter designed for baking may provide a result closer to traditional butter, depending on its formulation.
Can you use plant-based milk?
Yes, unsweetened oat milk or soy milk can work in this recipe. Almond milk may also work, although its flavor and consistency can differ by brand.
Choose an unsweetened option if you want more control over the sweetness. Check the packaging for allergy information, especially when preparing food for guests.
Can you use honey instead of granulated sugar?
Honey is not a direct one-to-one substitute in this recipe. It adds liquid, has a different sweetness profile, and behaves differently when heated.
Replacing all the granulated sugar with honey can prevent the cookies from setting as expected. If you want to experiment with a liquid sweetener, use a recipe specifically developed for that ingredient rather than assuming the original proportions will work.
Can you use a sugar substitute?
Some granulated sugar substitutes are suitable for cooking, but their performance varies. Certain sweeteners do not provide the same texture or setting behavior as sugar.
Read the product instructions and use a recipe designed for your chosen sweetener whenever possible. A simple one-to-one substitution may change the final result.
Can you make the recipe without peanut butter?
Yes, but you should replace it thoughtfully. Sunflower seed butter or another suitable seed butter may work, depending on its thickness and oil content.
Tahini has a stronger, more bitter flavor and may produce a different texture. If you use it, consider making a small test batch first.
If allergies are a concern, check every ingredient label and prevent cross-contact with utensils, pans, and work surfaces.
11. How to Make No-Bake Cookies Without Peanut Butter
Some people dislike peanut butter, while others need to avoid it because of allergies. You can still make a chocolate oatmeal treat, but removing peanut butter changes both the flavor and the binding properties.
For a version without peanut butter, consider using a suitable seed butter or a recipe specifically formulated without nut butter. The substitute should provide enough body to help the mixture hold the oats together.
Here are some practical suggestions:
- Use a seed butter with a consistency similar to creamy peanut butter.
- Avoid adding large quantities of dry ingredients without adjusting the rest of the recipe.
- Stir thoroughly so that the oats are coated evenly.
- Allow the cookies to cool completely before checking their texture.
- Test a small batch before preparing them for a gathering.
Do not assume that a product labeled “nut-free” is automatically safe for every allergy. Manufacturing practices and ingredient labels matter, particularly when food is being served to someone with a serious allergy.
12. How to Make Them Less Sweet
The original recipe produces a fairly sweet cookie because granulated sugar helps create the mixture that firms as it cools. If you prefer a darker chocolate flavor, there are several ways to adjust the taste without dramatically changing the structure.
First, use unsweetened cocoa powder rather than sweetened drinking chocolate. This gives you greater control over the chocolate flavor.
Second, add a small pinch of salt. Salt does not remove sugar, but it can balance the sweetness and make the cocoa flavor more noticeable.
Third, consider adding a small amount of finely chopped dark chocolate or a little espresso powder.
You may also reduce the sugar slightly, but avoid cutting it dramatically on your first attempt. Sugar contributes to the texture as well as the sweetness, so a large reduction can result in cookies that do not set properly.
If you need a genuinely low-sugar dessert, a recipe specifically developed for a suitable sweetener is more reliable than heavily modifying this one.
13. Are No-Bake Chocolate Oatmeal Cookies Healthy?
The answer depends on the ingredients, serving size, and your overall dietary needs.
Oats provide carbohydrates, fiber, and some protein. Peanut butter contributes fat and protein, while cocoa provides chocolate flavor. However, the traditional recipe also contains sugar and butter, which contribute calories and saturated fat.
For these reasons, it is more accurate to describe these cookies as a homemade dessert or sweet snack rather than a health food.
Ways to make a more balanced version
If you want a slightly more balanced cookie, consider the following approaches:
- Use measured portions: Smaller cookies make it easier to manage serving size.
- Choose rolled oats: They provide a chewy texture and contribute dietary fiber.
- Use unsweetened cocoa: This allows you to control the sweetness more effectively.
- Add a small quantity of nuts or seeds: These can contribute texture, protein, and unsaturated fats.
- Avoid unnecessary toppings: Additional chocolate, sugary decorations, and sweetened coconut can increase the overall sugar content.
- Serve alongside fruit: Fresh fruit can provide a contrasting flavor and additional nutrients.
These changes do not automatically make the cookies low-calorie or suitable for every dietary plan. If you need a precise nutritional profile, calculate it using the exact brands, ingredient weights, and serving sizes used in your kitchen.
14. Estimated Nutrition Information
The following table provides a general illustration of the nutrients in a traditional batch. It is not a laboratory analysis or a precise nutritional calculation.
| Nutritional factor | What to know |
|---|---|
| Calories | Depend on the ingredient brands and cookie size |
| Carbohydrates | Primarily supplied by oats and sugar |
| Sugar | Mainly comes from granulated sugar, with smaller amounts varying by other ingredients |
| Fat | Mainly comes from butter and peanut butter |
| Protein | Contributed by oats and peanut butter |
| Fiber | Mainly supplied by oats and cocoa |
| Sodium | Depends on the salt, butter, peanut butter, and milk used |
For a reliable estimate, enter the exact ingredient quantities into a nutrition calculator and divide the batch total by the number of cookies you actually make.
This is particularly useful if you need to track calories, carbohydrates, sugar, or other nutrients for personal reasons.
15. How to Store No-Bake Chocolate Oatmeal Cookies
Proper storage helps preserve the flavor and texture of homemade cookies.
Storing at room temperature
If your kitchen is cool and the ingredients are suitable for the storage conditions, the cookies may be kept in an airtight container for a short period. However, because this recipe contains milk and other perishable ingredients, refrigeration is the safer general recommendation.
Do not leave them out for extended periods in a hot kitchen.
Storing in the refrigerator
Once the cookies have fully cooled and set, arrange them in an airtight container.
If you need to stack them, place parchment paper between the layers to reduce sticking. Store the container in the refrigerator and keep the cookies away from strong-smelling foods, since chocolate can absorb surrounding odors.
For best quality, aim to enjoy them within about one week, provided they have been handled safely and remain in good condition. Discard cookies that develop an unusual smell, visible mold, or other signs of spoilage.
Can you freeze no-bake chocolate oatmeal cookies?
Yes. Freezing is a convenient option if you want to prepare a batch in advance.
Arrange the fully set cookies in a single layer on a tray and freeze them until firm. Transfer them to a freezer-safe airtight container or bag, separating layers with parchment paper.
For best quality, try to use them within about two months. They may remain safe for longer under continuous proper freezing, but their texture and flavor can gradually decline.
How to thaw frozen cookies
Remove the desired number of cookies from the freezer and allow them to thaw in the refrigerator or at a cool room temperature for a short period.
Keep them protected from condensation and avoid repeatedly thawing and refreezing the same batch. If you notice excessive moisture on the surface, let the cookies dry slightly before serving.
16. Can You Make These Cookies Ahead of Time?
Yes. No-bake chocolate oatmeal cookies are well suited to advance preparation.
If you are planning a family gathering or want snacks ready for the week, prepare the cookies the day before. Allow them to set completely, then transfer them to an airtight container.
Here is a simple preparation schedule:
The day before serving: Prepare and shape the cookies. Allow them to cool completely before covering and refrigerating them.
On the day of serving: Remove only the quantity you need. Keep the rest refrigerated until it is time to serve.
For longer-term preparation: Freeze fully set cookies in a suitable container and thaw the required quantity when needed.
If you are transporting the cookies during warm weather, use an insulated container with appropriate cold packs. Butter and chocolate mixtures can soften in high temperatures, making the cookies messy to handle.
17. Serving Ideas for Chocolate Oatmeal Cookies
These cookies are versatile enough for casual snacks and simple dessert plates.
Serve with a glass of milk
Milk is a classic pairing because its mild flavor balances the richness of chocolate and peanut butter.
Pair with tea or coffee
The cocoa flavor works well with unsweetened tea or coffee. A small cookie alongside a hot drink makes an easy afternoon snack.
Add them to a dessert platter
Arrange the cookies with fresh fruit and other small desserts. Their dark chocolate color creates an attractive contrast with lighter foods.
Serve with fresh strawberries
Strawberries add freshness and a slightly tart flavor that complements the sweetness of the cookies.
Make a simple ice cream dessert
Place a cookie beside a small scoop of vanilla ice cream for an easy dessert. Keep in mind that the ice cream will soften the cookie if they are left together for too long.
Pack them for a snack
Once fully set, the cookies can be packed in a suitable container. If they will be carried in hot weather, keep them cool so they do not soften or stick together.
18. How to Make the Cookies More Attractive
Presentation is simple, but a few details can make homemade cookies look more polished.
Make the portions consistent
Use the same spoon or cookie scoop for every portion. Uniform sizes help the cookies look neat and make serving sizes easier to estimate.
Shape the cookies carefully
Try to create rounded mounds rather than uneven piles. If desired, gently flatten the tops while the mixture is still warm.
Add toppings before they set
A few chopped nuts, coconut flakes, or small chocolate pieces can be pressed lightly onto the surface immediately after shaping.
Avoid adding too many toppings, because they may fall off or make the cookies harder to handle.
Use a clean serving plate
Arrange the cookies in a single layer or in a loose circle. A simple plate is often enough because the chocolate color and oat texture provide visual interest.
Allow complete setting before packaging
Even attractive cookies can look messy if they are packed while warm. Let them cool and firm first, especially if you are preparing them as homemade gifts.
19. Food Safety Tips for Homemade No-Bake Cookies
Although these cookies are easy to prepare, basic food safety still matters.
- Wash your hands before handling ingredients.
- Use clean utensils and a clean work surface.
- Keep children away from the hot saucepan and melted sugar mixture.
- Avoid tasting the hot mixture directly from the pan.
- Refrigerate the finished cookies when appropriate for their ingredients and your kitchen temperature.
- Use clean, airtight storage containers.
- Check ingredient labels for allergens before serving others.
- Do not serve cookies that show signs of spoilage.
The chocolate mixture can become extremely hot during cooking. Let it cool sufficiently before allowing children to help with shaping or decorating. Children can assist with measuring dry ingredients or choosing toppings, but an adult should manage the stovetop.
20. Frequently Asked Questions
1. Why are my no-bake chocolate oatmeal cookies not setting?
The most common reasons are insufficient cooking, excess liquid, inaccurate measurements, or a warm environment. Allow the cookies more time to cool and refrigerate them if needed. For future batches, follow the recommended boiling time and measure the ingredients carefully.
2. Can I make no-bake chocolate oatmeal cookies without an oven?
Yes. This recipe uses the stovetop to prepare the chocolate mixture. After shaping, the cookies set as they cool, so an oven is not required.
3. Which oats are best for no-bake cookies?
Rolled oats are generally a reliable choice because they provide a chewy texture and hold their shape. Quick oats can work but usually produce a softer, more compact result. Steel-cut oats are not suitable as a direct replacement.
4. Can I use crunchy peanut butter?
Yes. Crunchy peanut butter adds small peanut pieces and creates a slightly different texture. Make sure the mixture is still easy to stir and that the oats become evenly coated.
5. How long do no-bake chocolate oatmeal cookies take to set?
They commonly take around 30–60 minutes, depending on their size and the temperature of the room. Larger cookies and warm kitchens may require more time.
6. Can I make these cookies without milk?
You can try a suitable plant-based milk, such as unsweetened oat or soy milk. Completely removing the milk without replacing its liquid contribution can change the consistency, so use an alternative recipe if you need a version with no milk or milk substitutes.
7. Can I make them without butter?
A suitable baking-style plant-based butter or measured coconut oil may work, but the texture and flavor will differ. If you need a dairy-free recipe, choose ingredients that meet your dietary requirements and expect to test the consistency.
8. Why are my cookies crumbly?
They may have been cooked for too long, contain too many oats, or lack sufficient binding mixture. For the next batch, measure the oats accurately and avoid extending the boiling time unnecessarily.
9. Can I reduce the sugar?
You can experiment with a modest reduction, but a large reduction may affect how the cookies set. Sugar contributes to the structure as well as the sweetness, so a recipe specifically developed for lower-sugar preparation is the more reliable option.
10. Can I use sweetened cocoa powder?
You can, but the cookies may become sweeter and the flavor may be less chocolate-forward. Unsweetened cocoa powder is recommended because it gives you better control over the final taste.
11. Are these cookies suitable for children?
They can be served to children who can safely eat all the ingredients, provided allergies and choking risks are considered. An adult should handle the hot mixture, and younger children should receive appropriately sized portions.
12. Can I make the cookies vegan?
A vegan version may be possible using plant-based butter or oil, plant-based milk, and a suitable seed butter. Check that the cocoa and all other ingredients meet your requirements. Because substitutions affect the texture, a recipe specifically tested for vegan ingredients may provide more consistent results.
13. Can I freeze the cookies?
Yes. Freeze fully set cookies in an airtight, freezer-safe container with parchment paper between layers. For best quality, use them within about two months and thaw only the amount you need.
14. Can I make the cookies without cocoa powder?
Yes, but they will no longer have the same chocolate flavor. You would need a different recipe designed around ingredients such as peanut butter, oats, and an appropriate binding mixture.
15. Why did the cookies become hard after cooling?
The mixture may have been boiled for too long, causing it to become overly concentrated. Reduce the boiling time slightly in your next batch and check the cookies only after they have cooled completely.
16. Can I prepare the mixture in advance and shape it later?
It is better to shape the cookies soon after adding the oats. As the mixture cools, it becomes thicker and harder to portion evenly. Prepare your work surface and measuring tools before cooking so you can shape the cookies promptly.
17. Can I add chocolate chips?
Yes. Stir in a small quantity after removing the pan from the heat. If the mixture is extremely hot, the chips may melt rather than remain in distinct pieces, so the final appearance will depend on the type of chocolate and the temperature of the mixture.
18. Are no-bake cookies gluten-free?
Oats are naturally gluten-free, but cross-contact can occur during harvesting, processing, or packaging. If gluten avoidance is necessary, use oats specifically labeled gluten-free and check every other ingredient for suitability.
21. Final Thoughts
No-bake chocolate oatmeal cookies are a practical homemade dessert for anyone who wants a rich chocolate treat without the work of traditional baking. With oats, cocoa powder, butter, milk, sugar, and peanut butter, you can create chewy cookies using a simple stovetop method and a little patience while they cool.
The most important steps are measuring the ingredients accurately, boiling the chocolate mixture for the right amount of time, coating the oats evenly, and allowing the cookies to set completely before storing them. Once you master the basic method, you can experiment with coconut, walnuts, raisins, dark chocolate, or other suitable additions.
Whether you prepare them for an afternoon snack, a family dessert, or a busy weekday, these no-bake chocolate oatmeal cookies offer a straightforward way to enjoy homemade chocolate flavor with minimal equipment and effort.