Introduction
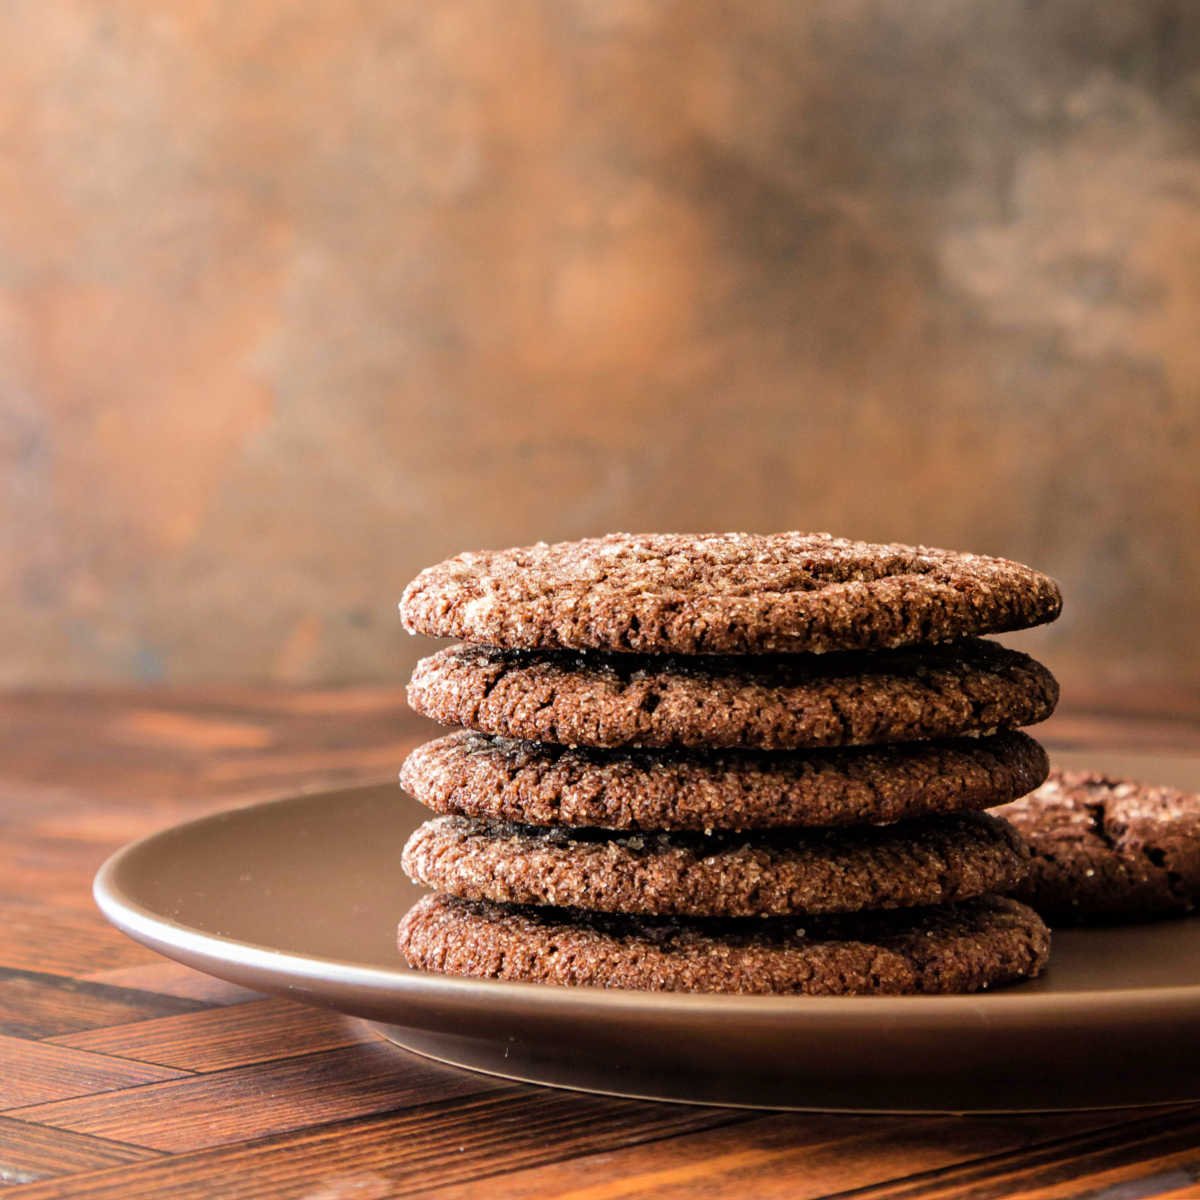
A crispy chocolate biscuit recipe without an oven is an excellent choice for anyone who wants to prepare a delicious homemade chocolate treat using simple kitchen ingredients. These biscuits are crunchy, chocolatey, and satisfying, making them perfect for tea time, family gatherings, school lunchboxes, and evening snacks. The best part is that you do not need an oven or expensive baking equipment to make them.
Many people love homemade biscuits but avoid making them because they do not own an oven. Fortunately, you can prepare crispy chocolate biscuits on a stovetop using a heavy-bottomed pan, a covered pot, or a suitable stovetop baking setup. With the right ingredients, controlled heat, and a little patience, you can create biscuits with a rich chocolate flavor and a pleasantly crisp texture.
This recipe is designed for beginners. It explains everything from choosing the right ingredients to mixing the dough, shaping the biscuits, cooking them without an oven, and storing them correctly. You will also learn how to avoid common problems such as soft biscuits, burnt bottoms, crumbly dough, and biscuits that lose their crispness after cooling.
Whether you are preparing a quick homemade snack or looking for an affordable chocolate biscuit recipe for your family, this guide will help you make a delicious batch using everyday ingredients.
What Are Crispy Chocolate Biscuits?
Crispy chocolate biscuits are small baked-style treats made with flour, cocoa powder, sugar, butter or oil, and a few additional ingredients. They have a chocolate flavor and a firm texture that becomes more noticeable as the biscuits cool.
Unlike soft chocolate cookies, crispy biscuits are designed to have a drier, firmer bite. They are particularly enjoyable with tea, coffee, milk, or hot chocolate.
Traditional biscuits are often baked in an oven, but this version uses a stovetop method. The dough is shaped into small, thin rounds and cooked slowly inside a covered pot or heavy-bottomed pan. Gentle, indirect heat allows the biscuits to cook without burning too quickly.
The final texture depends on several factors:
- The ratio of flour to fat.
- The amount of moisture in the dough.
- The thickness of the biscuits.
- The cooking temperature.
- The cooling time after cooking.
- How the finished biscuits are stored.
Understanding these factors makes it easier to achieve consistent results every time.
Why You Will Love This Chocolate Biscuit Recipe
There are many reasons to try this easy no-oven chocolate biscuit recipe.
1. No Oven Required
You can prepare these biscuits using a stovetop and a suitable heavy-bottomed cooking pot. This makes the recipe useful for kitchens without an oven.
2. Simple Ingredients
Most ingredients are common pantry staples, including flour, cocoa powder, sugar, butter, and baking powder. You do not need special baking mixes or complicated ingredients.
3. Rich Chocolate Flavor
Unsweetened cocoa powder gives the biscuits their chocolate taste. A small amount of vanilla enhances the aroma, while butter contributes richness.
4. Beginner-Friendly Instructions
The recipe uses straightforward steps that are easy to follow. Even if you have never made biscuits from scratch, you can learn the process with practice.
5. Affordable Homemade Snack
Making biscuits at home can be more economical than purchasing packaged chocolate biscuits, especially when you already have the ingredients available.
6. Easy to Customize
You can add chopped nuts, chocolate chips, cinnamon, or a small amount of instant coffee powder to create different flavor combinations.
7. Suitable for Tea Time
Crispy chocolate biscuits pair especially well with hot tea, coffee, and milk. They are also convenient to pack in a lunchbox once they have cooled completely.
Crispy Chocolate Biscuits Without an Oven: Recipe Overview
| Recipe detail | Information |
|---|---|
| Preparation time | 20 minutes |
| Cooking time | 20–30 minutes per batch |
| Cooling time | 20–30 minutes |
| Total time | Approximately 60–80 minutes |
| Yield | 18–22 small biscuits |
| Difficulty | Easy |
| Cooking method | Stovetop |
| Main flavor | Chocolate |
| Texture | Crisp after cooling |
| Best served with | Tea, coffee, or milk |
Cooking times vary depending on the thickness of the biscuits, the type of pan, and the heat level of your stove.
Ingredients for Crispy Chocolate Biscuits
The following quantities are designed to produce approximately 18–22 small biscuits.
Dry Ingredients
1. All-purpose flour — 1 cup (125 grams)
All-purpose flour provides the main structure of the biscuits. Measuring flour by weight gives more consistent results than using a cup, because flour can become compacted when scooped.
2. Unsweetened cocoa powder — 2 tablespoons (approximately 10–12 grams)
Cocoa powder gives the biscuits their chocolate flavor and dark color. Use unsweetened cocoa rather than a sweetened chocolate drink mix, which contains different proportions of sugar and other ingredients.
3. Powdered sugar — 1/3 cup (approximately 40–45 grams)
Powdered sugar blends easily into biscuit dough. It helps create a delicate texture and a balanced sweetness.
If you only have granulated sugar, grind it into a fine powder before using it.
4. Baking powder — 1/4 teaspoon
Baking powder provides a small amount of lift. Do not use too much, because excessive leavening can change the texture and shape of the biscuits.
5. Salt — a small pinch
Salt balances the sweetness and makes the chocolate flavor more noticeable.
Wet Ingredients
6. Butter — 1/4 cup (57 grams), softened
Butter adds flavor and contributes to the crisp, crumbly texture. It should be soft enough to mix but should not be melted or oily.
Unsalted butter is ideal because you can control the amount of salt in the recipe.
7. Milk — 1–2 tablespoons, as needed
Milk helps bring the dough together if it is too dry. Add it gradually because the amount required depends on the flour and cocoa powder.
8. Vanilla extract — 1/2 teaspoon
Vanilla complements the chocolate flavor and adds a pleasant aroma. It is optional, but recommended.
Optional Ingredients
You may also use:
- 1 tablespoon finely chopped almonds.
- 1 tablespoon mini chocolate chips.
- A pinch of cinnamon.
- A small pinch of instant coffee powder.
- A little extra powdered sugar for dusting after cooling.
Keep optional additions modest. Too many nuts or chocolate pieces can make the biscuits difficult to shape evenly.
Equipment Needed
You do not need an oven, but the correct equipment helps you control the cooking process.
- A mixing bowl.
- Measuring cups and spoons or a kitchen scale.
- A spoon or spatula.
- A rolling pin, if available.
- A small round cutter or the rim of a suitable glass.
- Parchment paper, if appropriate for your setup.
- A heavy-bottomed pot or deep pan with a lid.
- A small metal rack or heat-safe trivet that fits inside the pot.
- A heatproof plate or tray.
- A thin spatula for turning or removing biscuits when necessary.
The most important equipment is a heavy-bottomed covered pot and a rack that keeps the biscuits above the base.
Safety note: Never place a dry, empty pot over high heat for an extended period. Avoid plastic or non-heat-safe materials inside the pot, and follow the cookware manufacturer’s instructions. Use low heat and oven mitts when handling hot cookware.
How to Choose the Best Ingredients
The quality of your ingredients has a noticeable effect on the final flavor and texture.
Choosing Cocoa Powder
Use unsweetened cocoa powder for a balanced chocolate taste. Natural cocoa powder generally produces a more pronounced cocoa flavor, while Dutch-process cocoa often has a smoother, darker character.
Either can work in this recipe. However, different cocoa powders absorb moisture differently, so you may need to adjust the milk slightly.
Choosing Butter
Butter gives biscuits a traditional, rich flavor. It also helps produce a delicate texture.
Avoid using melted butter unless the recipe specifically calls for it. Melted butter can make the dough greasy and may cause the biscuits to spread or become harder than expected.
Choosing Flour
All-purpose flour is the most convenient choice. Sift it with the cocoa powder and baking powder if there are lumps.
Avoid adding extra flour automatically when the dough feels slightly soft. First, allow the dough to rest for several minutes so the flour can absorb the moisture.
Choosing Sugar
Powdered sugar works well because its fine particles blend easily with butter. If using regular sugar, grind it finely for a more even texture.
Large sugar crystals may remain noticeable in the finished biscuits, particularly when the dough is mixed by hand.
Step-by-Step Instructions for Making Chocolate Biscuits Without an Oven
Step 1: Prepare Your Stovetop Cooking Setup
Before mixing the dough, prepare the pot that you will use for cooking.
Place a heat-safe metal rack or trivet inside a heavy-bottomed pot. The rack should raise the biscuit tray above the base of the pot so that the biscuits receive indirect heat.
Cover the pot with its lid and warm it over low heat for approximately 5 minutes, provided this is appropriate for your cookware. Avoid excessive preheating, especially with an empty pot.
If your cooking setup allows safe temperature control, maintain gentle heat throughout the process. A pot that becomes excessively hot at the bottom can burn the biscuits before the centers cook.
Do not use water inside the pot for this dry cooking method.
Step 2: Combine the Dry Ingredients
Place the flour, cocoa powder, powdered sugar, baking powder, and salt in a mixing bowl.
Mix them thoroughly with a spoon or whisk.
If the cocoa powder contains lumps, sift the mixture before proceeding. Evenly distributed cocoa powder gives the biscuits a consistent chocolate color and flavor.
This step is important because baking powder concentrated in one area can cause uneven rising.
Step 3: Add the Softened Butter
Add the softened butter to the dry ingredients.
Rub the butter into the mixture with your fingertips or use a spatula until the mixture resembles fine, slightly damp crumbs.
Do not knead the dough aggressively at this stage.
The butter should be distributed throughout the flour mixture. This helps create a tender biscuit that becomes crisp after cooking and cooling.
If you prefer a more pronounced buttery flavor, use good-quality butter. Margarine may also work, but its water content and texture can differ from those of butter, so the final result may change.
Step 4: Add Vanilla Extract
Add the vanilla extract and mix gently.
Vanilla adds aroma without overpowering the chocolate flavor. If you are using instant coffee powder, add only a small pinch at this stage.
Coffee can deepen the perceived chocolate flavor, but too much may make the biscuits taste bitter.
Step 5: Bring the Dough Together
Add one tablespoon of milk and mix gently.
If the mixture remains too dry to hold together when pressed, add the second tablespoon a little at a time.
The dough should be firm, smooth enough to shape, and only slightly soft. It should not be sticky or wet.
A good test is to press a small portion between your fingers. If it holds its shape without falling apart, the dough is ready.
If the dough is too sticky, add a teaspoon of flour at a time. If it is crumbly, add a few drops of milk and mix again.
Avoid adding too much milk because excess moisture can make the biscuits less crisp.
Step 6: Rest the Dough
Cover the dough and let it rest for about 5–10 minutes.
This short resting period allows the flour to absorb moisture and makes the dough easier to roll.
If your kitchen is warm and the butter begins to soften excessively, refrigerate the dough for approximately 10–15 minutes.
Chilling is not always necessary, but it can help produce neater biscuits.
Step 7: Roll Out the Dough
Lightly dust a clean work surface with flour.
Place the dough on the surface and roll it out evenly to approximately 4–5 millimeters thick.
Try to maintain a uniform thickness across the entire sheet.
Very thin biscuits may cook too quickly and burn, while very thick biscuits may remain soft in the center before the outside becomes sufficiently dry.
If you do not have a rolling pin, press small pieces of dough flat with your fingers. Aim for similar thickness in every biscuit.
Step 8: Cut the Biscuits
Use a small round cutter to cut the dough into circles.
A drinking glass with a clean, suitable rim can work as an alternative, provided the glass is strong enough for the task and used carefully.
Transfer the cut biscuits to a heat-safe tray that fits inside your pot.
Leave a little space between them so they do not touch during cooking.
Gather the leftover dough, bring it together gently, and roll it out again. Repeat until most of the dough has been used.
Avoid repeatedly kneading the dough, as excessive handling can make the texture less delicate.
Step 9: Arrange the Biscuits in the Pot
Place the tray on the rack inside the preheated pot.
Ensure the tray is stable and does not touch the pot’s base directly.
Cover the pot with its lid.
If your lid traps a significant amount of moisture, make sure the biscuits can cook in a dry environment and avoid allowing condensation to drip onto them. Do not block ventilation openings or modify your cookware in ways that compromise safety.
The objective is to cook the biscuits using gentle, indirect heat rather than direct contact with the hot base.
Step 10: Cook Over Low Heat
Cook the biscuits over low heat for approximately 15–20 minutes as an initial estimate.
The exact time depends on the pot, the stove, and the thickness of the biscuits. Check them carefully rather than relying on time alone.
If you need to inspect them, lift the lid carefully, keeping your face and hands away from escaping steam or hot air.
Look for biscuits that feel set around the edges and no longer appear wet on the surface.
Do not increase the heat simply to shorten the cooking time. Excessive heat can burn the bottoms while leaving the centers undercooked.
If the biscuits are not ready, cover the pot again and continue cooking in short intervals.
Step 11: Check for Doneness
Chocolate biscuits can be difficult to judge by color because cocoa powder makes the dough dark from the beginning.
Use several signs instead of relying on appearance alone.
- The edges should look set.
- The surface should not appear wet or raw.
- The biscuits should hold their shape when carefully lifted.
- The underside should not be blackened or scorched.
The biscuits may still feel somewhat soft when hot. This is normal because their final crispness develops as moisture escapes during cooling.
Do not wait until they feel completely hard inside the hot pot, as they may become excessively dry after cooling.
Step 12: Remove the Biscuits Carefully
Turn off the heat and carefully remove the tray using suitable heat protection.
Transfer the biscuits to a wire rack if available.
Do not stack them while they are warm. Stacking traps heat and moisture, which can soften the biscuits.
If you have several batches, allow the pot and cooking setup to return to a suitable temperature before preparing the next batch. Continue using low heat and monitor the results closely.
Step 13: Cool Completely
Let the biscuits cool for approximately 20–30 minutes.
During cooling, the butter firms up and the biscuits lose some remaining moisture. Their texture becomes noticeably firmer.
Test one biscuit after it has cooled completely.
If it is crisp, the batch is ready to serve. If it remains soft, the dough may have been too moist or the biscuits may need a little more cooking.
Do not judge the final texture while the biscuits are still hot.
Step 14: Serve Your Chocolate Biscuits
Arrange the cooled biscuits on a plate and serve them with tea, coffee, milk, or hot chocolate.
For a simple presentation, dust them lightly with powdered sugar. You can also drizzle them with melted chocolate, but allow the coating to set before storing the biscuits.
These homemade chocolate biscuits are best enjoyed after they have cooled completely.
How to Make Chocolate Biscuits Extra Crispy
Getting the right crispness is one of the most important parts of this recipe.
Keep the Dough Firm
A firm dough is easier to shape and generally produces a better biscuit texture than a wet dough.
Add milk gradually. You may not need the full amount if your flour or cocoa powder absorbs moisture differently.
Roll the Dough Evenly
Uniform thickness helps every biscuit cook at approximately the same rate.
If one biscuit is twice as thick as another, the thinner one may become too dry before the thicker one is cooked through.
Use Low, Controlled Heat
Low heat allows the biscuits to cook gradually.
Direct high heat can burn the underside and leave the center insufficiently cooked. A rack or trivet helps separate the biscuits from the hottest surface.
Avoid Excessive Butter
Butter provides flavor and tenderness, but too much can make the dough greasy and affect the final texture.
Measure the butter carefully rather than estimating by eye.
Allow Proper Cooling
Freshly cooked biscuits may seem soft. Let them cool completely before deciding whether the texture is correct.
Cooling is an essential part of the process, not an optional finishing step.
Store Only When Completely Cool
Warm biscuits release moisture into their surroundings. If placed in a sealed container too soon, they may become soft.
Wait until the biscuits are completely cool before packing them.
Different Ways to Cook Chocolate Biscuits Without an Oven
The method above uses a covered pot with a rack, but the best approach depends on the equipment available.
Method 1: Heavy-Bottomed Pot
A heavy-bottomed pot with a lid and a heat-safe rack is a practical option for many kitchens.
The rack raises the tray above the base, reducing the risk of direct burning. Low heat is essential.
Choose a pot large enough to accommodate the tray without forcing the biscuits against the sides.
Method 2: Stovetop Baking Pan
A purpose-designed stovetop baking pan can also work.
Follow the manufacturer’s instructions for preheating, temperature control, and tray placement. Different pans distribute heat differently, so the cooking time may need adjustment.
Method 3: Electric Pressure Cooker Without Pressure
Some electric multicookers include a suitable baking function. If your appliance specifically supports baking, follow its manual and use only approved accessories.
Do not assume that every pressure cooker can safely function as a dry baking appliance. Never operate a pressure cooker with its lid or valve modified contrary to the manufacturer’s instructions.
For ordinary stovetop pressure cookers, use only a dry-baking arrangement if the manufacturer explicitly permits it.
Method 4: Sandwich Maker or Other Small Appliance
Some appliances may cook small portions of cookie dough, but the shape and texture can differ from traditional biscuits.
Only use an appliance for this purpose if its instructions permit it. Do not force thick dough into an appliance designed for thin sandwiches.
For the most predictable result, a covered pot with a rack is generally the simplest approach when oven-free stovetop cooking is appropriate for your cookware.
Variations of the Crispy Chocolate Biscuit Recipe
Once you understand the basic dough, you can experiment with different flavors and textures.
1. Chocolate Chip Biscuits
Add one tablespoon of mini chocolate chips to the dough.
Fold them in gently after the butter and dry ingredients have been combined.
Avoid adding too many chocolate chips because they can make thin biscuits difficult to shape.
2. Chocolate Almond Biscuits
Add one or two tablespoons of finely chopped almonds.
Almonds contribute a mild nutty flavor and a pleasant crunch. Use small pieces so the dough remains easy to roll.
3. Chocolate Coconut Biscuits
Mix in one tablespoon of finely desiccated coconut.
Coconut adds sweetness and a subtle tropical flavor. Because coconut absorbs moisture, you may need a few extra drops of milk if the dough becomes too dry.
4. Chocolate Cinnamon Biscuits
Add approximately 1/8 teaspoon of ground cinnamon.
Cinnamon gives the biscuits a warm aroma that pairs well with cocoa.
Use a small quantity at first so it does not overpower the chocolate.
5. Chocolate Coffee Biscuits
Add a small pinch of instant coffee powder to the dry ingredients.
Coffee can enhance the depth of the cocoa flavor. If you want the biscuits to taste distinctly like coffee, adjust the amount carefully in a later batch.
6. Double Chocolate Biscuits
Add a small amount of finely chopped dark chocolate or mini chocolate chips.
For a richer result, use good-quality chocolate. Remember that extra chocolate adds fat and sugar, which can affect the texture.
7. Chocolate Orange Biscuits
Add a small amount of finely grated orange zest.
Orange zest provides a fresh citrus aroma that contrasts nicely with dark cocoa.
Use only the colored outer layer of the orange peel, avoiding the bitter white pith.
8. Chocolate Peanut Biscuits
Add finely chopped roasted peanuts.
Peanuts provide a roasted flavor and crunchy texture. Check for allergies before serving these biscuits to others.
9. Less-Sweet Chocolate Biscuits
Reduce the powdered sugar slightly if you prefer a darker chocolate flavor.
Do not remove too much sugar without testing the recipe, because sugar contributes to both taste and texture.
10. Gluten-Free Chocolate Biscuits
You can experiment with a gluten-free all-purpose flour blend designed for baking.
Choose a blend that includes appropriate binders when needed. The dough may behave differently, so add milk gradually and test a small batch before cooking the entire quantity.
Check ingredient labels for cross-contact warnings if you are preparing food for someone with celiac disease or a serious gluten allergy.
How to Make Chocolate Biscuits Without Eggs
One advantage of this recipe is that it does not require eggs.
Eggs can provide structure and moisture in many biscuit recipes, but they are not necessary for this particular dough. Butter, flour, and the small amount of milk provide enough cohesion when the ingredients are measured correctly.
To make the egg-free version:
- Combine the flour, cocoa powder, sugar, baking powder, and salt.
- Rub in the softened butter.
- Add vanilla extract.
- Add milk gradually until the dough holds together.
- Shape the biscuits and cook them using the stovetop method.
- Cool them completely before checking the texture.
This makes the recipe convenient for people who do not have eggs available.
However, the biscuits are not automatically suitable for every allergy-sensitive person. Check the labels on cocoa powder, flour, chocolate chips, and other ingredients for possible allergens or cross-contact.
How to Make Chocolate Biscuits Without Butter
If you do not have butter, you may be able to use a baking margarine or another solid baking fat.
The results depend on the product. Some spreads contain more water than butter, which can change how the dough behaves.
For the best results:
- Choose a solid product intended for baking.
- Avoid very soft spreads with high water content.
- Start with the same weight as the butter.
- Add milk only if the dough needs it.
- Test a small batch before making the full recipe.
Neutral vegetable oil is another possible substitute, but it produces a different dough texture and may make shaping more difficult. Do not assume that replacing butter with an equal volume of oil will produce identical results.
Common Mistakes to Avoid
Mistake 1: Adding Too Much Milk
Too much milk creates a wet dough that can be difficult to shape and may produce softer biscuits.
Solution: Add milk a little at a time and stop as soon as the dough holds together.
Mistake 2: Using High Heat
High heat can burn the underside before the rest of the biscuit is cooked.
Solution: Use a suitable rack and maintain low, controlled heat.
Mistake 3: Making Biscuits Too Thick
Thick biscuits require more time to cook. The outside may become dry before the center reaches the desired texture.
Solution: Roll the dough evenly to approximately 4–5 millimeters.
Mistake 4: Using Melted Butter
Melted butter may make the dough greasy and alter how the biscuits spread or firm up.
Solution: Use softened butter that is pliable but not liquid.
Mistake 5: Opening the Pot Too Frequently
Repeatedly lifting the lid can interfere with the cooking environment and make timing less consistent.
Solution: Check the biscuits after the initial cooking period, then inspect them at sensible intervals.
Mistake 6: Storing Biscuits While Warm
Warm biscuits release moisture inside a sealed container.
Solution: Cool them completely before storage.
Mistake 7: Expecting Hot Biscuits to Be Completely Crisp
Biscuits can feel soft while hot even when they are cooked correctly.
Solution: Let them cool on a rack before assessing their texture.
Mistake 8: Measuring Cocoa Powder Incorrectly
Too much cocoa powder can make the dough dry and bitter.
Solution: Measure cocoa carefully and use unsweetened cocoa rather than an untested substitute.
Mistake 9: Repeatedly Kneading the Dough
Excessive handling can change the texture and make the biscuits less delicate.
Solution: Mix only until the dough comes together.
Mistake 10: Using an Unsafe Cooking Setup
A tray placed directly on a very hot pot base may burn the biscuits. Improvised equipment can also create safety hazards.
Solution: Use a stable, heat-safe rack and cookware approved for the intended method.
Troubleshooting: How to Fix Chocolate Biscuit Problems
| Problem | Possible cause | What to do |
|---|---|---|
| Biscuits are soft after cooling | Excess moisture or insufficient cooking | Check the dough consistency and cook a test biscuit slightly longer next time |
| Bottoms are burnt | Heat is too high or tray is too close to the base | Lower the heat and use a stable rack |
| Dough crumbles | Too little moisture or butter is not distributed properly | Add a few drops of milk and mix gently |
| Dough is sticky | Too much milk or butter has become too warm | Add a little flour or chill briefly |
| Biscuits taste bitter | Excess cocoa powder or burnt bottoms | Measure cocoa carefully and reduce heat |
| Biscuits are too hard | Excessive cooking or dough rolled too thin | Reduce cooking time slightly or make them marginally thicker |
| Biscuits lose crispness | Moisture from the air or warm storage | Cool completely and store in an airtight container |
| Biscuits cook unevenly | Uneven thickness or inconsistent heat | Roll evenly and use a stable cooking setup |
| Biscuits break while lifting | They are too hot or the dough is too fragile | Allow them to cool longer before handling |
| Biscuits have an oily surface | Too much fat or very warm dough | Measure butter carefully and chill the dough if needed |
How to Store Homemade Chocolate Biscuits
Proper storage helps preserve the flavor and texture of homemade biscuits.
At Room Temperature
Allow the biscuits to cool completely before storing them in a clean, airtight container.
Keep the container in a cool, dry place away from direct sunlight, steam, and heat sources.
For best quality, enjoy the biscuits within approximately 5–7 days. Actual shelf life depends on ingredient quality, cooking, moisture, storage conditions, and kitchen temperature.
In hot or humid weather, biscuits may lose crispness more quickly.
In the Refrigerator
Refrigeration is generally unnecessary for these plain, fully cooked biscuits.
The refrigerator can introduce moisture and may soften the texture. If your kitchen is exceptionally hot, choose a cool, dry storage area and use a well-sealed container.
If refrigeration is necessary, let the biscuits return to room temperature while still protected from condensation, then check their texture before serving.
In the Freezer
You can freeze fully cooled biscuits in a freezer-safe container or sealed bag.
Separate layers with parchment paper if needed to prevent breakage.
For best quality, use them within approximately 2 months. Thaw them while protected from condensation.
Freezing may slightly affect the texture, so allow the biscuits to dry at room temperature after thawing if they become soft.
How to Keep Biscuits Crisp in Humid Weather
Humidity is a common reason biscuits lose their crunch.
Follow these practices:
- Cool the biscuits completely.
- Use a clean, airtight container.
- Keep the container away from steam and cooking areas.
- Avoid opening it unnecessarily.
- Do not store warm biscuits with completely cooled biscuits.
- If the biscuits soften, check that they have been cooked adequately before attempting to dry them further.
If you decide to reheat soft biscuits, use only an appliance and temperature setting suitable for the biscuits and cookware. Watch them closely to avoid burning. Allow them to cool completely again before judging the texture.
Serving Ideas for Chocolate Biscuits
Homemade chocolate biscuits can be served in many simple ways.
With Tea
Serve two or three biscuits with black tea, milk tea, or green tea.
The chocolate flavor works particularly well with tea that has a mild, slightly malty character.
With Coffee
Pair the biscuits with espresso, cappuccino, or ordinary brewed coffee.
The combination of cocoa and coffee creates a classic afternoon snack.
With Milk
Serve the biscuits with a glass of cold milk or warm milk.
This is an easy option for children and adults who enjoy a simple chocolate treat.
With Ice Cream
Crumble a biscuit over vanilla ice cream or serve whole biscuits alongside a scoop.
Add the biscuits immediately before serving if you want to preserve their crunch.
As a Dessert Garnish
Break the biscuits into small pieces and use them as a topping for pudding, mousse, or other desserts.
As a Homemade Gift
Place completely cooled biscuits in a clean food-safe box or tin lined with suitable food paper.
Keep them away from damp ingredients and avoid adding perishable fillings unless the storage requirements are properly addressed.
Are Homemade Chocolate Biscuits Better Than Store-Bought Biscuits?
Homemade and packaged biscuits each have advantages.
Homemade biscuits allow you to control the ingredients, sweetness, size, and flavor. You can avoid certain additives if you choose suitable ingredients, and you can adapt the recipe to your preferences.
Packaged biscuits are convenient and often have consistent shapes and textures. They may also have a longer shelf life because of their formulation and packaging.
The nutritional value of homemade biscuits depends on the quantities of butter, sugar, flour, and other ingredients used. Homemade does not automatically mean healthier.
If you want to compare the two fairly, consider the serving size, ingredients, calorie content, added sugar, saturated fat, and any dietary requirements that matter to you.
Nutritional Information
The following is an approximate estimate for one biscuit, assuming the recipe makes 20 biscuits and uses the specified quantities of flour, cocoa powder, sugar, butter, and milk.
| Nutrient | Approximate amount per biscuit |
|---|---|
| Calories | 45–55 kcal |
| Carbohydrates | 6–7 g |
| Fat | 2–3 g |
| Protein | About 1 g |
| Sugar | 2–3 g |
| Fiber | Less than 1 g |
These estimates can vary depending on the brands and exact amounts of ingredients used, the number of biscuits produced, and any additions such as chocolate chips or nuts.
For precise nutritional information, calculate the values from the ingredient labels and divide the totals by the actual number of biscuits.
Cost-Saving Tips for Homemade Chocolate Biscuits
You do not need expensive ingredients to make tasty biscuits.
Buy Pantry Staples in Suitable Quantities
Flour, cocoa powder, sugar, and baking powder can be economical when purchased in quantities you can use before they lose quality.
Store them in sealed containers in dry conditions.
Measure Carefully
Accurate measuring reduces waste and helps prevent failed batches.
A kitchen scale is especially useful for butter and flour.
Make Uniform Biscuits
Cutting biscuits to a similar size helps them cook evenly. This reduces the chance of burning some biscuits while others remain undercooked.
Use Optional Additions Sparingly
Chocolate chips, nuts, and other extras can increase the cost of the recipe.
The basic chocolate dough is delicious without them, so add extras according to your budget and preference.
Prepare Small Test Batches
If you are using an unfamiliar pot or stove, cook a small test batch first.
Once you understand how your equipment behaves, you can adjust the heat and timing for the remaining dough.
Frequently Asked Questions
1. Can I make crispy chocolate biscuits without an oven?
Yes. You can use a suitable stovetop setup with a heavy-bottomed pot, a lid, and a heat-safe rack that keeps the biscuit tray above the base. Cook over low heat and follow the cookware manufacturer’s instructions.
2. How long do chocolate biscuits take to cook without an oven?
The initial cooking estimate is approximately 15–20 minutes per batch, but some setups may require longer. Thickness, heat distribution, and cookware all affect the timing.
3. Why are my chocolate biscuits not crispy?
They may contain too much moisture, be insufficiently cooked, or have been stored before cooling completely. Humid conditions can also soften biscuits.
4. Can I use drinking chocolate instead of cocoa powder?
You can experiment with drinking chocolate, but the results will differ because it often contains sugar and other ingredients. Unsweetened cocoa powder provides a more predictable chocolate flavor.
5. Can I make these biscuits without eggs?
Yes. This recipe does not require eggs. Butter, flour, and a small amount of milk help the dough hold together.
6. Can I use oil instead of butter?
You can experiment with a small amount of neutral oil, but the dough may be more difficult to shape and the texture may differ. A solid baking margarine is often a more practical substitute.
7. Can I use brown sugar?
Yes, but brown sugar contains more moisture than powdered sugar and can affect the texture. For the closest result to the original recipe, use powdered sugar.
8. Can I make the dough in advance?
Yes. Wrap the dough well and refrigerate it for up to about 24 hours for convenience. Let it soften slightly if it becomes too firm to roll. Keep the dough protected from odors and follow safe food-handling practices.
9. Can I freeze the biscuit dough?
You can freeze well-wrapped dough for later use. Thaw it in the refrigerator before shaping and cooking. The texture may change slightly, so test a small portion if the dough has been frozen for an extended period.
10. How can I make the biscuits more chocolatey?
Use good-quality unsweetened cocoa powder and measure it accurately. A small pinch of instant coffee can enhance the chocolate flavor without necessarily making the biscuits taste strongly of coffee.
11. Why do my biscuits break when I lift them?
They may be too hot, too thin, or made with dough that does not hold together well. Let them cool before lifting and add a few drops of milk to crumbly dough if needed.
12. Can I add chocolate chips?
Yes. Add a small amount of mini chocolate chips or finely chopped chocolate. Too many pieces can make the dough difficult to roll evenly.
13. Can children help make this recipe?
Children can help measure ingredients, mix the dry ingredients, or cut shapes under adult supervision. An adult should handle the hot pot, stove, tray, and all hot cookware.
14. How should I store chocolate biscuits in summer?
Cool them completely and place them in an airtight container in a cool, dry area. Avoid placing them near steam or heat. High humidity may cause them to soften.
15. Can I make round biscuits without a cutter?
Yes. Roll the dough into small balls and flatten them gently with your fingers. Try to make each biscuit the same thickness for even cooking.
16. Can I add nuts and dried fruit together?
Yes, but keep the total quantity modest. Too many additions can weaken the dough and make the biscuits harder to shape. Chop larger pieces finely.
17. Why does the underside burn before the biscuits cook?
The heat may be too high, or the tray may be too close to the hot base. Use a stable rack and lower the heat. Avoid placing the biscuits directly against the bottom of the pot.
18. Do the biscuits become harder after cooling?
Yes. Butter firms up and the biscuits lose some moisture as they cool, so their texture becomes firmer. Always allow them to cool before deciding whether they are crisp enough.
19. Can I make this recipe dairy-free?
You can try a suitable plant-based baking fat and an unsweetened plant-based milk. The flavor and texture may differ, so adjust the liquid gradually and test a small batch.
20. Are these biscuits suitable for a lunchbox?
Yes, provided they are completely cooled and packed in a clean, dry container. They are convenient for lunchboxes, although they should be considered a treat rather than a nutritionally complete snack.
21. Can I reduce the sugar?
You can reduce the sugar modestly, but this may affect the flavor and texture. Make a small test batch before changing the proportions significantly.
22. What should I do if the dough is too dry?
Add milk a few drops at a time and mix gently. Stop as soon as the dough holds together when pressed.
23. What should I do if the dough is too soft?
Add a small amount of flour or refrigerate the dough briefly. Avoid adding too much flour, which can make the biscuits dry and tough.
24. Can I make these biscuits in an air fryer?
An air fryer is not an oven-free stovetop method, but it may cook the biscuits if the appliance supports baking. Use an appropriate temperature, a suitable tray, and the manufacturer’s instructions. Cooking times will differ from the stovetop method.
25. What is the best way to serve crispy chocolate biscuits?
Serve them after they have cooled completely, alongside tea, coffee, milk, or hot chocolate. Their crisp texture makes them especially enjoyable as an afternoon snack.
Final Thoughts
Making crispy chocolate biscuits without an oven is a practical way to enjoy homemade chocolate treats with simple ingredients. The key is to prepare a firm dough, measure the ingredients carefully, roll the biscuits evenly, and cook them slowly using a suitable stovetop setup.
Remember that low heat is essential for preventing burnt bottoms, while complete cooling helps the biscuits develop their final crisp texture. Proper storage in an airtight container also helps preserve their quality.
Once you master the basic recipe, you can experiment with almonds, coconut, cinnamon, coffee, or chocolate chips to create your own variations. With a little practice, these homemade chocolate biscuits can become a reliable favorite for tea time, family snacks, and everyday sweet cravings.