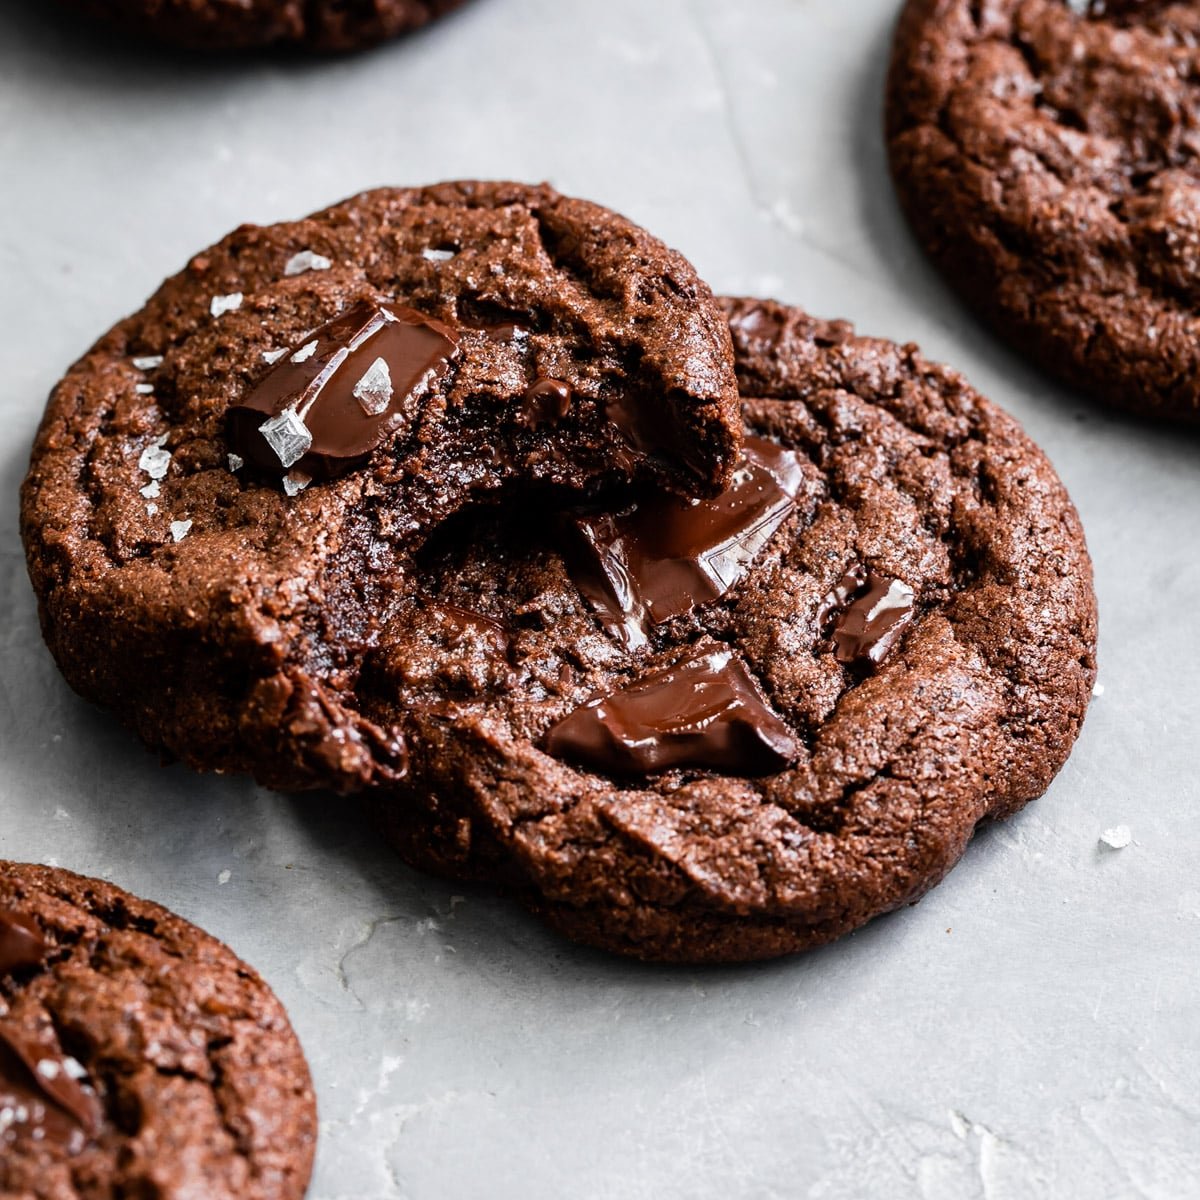
Gluten-free chocolate cookies are a delicious homemade treat for anyone who wants rich chocolate flavor without using traditional wheat flour. These cookies are suitable for beginner bakers because they require simple ingredients, straightforward preparation, and basic baking equipment.
Whether you need to avoid gluten because of celiac disease, have a gluten sensitivity, or simply want to experiment with gluten-free baking, this recipe offers a practical starting point. The cookies have a rich cocoa flavor, a soft center, and slightly crisp edges when baked correctly.
The secret to successful gluten-free chocolate cookies is choosing the right flour, measuring ingredients carefully, and understanding how gluten-free dough behaves. Unlike regular wheat-based dough, gluten-free dough does not develop the same elastic structure. This means the balance between flour, fat, eggs, and moisture is especially important.
In this guide, you will learn how to prepare gluten-free chocolate cookies from scratch, choose suitable ingredients, avoid common baking mistakes, and customize the recipe according to your taste.
Recipe Overview

- Preparation time: 15 minutes
- Chilling time: 20 minutes
- Baking time: 10–12 minutes per batch
- Total time: Approximately 45 minutes
- Yield: 16–18 cookies
- Difficulty level: Beginner-friendly
- Oven temperature: 175°C (350°F)
- Main ingredients: Gluten-free flour, cocoa powder, butter, sugar, eggs, and chocolate chips
The exact number of cookies depends on the size of each dough portion.
Why Make Gluten-Free Chocolate Cookies at Home?
Homemade gluten-free chocolate cookies allow you to control the ingredients and adjust the recipe to your preferences.
1. Suitable for Gluten-Free Diets
People who must avoid gluten need to pay close attention to ingredients and food preparation. Baking at home can make it easier to select appropriate flour, chocolate, and other ingredients.
For people with celiac disease, use certified gluten-free ingredients when appropriate and prevent cross-contact with wheat flour, shared utensils, baking trays, and kitchen surfaces.
2. Rich Chocolate Flavor
Cocoa powder gives these cookies a deep chocolate taste without requiring a complicated recipe. Adding chocolate chips creates small pockets of melted chocolate throughout the cookies.
You can use dark chocolate chips, milk chocolate chips, or a suitable dairy-free alternative depending on your preferences and dietary needs.
3. Beginner-Friendly Preparation
The recipe follows familiar baking steps: mixing dry ingredients, creaming butter and sugar, adding eggs, combining the dough, and baking.
You do not need a stand mixer or specialist equipment. A mixing bowl, whisk, spoon, and baking tray are enough.
4. Easy to Customize
You can add chopped walnuts, almonds, shredded coconut, or a small amount of instant coffee powder to create different flavors.
The basic recipe can also be adapted to make dairy-free cookies, although ingredient substitutions may affect the texture.
Ingredients for Gluten-Free Chocolate Cookies
The following ingredients make approximately 16–18 medium-sized cookies.
Dry Ingredients
- 1 1/2 cups gluten-free all-purpose baking flour blend
- 1/3 cup unsweetened cocoa powder
- 1/2 teaspoon baking soda
- 1/4 teaspoon salt
Wet Ingredients
- 1/2 cup unsalted butter, softened
- 3/4 cup granulated sugar
- 1 large egg
- 1 teaspoon vanilla extract
Chocolate Ingredients
– 1/2 cup chocolate chips or chopped chocolate
Optional Ingredients
- 1/4 cup chopped walnuts
- 1/4 teaspoon instant coffee powder
- 1 tablespoon milk if the dough is unusually dry
- A small pinch of flaky salt for finishing
Choose a gluten-free flour blend designed for cookies or general baking. A blend containing rice flour, tapioca starch, potato starch, or other gluten-free flours may work well, depending on its formulation.
Some blends already contain xanthan gum or another binder. Check the packaging before adding extra because too much can make the cookies gummy.
Understanding Gluten-Free Flour
Gluten-free flour behaves differently from ordinary wheat flour because it does not contain the gluten proteins responsible for the elasticity and structure of conventional dough.
Different gluten-free flours also absorb liquid at different rates. For this reason, using a tested gluten-free flour blend is generally easier for beginners than mixing individual flours without a recipe.
Gluten-Free All-Purpose Flour
A commercial gluten-free baking blend is the most convenient choice for this recipe. Many blends are formulated to replace wheat flour in common baked goods.
However, not every blend performs identically. Some produce softer cookies, while others create a slightly grainier texture.
Rice Flour
Rice flour is common in gluten-free baking. It can produce a relatively light texture, although cookies made with poorly balanced rice flour blends may feel gritty.
Almond Flour
Almond flour contributes moisture, fat, and a mild nutty flavor. It is not a direct one-to-one replacement for every gluten-free flour blend.
Replacing all the flour with almond flour without adjusting the recipe can lead to cookies that spread too much or lack structure.
Coconut Flour
Coconut flour absorbs considerable moisture. It should not replace gluten-free all-purpose flour in equal quantities without a specifically developed recipe.
For reliable results, start with a gluten-free flour blend that is intended for cookies.
Step-by-Step Instructions
Step 1: Preheat the Oven
Preheat your oven to 175°C (350°F).
Line a baking tray with parchment paper. If you are baking for someone with celiac disease, make sure the tray and utensils have not been contaminated by ordinary wheat flour.
Preheating helps the cookies bake evenly and reduces the risk of inconsistent results.
Step 2: Mix the Dry Ingredients
In a medium bowl, add the gluten-free flour, cocoa powder, baking soda, and salt.
Whisk until everything is evenly combined.
Cocoa powder sometimes contains small lumps. Breaking them up now helps distribute the chocolate flavor throughout the dough.
If your flour blend contains a binder, do not automatically add more xanthan gum. Follow the flour manufacturer’s instructions.
Step 3: Cream the Butter and Sugar
Place the softened butter in a large bowl.
Add the granulated sugar and beat with a hand mixer or sturdy spoon until the mixture looks creamy.
This step helps distribute the fat and sugar evenly. The mixture does not need to become extremely fluffy, but it should not contain large lumps of butter.
Avoid using completely melted butter unless you are following a recipe specifically designed for it.
Step 4: Add the Egg and Vanilla
Add the egg and vanilla extract to the butter mixture.
Mix until combined.
The egg provides moisture and helps bind the gluten-free ingredients. Vanilla enhances the flavor and balances the bitterness of cocoa powder.
If the mixture looks slightly uneven, continue mixing briefly until the ingredients come together.
Step 5: Combine the Wet and Dry Ingredients
Add the dry ingredients to the wet mixture in two portions.
Stir gently after each addition until a thick chocolate dough forms.
Gluten-free dough may feel different from ordinary cookie dough. Depending on the flour blend, it can be slightly sticky or somewhat firm.
If the dough appears excessively dry and will not hold together, add milk one teaspoon at a time. Do not add too much liquid at once because excess moisture can cause the cookies to spread.
Step 6: Add the Chocolate Chips
Fold the chocolate chips into the dough.
Distribute them evenly so that each cookie receives a good amount of chocolate.
If you prefer a richer chocolate flavor, reserve a few chocolate pieces and press them into the tops of the cookies before baking.
Make sure the chocolate chips are gluten-free according to the product label, especially if preparing cookies for someone with celiac disease.
Step 7: Chill the Dough
Cover the bowl and refrigerate the dough for approximately 20 minutes.
Chilling helps firm the butter and makes the dough easier to shape. It can also reduce excessive spreading during baking.
Some gluten-free flour blends benefit from a short resting period because the flour needs time to absorb moisture.
If the dough becomes very firm, let it stand at room temperature briefly before shaping.
Step 8: Shape the Cookies
Scoop approximately one tablespoon of dough for each cookie.
Roll each portion gently into a ball and place it on the prepared tray.
Leave around 5 centimetres between cookies to allow space for spreading.
Flatten the dough balls slightly with your fingers or the back of a spoon. Gluten-free cookies may spread less than traditional wheat-based cookies, depending on the flour blend.
Try to make each portion approximately the same size so that the cookies bake evenly.
Step 9: Bake the Cookies
Place the tray in the preheated oven and bake for approximately 10–12 minutes.
The edges should look set while the centers may remain slightly soft.
Avoid waiting until the entire cookie feels firm inside the oven. The cookies will continue to set as they cool.
If you prefer crispier cookies, you can extend the baking time slightly, checking frequently to prevent burning.
Step 10: Cool the Cookies
Remove the tray from the oven and leave the cookies on it for approximately five to ten minutes.
Gluten-free cookies can be fragile while hot, so allow them to firm before transferring them to a cooling rack.
Once completely cooled, the cookies should hold their shape more easily and develop a more consistent texture.
Tips for Soft and Chewy Gluten-Free Chocolate Cookies
Measure Flour Carefully
Too much flour is a common cause of dry, crumbly gluten-free cookies.
For greater accuracy, weigh the flour according to the amount recommended for your selected blend. If using measuring cups, spoon the flour into the cup and level it rather than packing it down.
Choose Unsweetened Cocoa Powder
Unsweetened cocoa powder provides concentrated chocolate flavor without additional sugar.
Natural cocoa powder and Dutch-process cocoa powder have different acidity levels, so results may vary depending on the baking soda and other ingredients. For a first attempt, use the cocoa powder specified by your recipe.
Do Not Skip the Resting Period
A short rest can help gluten-free flour absorb moisture and reduce a gritty texture.
Chilling also makes sticky dough easier to shape.
Avoid Overmixing
Once the flour has been incorporated, mix only until the dough is combined.
Gluten-free dough does not develop wheat gluten in the same way as ordinary dough, but excessive mixing can still affect the distribution of ingredients and the final texture.
Let the Cookies Cool Completely
The cookies may seem soft immediately after baking. Cooling allows their structure to stabilize.
Moving them too early can cause them to break apart.
How to Make Gluten-Free Chocolate Cookies Extra Chocolatey
If you enjoy a rich chocolate flavor, there are several ways to intensify this recipe.
Add Dark Chocolate Chips
Dark chocolate chips can provide a more intense flavor than sweeter chocolate varieties.
Choose a product that meets your dietary requirements and check its ingredient label.
Use a Small Amount of Coffee
A small quantity of instant coffee powder can enhance the perceived depth of chocolate flavor without making the cookies taste strongly of coffee.
Start with approximately 1/4 teaspoon and adjust according to your preferences.
Add Chopped Chocolate
Chopped chocolate creates irregular pockets of melted chocolate, giving the cookies a homemade bakery-style appearance.
Use chocolate that is suitable for gluten-free baking.
Make Double Chocolate Cookies
You can add a modest amount of extra chocolate chips or follow a specifically developed double chocolate cookie recipe.
If you add more dry cocoa powder, the dough may become drier. Adjustments to the flour or moisture may be necessary.
Gluten-Free Chocolate Cookies Without Dairy
You can adapt the recipe for a dairy-free diet by replacing butter with a suitable plant-based baking butter.
Choose a product intended for baking because some spreads contain more water than conventional butter and may cause different spreading or texture.
Use dairy-free chocolate chips and check the labels of all ingredients.
Follow the same basic preparation steps, but chill the dough if it appears too soft.
Remember that dairy-free and gluten-free are separate dietary requirements. A product may meet one requirement without meeting the other.
Gluten-Free Chocolate Cookies Without Eggs
Eggs provide binding, moisture, and structure. Removing them can make gluten-free cookies more fragile.
A commercial egg replacer designed for baking is one possible option. Follow the manufacturer’s instructions and use a recipe that has been tested with that product.
A flaxseed mixture may also work in certain cookie recipes, but it can create a denser texture and may require adjustments to the moisture level.
For the most reliable outcome, use a gluten-free chocolate cookie recipe specifically developed to be egg-free.
Vegan Gluten-Free Chocolate Cookies
To prepare vegan gluten-free chocolate cookies, you need to replace both the dairy ingredients and the egg.
Choose a suitable plant-based baking butter, an appropriate egg replacer, and chocolate chips without dairy ingredients.
Also verify that the flour blend and other ingredients are suitable for your needs.
Because several ingredients change at once, the texture may differ significantly from the original recipe. A tested vegan gluten-free formulation is preferable when consistent results are important.
Gluten-Free Chocolate Cookies With Almond Flour
Almond flour is popular in gluten-free baking because it adds moisture and a mild nutty flavor.
However, almond flour does not behave like a standard gluten-free flour blend.
It contains more fat and less starch than many commercial blends, so cookies may spread differently and remain more delicate.
If you want to use almond flour, select a recipe specifically designed for it rather than replacing all the flour in this recipe cup-for-cup.
Almond flour is also unsuitable for people with almond or certain tree-nut allergies.
How to Make Gluten-Free Chocolate Cookies Crispy
Some bakers prefer crisp edges and a firmer texture rather than soft centers.
To encourage crispness:
- Make the cookies slightly thinner.
- Use consistent dough portions.
- Bake for a little longer while monitoring closely.
- Allow the cookies to cool completely on a rack.
- Avoid adding unnecessary liquid.
Do not increase the oven temperature excessively. The edges can burn before the centers bake through.
The result also depends on the gluten-free flour blend, the type of fat, and the amount of moisture in the dough.
Common Gluten-Free Baking Mistakes
Using an Unbalanced Flour Substitute
Replacing wheat flour with a random combination of gluten-free flours can produce poor texture.
Different flours absorb moisture differently and provide different levels of structure. Use a suitable baking blend or a tested recipe.
Adding Too Much Liquid
Gluten-free dough can be sticky, but that does not always mean it needs more flour or liquid.
Allow the dough to rest briefly before deciding whether it needs an adjustment.
Baking for Too Long
Gluten-free cookies can become dry and crumbly when overbaked.
Remove them when the edges are set and let residual heat finish firming the centers.
Handling Cookies While Hot
The cookies may be fragile immediately after baking.
Allow them to cool on the tray before transferring them to a rack.
Ignoring Cross-Contact
If you are preparing gluten-free cookies for someone with celiac disease, ordinary flour residue on bowls, mixers, trays, and countertops can contaminate the food.
Use clean equipment and verify the gluten-free status of packaged ingredients.
How to Store Gluten-Free Chocolate Cookies
At Room Temperature
Allow the cookies to cool completely before placing them in an airtight container.
Store them in a cool, dry place and consume them within approximately three to four days for good quality, depending on the ingredients and conditions.
In the Refrigerator
For longer short-term storage, place the cookies in an airtight container in the refrigerator.
They may become firmer when cold. Let them stand briefly at room temperature before eating if you prefer a softer texture.
In the Freezer
Arrange completely cooled cookies in a single layer and freeze until firm.
Transfer them to a freezer-safe container or bag, separating layers with parchment paper.
For best quality, use them within approximately two months. Thaw the cookies in a clean environment before serving.
Can You Freeze the Dough?
Yes. Shape the dough into individual portions and freeze them on a tray.
Once firm, transfer the portions to a freezer-safe container. When ready to bake, follow the recipe’s baking instructions and allow additional time if needed.
Always check the cookies for doneness rather than relying only on a fixed baking time.
Frequently Asked Questions
1. Are gluten-free chocolate cookies suitable for beginners?
Yes. This recipe uses common baking techniques and a commercial gluten-free flour blend. Beginners should measure the ingredients carefully and allow the cookies to cool before handling.
2. What is the best flour for gluten-free chocolate cookies?
A gluten-free all-purpose flour blend designed for baking is a convenient choice. Different blends produce different textures, so choose one suitable for cookies.
3. Do gluten-free cookies taste different?
They can. Some blends produce a texture that is similar to wheat-based cookies, while others may be softer, grainier, or more delicate.
4. Why are my gluten-free cookies crumbly?
Possible reasons include excessive flour, insufficient moisture, an unsuitable flour blend, or moving the cookies before they have cooled.
Measure ingredients carefully and allow the cookies to set before transferring them.
5. Can I use almond flour instead of gluten-free all-purpose flour?
Not as a direct one-to-one substitution in every recipe. Almond flour has a different composition and requires a recipe designed for it.
6. Are chocolate chips gluten-free?
Some are, but you should not assume every product is suitable. Check the ingredient label and any gluten-related allergen or cross-contact information.
7. Can I make the dough without a mixer?
Yes. A sturdy spoon and mixing bowl are sufficient. Make sure the butter is softened enough to combine with the sugar.
8. Can I use coconut sugar?
Coconut sugar can be used in some cookie recipes, but it is still a form of sugar. It does not make the cookies sugar-free.
It may also affect flavor and texture.
9. Can I reduce the sugar in this recipe?
You can experiment with reducing the sugar, but sugar contributes to spreading, browning, and texture as well as sweetness.
Large reductions may result in cookies that are drier or less tender.
10. How can I make the cookies softer?
Avoid overbaking, measure the flour accurately, and allow the cookies to cool without leaving them in the oven for too long.
A suitable flour blend and balanced moisture level are also important.
11. How do I know when the cookies are ready?
The edges should be set while the centers may remain slightly soft. They will firm as they cool.
12. Can I add nuts to this recipe?
Yes. Add a small quantity of chopped walnuts, pecans, or almonds if appropriate for your dietary needs.
13. Are these cookies suitable for celiac disease?
They can be prepared for a gluten-free diet if all ingredients are suitable and cross-contact is prevented. Use certified gluten-free ingredients when necessary and follow appropriate food-safety practices.
14. Can I make these cookies ahead of time?
Yes. You can refrigerate the dough for a short period before baking or freeze individual portions for later use.
15. Can I make these cookies without cocoa powder?
You can make gluten-free chocolate chip cookies without cocoa powder by using a suitable vanilla cookie recipe and adding chocolate chips. The result will have a lighter cookie base rather than a dark chocolate flavor.
16. Can I use baking powder instead of baking soda?
Not always as a direct replacement. Baking soda and baking powder work differently, and the appropriate leavening agent depends on the recipe’s other ingredients.
Use a tested substitution rather than replacing them in equal quantities without adjustment.
17. Why did my cookies spread too much?
The butter may have been too warm, the dough may not have been chilled enough, or the flour blend may have different absorption properties.
Chill the dough and make sure the oven is fully preheated.
18. How should I serve gluten-free chocolate cookies?
Serve them after cooling with tea, coffee, milk, or a suitable plant-based beverage. They also make a simple dessert for family gatherings.
Final Thoughts
Gluten-free chocolate cookies are an enjoyable homemade treat that can be prepared with simple ingredients and beginner-friendly techniques. The combination of cocoa powder, vanilla, butter, and chocolate chips creates a rich flavor, while a suitable gluten-free flour blend helps the cookies hold together.
For the best results, measure the ingredients carefully, chill the dough, avoid overbaking, and let the cookies cool before moving them. If you need to avoid gluten for medical reasons, pay close attention to ingredient labels and prevent cross-contact during preparation.
Once you are comfortable with the basic method, experiment with different chocolate varieties, nuts, or suitable dairy-free alternatives to create your preferred version of gluten-free chocolate cookies.