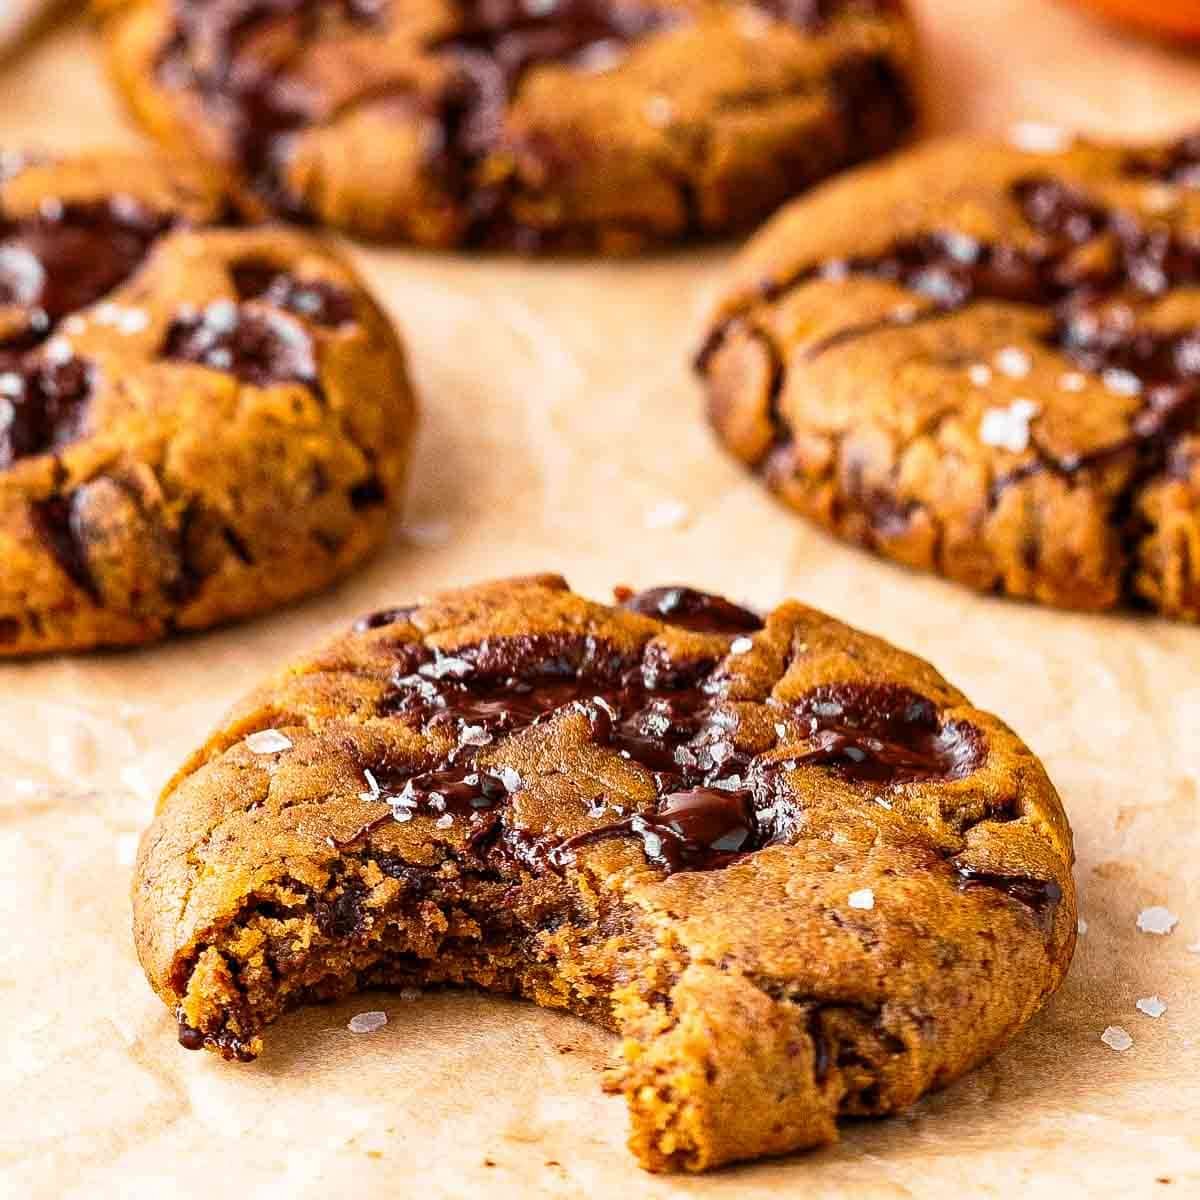
Homemade cookies should have the right balance of texture, flavor, and appearance. Whether you are baking classic chocolate chip cookies, buttery sugar cookies, oatmeal cookies, or peanut butter cookies, you probably want them to hold their shape while developing lightly golden edges and a soft, delicious center. However, one common baking problem can ruin the result: cookies spreading too much in the oven.
If your cookies turn into thin, flat discs, merge together on the baking tray, or become crispy and greasy instead of soft and chewy, you are not alone. Excessive cookie spreading is one of the most common problems home bakers experience. The good news is that it is usually easy to fix once you understand what causes it.
Cookie spreading depends on several factors, including butter temperature, flour measurement, sugar ratios, dough consistency, oven temperature, baking sheet preparation, and chilling time. Even a small change in one ingredient or baking step can affect the final shape of your cookies.
This guide explains why homemade cookies spread too much, how to identify the cause, and what you can do to achieve thicker, softer, and more evenly baked cookies. You will also learn practical troubleshooting methods, ingredient adjustments, storage tips, and common mistakes to avoid.
Understanding Why Cookies Spread in the Oven
Cookie dough naturally spreads as it heats. Butter or other fats soften and melt, sugar dissolves, and the dough gradually loses some of its original structure. At the same time, the flour absorbs moisture and the proteins and starches help the cookie set.
The final shape depends on how quickly the dough spreads compared with how quickly its structure becomes firm.
When the dough spreads slowly and sets at the right time, cookies often develop a thicker center and attractive edges. When the fat melts too quickly or the dough lacks enough structure, the cookies may spread excessively before they have a chance to set.
Several ingredients influence this process.
- Butter: Provides flavor, tenderness, and fat. If it is too warm or partially melted, the dough may spread quickly.
- Flour: Gives the dough structure. Too little flour can produce thin cookies.
- Sugar: Helps cookies spread, brown, and develop crisp or chewy textures.
- Eggs: Supply moisture and structure, depending on the recipe.
- Leavening agents: Baking soda and baking powder affect the way cookies rise, spread, and brown.
- Moisture: Excess liquid can make dough too loose.
- Oven heat: Determines how quickly the dough melts, spreads, and sets.
The goal is not to eliminate spreading completely. Instead, you want to control it so that the cookies reach the intended size and texture.
1. Butter Is Too Soft or Melted
One of the most common reasons homemade cookies spread too much is butter that is too warm.
Many cookie recipes call for softened butter because it can be beaten with sugar to incorporate air. However, softened butter and melted butter are not interchangeable in most recipes.
When butter is excessively soft, oily, or partially melted, the dough may become loose. Once placed in a hot oven, the fat melts rapidly, allowing the dough to spread before the flour and eggs create enough structure.
How to Recognize This Problem
Your cookies may have the following characteristics:
- They spread into very thin circles.
- The edges become greasy or unusually crispy.
- The centers remain thin rather than thick and soft.
- The dough feels oily or sticky before baking.
- Cookies spread much more on the second tray if the dough has warmed up.
If your recipe calls for softened butter, the butter should be pliable but not liquid.
How to Fix Butter Temperature
Remove butter from the refrigerator and let it soften gradually at room temperature. Depending on the size of the pieces and the room temperature, this may take approximately 30–60 minutes.
Properly softened butter should yield to gentle pressure while still holding its shape. It should not look shiny, watery, or oily.
If you accidentally soften the butter too much, place it in the refrigerator until it firms up slightly before mixing the dough.
If the butter has completely melted, refrigerating it until firm may help restore its consistency, but it will not necessarily behave exactly like freshly softened butter that has been creamed with sugar. For recipes that rely on creaming, starting again with properly softened butter may give better results.
Should You Use Melted Butter for Cookies?
Yes, but only when the recipe is designed for it. Some chocolate chip cookie recipes use melted butter to create a dense, chewy texture. These recipes usually balance the melted fat with the right quantities of flour, sugar, and other ingredients.
Do not replace softened butter with melted butter without adjusting the recipe.
2. You Are Not Measuring Flour Correctly
Flour provides much of the structure that prevents cookies from spreading excessively. If you use too little flour, the dough may not be strong enough to maintain its shape during baking.
This problem often occurs when flour is measured by scooping a measuring cup directly into the bag.
Scooping can compact the flour, making measurements inconsistent. Depending on how you fill the cup, you might add too much flour one day and too little the next.
Why Too Little Flour Causes Flat Cookies
Flour contains starch and proteins that contribute to the structure of baked goods. During baking, these components help the dough become firm.
When there is not enough flour relative to the fat and sugar, the dough may melt and spread rapidly. The result can be thin cookies with fragile centers.
The Best Way to Measure Flour
Using a kitchen scale is the most reliable approach.
- Place a clean bowl on the scale.
- Set the scale to zero.
- Add the amount of flour specified by the recipe in grams.
- Add the flour gradually rather than estimating the quantity.
- Check that you are using the correct type of flour.
If you do not have a kitchen scale, fluff the flour with a spoon, gently spoon it into a measuring cup, and level the top with a straight edge. Avoid packing the flour into the cup.
Remember that cup-to-gram conversions vary according to the ingredient and measuring method. Follow the conversion provided by your recipe when available.
How to Correct Dough That Is Already Too Soft
If the dough is clearly loose, oily, or difficult to portion, refrigerate it first. Chilling may firm the fat and improve handling.
If the dough remains unusually loose after chilling, compare your measurements with the original recipe. If you discover that you omitted flour or added too much fat, carefully correct the dough.
Add extra flour in small increments, mixing only until incorporated. Avoid adding large quantities all at once because excessive flour can produce dry, tough cookies.
For future batches, accurate measuring is better than repeatedly adjusting the dough after mixing.
3. You Used Too Much Sugar
Sugar does more than make cookies sweet. It also influences spreading, browning, moisture retention, and texture.
When sugar dissolves and heats during baking, it contributes to the cookie’s structure and can encourage spreading. A recipe with too much sugar relative to flour and fat may produce cookies that become thin, crisp, or overly brown.
Different types of sugar also behave differently.
White Sugar
Granulated white sugar often encourages a crisper texture and more spreading, depending on the recipe. It can help create thin, crunchy edges.
Brown Sugar
Brown sugar contains molasses, which contributes moisture, flavor, and a softer texture. It often helps cookies remain chewy, although the final result depends on the entire recipe.
What Happens When You Change the Sugar Ratio?
Suppose a recipe calls for both white and brown sugar. If you replace all the brown sugar with white sugar, you may change the moisture balance and texture. The cookies could become crisper or spread differently.
Likewise, adding extra sugar simply because you prefer sweeter cookies can make the dough more difficult to control.
How to Fix Excessive Spreading Caused by Sugar
Start by following the recipe’s stated quantities. Do not reduce or increase the sugar substantially without considering how the change will affect texture.
If you want thicker cookies, choose a recipe specifically developed for a thicker result rather than making several large ingredient substitutions.
For a small experimental batch, you can test a modest sugar adjustment, but change only one variable at a time. This makes it easier to determine whether the adjustment actually improves the cookies.
4. You Did Not Chill the Cookie Dough
Chilling cookie dough is one of the easiest ways to reduce excessive spreading.
When dough rests in the refrigerator, the fat becomes firmer. The flour also has more time to absorb moisture, which can improve the dough’s consistency.
Cold dough generally takes longer to warm up in the oven. This can give the cookie more time to begin setting before it spreads too far.
However, chilling is not a universal solution for every cookie recipe. Some thin or delicate cookies are intentionally designed to spread, and some recipes use melted butter with a specific resting process.
How Long Should You Chill Cookie Dough?
The ideal time depends on the recipe.
- 30 minutes: A useful starting point when the dough is slightly warm or soft.
- 1–2 hours: Often helpful for chocolate chip cookies that need firmer dough.
- Overnight: Can deepen flavor and improve convenience for many cookie recipes.
- Longer storage: Usually requires an airtight container and appropriate refrigeration or freezing.
Always consider the recipe’s instructions. Chilling times are not identical for every dough.
How to Chill Dough Correctly
After mixing the dough, cover the bowl or transfer the dough to an airtight container. Refrigerate it until it is firm enough to scoop or shape.
You can also portion the dough into balls before chilling. This makes it easier to bake individual cookies later.
If you chill the dough overnight, allow it to soften slightly if it becomes too hard to portion. Avoid leaving it out long enough for the butter to become greasy and warm again.
Does Chilling Always Prevent Spreading?
No. Chilling helps control spreading, but it cannot completely correct a badly unbalanced recipe.
If your dough contains too little flour, too much fat, or an incorrect quantity of sugar, chilling may improve the result without fully solving the problem.
Use chilling together with accurate measurements and the correct oven temperature.
5. Your Oven Temperature Is Too Low
Oven temperature has a major influence on cookie shape.
When the oven is too cool, the fat in the dough may melt before the cookie develops enough structure. As the dough continues to warm, it spreads across the baking sheet.
The cookies may become thin even when the ingredients and dough preparation are correct.
A low oven temperature can also make baking times less predictable.
Signs of an Oven That Is Too Cool
Look for these clues:
- Cookies spread widely before the edges become firm.
- The centers remain pale or soft for a long time.
- Cookies take considerably longer to bake than the recipe suggests.
- Different trays produce inconsistent results.
- The bottoms brown slowly despite extensive baking.
These signs can also have other causes, so check your ingredient measurements and baking sheet before changing the temperature.
How to Check Your Oven Temperature
An inexpensive oven thermometer can help you determine whether your oven reaches the temperature displayed on its controls.
Preheat the oven fully before placing the cookies inside. Many ovens signal that they are ready before the temperature has stabilized throughout the oven cavity.
Avoid opening the oven door repeatedly because this allows heat to escape.
What Temperature Should You Use?
Many standard drop-cookie recipes bake somewhere around 175–190°C (350–375°F), but the correct temperature depends on the recipe.
Do not automatically increase the temperature to the highest setting. Excessive heat can burn the edges before the centers finish baking.
If your oven is consistently cooler than its setting, use the thermometer reading and adjust the controls cautiously. Follow the recipe’s intended baking temperature whenever possible.
6. Your Baking Sheet Is Too Hot
A hot baking sheet can cause dough to begin melting before it enters the oven.
This commonly happens when you bake several batches in succession and place fresh dough on the same tray immediately after removing the previous batch.
The warm metal transfers heat to the dough from underneath. The butter starts melting, and the cookies can spread before the oven has a chance to set them properly.
How to Fix a Hot Baking Sheet
Use a cool baking sheet for each new batch.
If you have only one tray, allow it to cool completely before adding more dough. You can speed up the process by carefully moving the tray away from the oven and letting it cool naturally.
Do not place dough on a hot tray simply because you want to finish baking quickly.
Can You Put a Hot Baking Sheet Under Cold Water?
It is generally better to let the tray cool naturally. Sudden temperature changes may warp some baking sheets, and handling hot metal near water can create a safety risk.
Keep a second baking sheet available if you frequently bake large batches.
7. You Greased the Baking Sheet Too Much
Cookies usually need a suitable baking surface, but extra grease can encourage spreading.
If you heavily grease the baking sheet with butter or oil, the dough may slide and spread more readily. Additional fat can also alter the bottom texture and make the cookies seem greasy.
Should You Grease a Cookie Sheet?
That depends on the recipe and the baking sheet.
Many modern baking sheets do not require greasing when used with parchment paper. Some recipes are designed for ungreased trays, while others specifically call for a lightly greased surface.
Follow the recipe’s directions rather than automatically adding butter or oil.
Parchment Paper or Silicone Baking Mats?
Both options can work well.
Parchment paper provides a convenient nonstick surface and makes cleanup easy. It is a reliable choice for many chocolate chip, oatmeal, and sugar cookie recipes.
Silicone baking mats can also provide a nonstick surface. However, cookies may spread or brown differently on silicone compared with parchment, depending on the recipe and mat.
If your cookies repeatedly spread too much, try baking a small test batch on parchment paper and compare the results.
Avoid placing parchment paper or baking mats in an oven above their manufacturer’s recommended temperature.
8. You Used the Wrong Type of Flour
Not all flours behave the same way in cookie recipes.
All-purpose flour is commonly used because it offers a balance of structure and tenderness. Cake flour generally has less protein and may produce a more delicate texture, while bread flour typically has more protein and can make cookies chewier.
Substituting one flour for another can change the final result.
Why Flour Type Matters
Flour proteins help form structure when combined with moisture. The type and amount of protein influence how a cookie holds together.
If you replace all-purpose flour with a lower-protein flour without adjusting the recipe, the cookies may become more delicate. Depending on the formula, they may also spread differently.
Using bread flour may produce a chewier cookie, but it can also change how much liquid the dough absorbs and how firm the finished texture becomes.
How to Choose the Right Flour
For most traditional homemade chocolate chip cookies, start with the all-purpose flour recommended by the recipe.
For gluten-free cookies, use a tested gluten-free baking blend rather than assuming that a direct substitution will work perfectly. Gluten-free blends vary in starch content, binding ingredients, and moisture absorption.
Do not change flour type, sugar ratio, and butter quantity at the same time. Testing one change per batch gives you more useful information.
9. You Added Too Much Liquid
Excess liquid can make cookie dough softer and less stable.
Liquid may come from milk, water, eggs, extracts, or other ingredients. Some cookie recipes intentionally use additional moisture, but the proportions must be balanced with flour, fat, and sugar.
Even a small measuring error can change the consistency of a small batch.
Common Sources of Extra Moisture
- Adding more milk than the recipe requires.
- Using oversized eggs when the recipe expects a particular size.
- Adding too much vanilla extract or another liquid flavoring.
- Measuring ingredients inaccurately.
- Using an ingredient with more moisture than the original recipe.
How to Prevent the Problem
Measure liquids carefully with suitable measuring tools. When a recipe specifies a particular egg size, follow that instruction.
If you are adapting a recipe, remember that replacing one ingredient with another can affect both moisture and structure.
For example, applesauce, yogurt, mashed banana, and some liquid sweeteners behave differently from butter or dry sugar. Substituting them without adjustment may produce dough that spreads differently or bakes into a softer, cake-like cookie.
If your dough appears wetter than expected, chill it first. Add extra flour only if the recipe’s proportions or the dough’s consistency indicate that it is necessary.
10. You Used Too Much Baking Soda or Baking Powder
Leavening agents help cookies rise and influence their texture, color, and spread.
Baking soda and baking powder are not identical. Baking soda needs an appropriate acidic ingredient to react effectively, while baking powder contains an acid and a base designed to react when moistened and heated.
Using too much of either ingredient can change the cookie’s structure and flavor.
What Happens When There Is Too Much Baking Soda?
Excess baking soda can produce unusually dark cookies, an unpleasant alkaline taste, and an altered texture. Depending on the recipe, it may also contribute to excessive spreading.
What Happens When There Is Too Much Baking Powder?
Too much baking powder can create excessive expansion, a puffy or irregular texture, or a bitter taste. The final result depends on the formula and how the cookies bake.
How to Fix the Problem
Measure leavening agents accurately. Use level measuring spoons and avoid estimating small quantities.
Do not assume that doubling the baking soda or powder will make cookies twice as thick. The relationship between leavening, spread, and texture is more complicated than that.
If you discover a significant measurement error after mixing, it is often better to prepare a corrected batch than to attempt a large adjustment without knowing the dough’s exact proportions.
11. You Are Using a Dark or Thin Baking Sheet
The material and color of a baking sheet can influence how cookies bake.
Dark metal sheets absorb heat differently from light-colored aluminum sheets. Very thin trays may heat unevenly or react quickly to temperature changes.
These differences can affect the bottoms, edges, and overall spread of your cookies.
Dark Baking Sheets
Dark sheets can brown the bottoms of cookies more quickly. Depending on the oven and recipe, they may produce different spreading and browning patterns than lighter sheets.
Thin Baking Sheets
Thin trays may be more likely to warp or heat unevenly. This can create inconsistent results across a batch.
Which Baking Sheet Is Best?
A sturdy, light-colored aluminum baking sheet is a dependable option for many home bakers.
Use the same type of tray while testing a recipe so that you can compare results consistently.
If you switch from a dark tray to a light tray, monitor the first batch carefully. The baking time and browning may change.
12. You Placed the Dough Too Close Together
Sometimes cookies spread normally, but the spacing between them is insufficient.
As they bake, the cookies expand outward. If the dough balls are positioned too close together, neighboring cookies may touch and merge into one large sheet.
This can make it difficult to remove individual cookies and can cause uneven baking where the cookies meet.
How Much Space Should You Leave?
For many standard drop-cookie recipes, leaving about 5–7.5 cm (2–3 inches) between dough portions is a useful starting point.
Larger cookies may require more space, while small cookies may need less.
Always follow the recipe if it provides a specific spacing recommendation.
What If Your Cookies Keep Touching?
Bake fewer cookies per tray. Use two or three batches rather than filling every available space.
If the cookies spread excessively even when they have plenty of room, spacing is not the main problem. Review the butter temperature, flour quantity, dough chilling, and oven temperature.
13. Your Cookie Dough Was Overmixed or Mixed Incorrectly
Mixing technique affects the texture and consistency of cookie dough.
Creaming butter and sugar introduces air, which can contribute to the cookie’s structure. However, mixing for too long or using the wrong technique can create inconsistent results.
Overmixing flour after it is added can develop more gluten, potentially making cookies tougher. It is not always the main cause of spreading, but it can change the texture.
How to Mix Cookie Dough Properly
If the recipe starts with softened butter:
- Beat the butter and sugar until the mixture is creamy and reasonably uniform.
- Add the eggs and flavoring as directed.
- Mix the dry ingredients separately if the recipe recommends it.
- Add the dry ingredients to the wet mixture.
- Mix just until the flour is incorporated.
- Fold in chocolate chips, nuts, or other additions.
Avoid continuing to beat the dough for several minutes after all the flour has been added.
Does Creaming Butter and Sugar Matter?
Yes, particularly for recipes designed around softened butter.
The creaming process affects the air incorporated into the dough and helps establish a consistent mixture. If the butter is too cold, the mixture may remain lumpy. If it is too warm, it may become greasy and fail to hold the intended structure.
Follow the method specified in your recipe instead of applying one mixing technique to every cookie.
14. Your Cookie Recipe Has Too Much Fat
Fat creates tenderness, flavor, and a desirable mouthfeel. However, the amount must be balanced with flour and sugar.
Too much butter or another fat can make the dough overly soft and encourage excessive spreading. It may also leave the cookies greasy.
This can happen when you accidentally add extra butter, use a different fat without adjusting the recipe, or misread the ingredient quantities.
How to Identify Excess Fat
Look for these signs:
- The dough appears shiny or oily.
- Butter pools around the edges during baking.
- The cookies spread much wider than expected.
- The bottoms become greasy.
- The cookies seem fragile after cooling.
These signs are not conclusive on their own, but they can indicate an imbalance between fat and the other ingredients.
How to Correct the Recipe
Check the butter measurement before changing anything else.
If you added more butter than required, chilling may help firm the dough, but it cannot fully restore the original ingredient balance.
For future batches, weigh the butter or use the measurement specified by the recipe. If you want to use oil, margarine, or another substitute, choose a recipe designed for that ingredient.
15. You Changed Several Ingredients at Once
Experimenting with cookie recipes is part of the fun of baking, but changing several ingredients at the same time makes troubleshooting difficult.
For example, you might replace butter with oil, reduce the flour, increase the sugar, and skip chilling. If the cookies become flat, you will not know which change caused the problem.
A Better Method for Testing Recipes
Start with a reliable recipe and follow it exactly.
If you want thicker cookies, change one factor at a time. For example:
- Batch A: Follow the original recipe.
- Batch B: Chill the dough for 30–60 minutes.
- Batch C: Use the same chilled dough but test a different baking tray.
Compare the results and record the differences.
A simple baking notebook can help you remember the oven temperature, chilling time, dough weight, baking time, and final texture.
This method is especially useful if you bake frequently or want to develop your own signature cookie recipe.
16. Your Dough Balls Are Too Small or Too Large
The size of each portion influences how the cookie heats and spreads.
Small dough portions warm up quickly and may bake into thin, crisp cookies if the recipe is not designed for their size. Large portions may remain soft in the center longer and need additional baking time.
Changing the size without adjusting the baking instructions can lead to inconsistent results.
How to Portion Cookies Consistently
Use a cookie scoop or kitchen scale to create evenly sized dough portions.
For example, you might test portions weighing 30–40 grams for a standard homemade chocolate chip cookie, provided the recipe is suitable for that size.
The exact amount is less important than consistency and following the recipe’s intended yield.
Should You Make Dough Balls Taller?
Some thick-cookie recipes use taller or slightly cylindrical dough portions rather than perfectly round balls. This can influence the shape and center thickness, but it is not a substitute for properly balanced dough.
If you want thicker cookies, begin with the right recipe, correct measurements, and properly chilled dough. Portion shape can then be used as an additional technique.
17. You Removed Cookies From the Oven Too Early
Underbaking can make cookies seem fragile and may cause them to break or collapse when handled.
However, underbaking is not always the original reason for excessive spreading. The dough may have spread too much earlier in the baking process because the butter was warm or the oven was too cool.
The key is to distinguish between spreading and setting.
How to Tell When Cookies Are Ready
Many chocolate chip cookies are ready when:
- The edges look set and lightly golden.
- The centers still appear slightly soft.
- The surface is no longer wet or shiny.
- The cookies hold their shape when carefully moved after cooling.
Cookies continue to firm as they cool on the baking sheet. Removing them too soon may cause breakage, while baking them for too long can produce hard, dry results.
Should You Bake Cookies Longer to Stop Spreading?
Not necessarily. Once a cookie has spread, additional baking generally will not make it thicker again.
Longer baking can help a soft center set, but it may also dry out the cookie.
To prevent excessive spreading, focus on the dough’s composition, temperature, and oven conditions before baking.
18. Humidity and Room Temperature Are Affecting Your Dough
Environmental conditions can influence cookie dough, especially when you bake in a warm kitchen.
In a hot room, butter softens more quickly while you mix, portion, and prepare the baking tray. This means dough that initially had the right consistency may become too warm before it enters the oven.
Humidity can also affect dry ingredients and the way dough feels, although its impact varies by recipe and storage conditions.
How to Bake Cookies in a Warm Kitchen
If your kitchen is warm:
- Measure the ingredients before mixing.
- Keep butter at the temperature specified by the recipe.
- Chill the dough when necessary.
- Portion dough quickly.
- Return unused dough to the refrigerator.
- Use a cool baking sheet for every batch.
Avoid leaving shaped dough balls beside a hot oven for an extended period.
If you bake in a particularly warm climate, it may help to work in smaller batches so that the dough stays cool.
19. You Used a Different Brand of Butter or Margarine
Different butter and margarine products can have different fat and water contents.
A baking recipe developed for butter may not behave the same way when made with a soft tub spread or a product designed primarily for spreading on bread.
Some spreads contain more water and less fat than standard butter. This can change the dough’s texture and the way moisture evaporates during baking.
Can Margarine Cause Cookies to Spread?
It can, depending on the product and recipe. Soft margarine or a high-moisture spread may produce dough that behaves differently from a firm baking margarine or standard butter.
Not every margarine product is unsuitable for cookies, but they are not always direct substitutes.
How to Choose a Suitable Fat
Use the exact fat specified by the recipe when troubleshooting.
If you need a dairy-free option, look for a recipe developed with a suitable dairy-free baking block or other tested fat substitute. Follow the product’s storage and handling directions.
Avoid assuming that any spreadable fat will produce the same cookie texture.
20. You Used a Recipe Designed for Thin Cookies
Not every flat cookie is a baking failure.
Some recipes are intentionally designed to create thin, crisp cookies. Others produce cookies with delicate, lacy edges or a wide, chewy center.
If your recipe contains a high proportion of sugar or fat and little chilling time, it may naturally produce more spreading.
How to Tell Whether the Recipe Is the Problem
Compare the expected result with your finished cookies.
If the recipe photographs show thin cookies and the instructions call for warm or melted butter, your cookies may be behaving as intended.
If you want thick, bakery-style cookies, choose a recipe specifically designed for that result.
Look for recipes that explain the intended texture, provide accurate ingredient weights, and include clear instructions about butter temperature and chilling.
Do not judge every cookie recipe by the same standard. A thin, crisp butter cookie and a thick, chewy chocolate chip cookie have different goals.
A Step-by-Step Method to Fix Cookie Dough That Spreads Too Much
If you have already mixed your dough and suspect something is wrong, use this troubleshooting process before changing the recipe.
Step 1: Examine the Dough
Check whether the dough is firm, soft, sticky, or oily.
Cookie dough should generally be cohesive and manageable, although the exact consistency depends on the recipe. Some doughs are naturally soft, so compare it with the recipe’s instructions.
Step 2: Check the Ingredient Measurements
Review the amount of flour, butter, sugar, eggs, and liquid ingredients.
If you suspect a measurement error, correct the known mistake rather than adding random amounts of flour.
Step 3: Chill the Dough
If the dough is soft or warm, cover it and refrigerate it for approximately 30–60 minutes.
After chilling, check whether it has become firmer and easier to portion.
Step 4: Check the Oven
Preheat the oven and use an oven thermometer if available.
Confirm that the oven reaches the temperature required by the recipe.
Step 5: Use a Cool Baking Sheet
Do not place dough on a hot tray from a previous batch.
Line the tray with parchment paper if appropriate for your recipe.
Step 6: Bake a Small Test Batch
Bake two or three cookies before preparing the entire tray.
This is one of the most useful ways to troubleshoot because it allows you to test the dough without risking the whole batch.
Step 7: Evaluate the Results
Observe the cookies’ width, thickness, color, and texture.
If they still spread excessively, review the flour-to-fat ratio, sugar quantity, and recipe method. Do not immediately add several ingredients at once.
Quick Troubleshooting Guide for Flat Cookies
| Problem | Likely cause | Best first solution |
|---|---|---|
| Cookies spread immediately | Warm or melted butter | Chill the dough and check the butter method |
| Cookies are thin and greasy | Too much fat or too little flour | Recheck measurements |
| Cookies spread on the second tray | Hot baking sheet or warm dough | Cool the tray and chill remaining dough |
| Cookies are pale and flat | Oven may be too cool | Verify oven temperature |
| Cookies become very crisp | Recipe ratio, excess sugar, or overbaking | Follow the recipe and check baking time |
| Cookies merge together | Insufficient spacing | Leave more room between dough portions |
| Cookies spread unevenly | Uneven portions or oven heat | Portion consistently and check oven conditions |
| Cookies have an oily texture | Fat imbalance or warm dough | Verify butter quantity and temperature |
| Cookies are dark but still flat | Excess baking soda or other ingredient imbalance | Recheck leavening measurements |
| Cookies are thinner than the recipe photos | Recipe may be designed to spread | Use a tested thick-cookie recipe |
How to Make Thick and Chewy Cookies That Hold Their Shape
If you prefer thick, chewy cookies, a few reliable habits can help you achieve that texture.
Use Accurate Ingredient Measurements
Measure flour, sugar, and butter carefully. A kitchen scale is particularly useful when you want consistent results from one batch to another.
Start With the Correct Butter Temperature
Use softened butter when the recipe calls for creaming. Use melted butter only when the recipe is designed for it.
Chill the Dough When Needed
Refrigerating dough helps firm the fat and can improve its handling. For many chocolate chip cookie recipes, chilling for at least 30 minutes is a useful starting point.
Avoid Excessive Sugar Adjustments
Sugar affects spreading and texture. Do not add extra sugar or make large substitutions without understanding how they affect the recipe.
Preheat the Oven Properly
Allow the oven to reach the intended temperature before baking.
Use Consistent Portions
Weigh or scoop the dough evenly so that the cookies bake at a similar rate.
Avoid Overbaking
For chewy cookies, remove them when the edges are set and the centers are still slightly soft, provided the recipe is designed for that finish. Let them rest on the baking sheet as directed.
Let the Cookies Cool
Cookies may feel fragile immediately after baking. Allowing them to cool helps the structure set and makes them easier to move.
A Reliable Test Recipe for Thick Chocolate Chip Cookies
The following small-batch recipe provides a practical way to practice controlling cookie spread. It is designed for a chewy center and moderately thick shape, although results still depend on your ingredients and oven.
Ingredients
- 115 g unsalted butter, softened but not oily
- 100 g brown sugar
- 50 g granulated white sugar
- 1 large egg
- 1 teaspoon vanilla extract
- 190 g all-purpose flour
- ½ teaspoon baking soda
- ¼ teaspoon salt
- 120 g chocolate chips
Instructions
1. Prepare the baking equipment.
Preheat the oven to 180°C (350°F). Line a cool baking sheet with parchment paper.
2. Mix the butter and sugars.
Place the softened butter, brown sugar, and granulated sugar in a mixing bowl. Beat until creamy and evenly combined.
3. Add the egg and vanilla.
Mix in the egg and vanilla extract until the mixture is smooth.
4. Combine the dry ingredients.
In another bowl, mix the flour, baking soda, and salt.
5. Make the dough.
Add the dry ingredients to the wet mixture. Mix just until no dry flour remains. Fold in the chocolate chips.
6. Chill the dough.
Cover the bowl and refrigerate for approximately 30–60 minutes, or until the dough is firm enough to portion.
7. Portion the dough.
Divide the dough into evenly sized portions. Leave approximately 5–7.5 cm (2–3 inches) between them.
8. Bake the cookies.
Bake for approximately 10–13 minutes, checking for set edges and slightly soft centers. The exact baking time will depend on portion size and your oven.
9. Allow the cookies to cool.
Leave the cookies on the baking sheet for several minutes before transferring them to a cooling rack.
10. Evaluate the results.
Check whether the cookies maintain their shape, develop golden edges, and remain chewy in the center. If they spread excessively, review your measurements and oven temperature before making major ingredient changes.
This recipe is a starting point, not a guarantee that every oven will produce identical results. Keep notes so that you can refine the process.
How to Rescue Cookies That Have Already Spread Too Much
Sometimes you only discover the problem after the cookies are in the oven. Although you cannot completely reverse spreading after it occurs, you may be able to improve their appearance or use the finished cookies in another dessert.
Shape the Edges While the Cookies Are Warm
If the cookies are still hot and soft, use a round cookie cutter slightly larger than each cookie to gently nudge the edges inward in a circular motion.
Work carefully and avoid pressing the cutter down into the cookie. This method can make irregular cookies look rounder, but it will not make their centers thicker.
Let the Cookies Cool Before Moving Them
Very thin cookies can break easily. Leave them on the tray for several minutes so that they become firmer.
If they are still soft in the center, allow them to cool longer before transferring them.
Turn Them Into Another Dessert
Flat cookies can still taste excellent.
Try using them for:
- Ice cream sandwiches.
- Cookie crumbs for cheesecake bases.
- Layered cookie desserts.
- Crumbled toppings for pudding or yogurt.
- Chocolate-dipped cookie pieces.
- A base for homemade dessert bars.
Avoid discarding a batch simply because it does not have the shape you expected.
Common Mistakes to Avoid When Fixing Cookie Spread
Troubleshooting is easier when you avoid making the problem worse.
Adding Too Much Flour at Once
Extra flour may make the dough firmer, but adding too much can produce dry, dense cookies. If the dough needs adjustment, add flour gradually and only when there is a clear reason.
Increasing the Oven Temperature Dramatically
A very hot oven may brown the outside before the inside bakes properly. Check the actual oven temperature instead of guessing.
Chilling Only the First Batch
If the kitchen is warm, the remaining dough may soften while the first tray bakes. Keep unused dough refrigerated until you are ready to portion it.
Using a Hot Tray for Fresh Dough
Always allow baking sheets to cool before placing new dough on them.
Changing Several Ingredients at Once
Make one adjustment per test batch. This helps you understand which change improves the result.
Expecting Every Cookie to Be Thick
Some cookie styles are naturally thin. Choose a recipe based on your preferred texture rather than trying to force every formula to produce the same result.
Judging Cookies Before They Cool
Freshly baked cookies often look soft and delicate. Their structure develops further as they cool, so wait before deciding that the batch has failed.
Frequently Asked Questions
1. Why do my homemade cookies spread too much in the oven?
The most common causes are butter that is too warm, too little flour, excess sugar, dough that needs chilling, a baking sheet that is too hot, or an oven that is too cool. Check ingredient measurements and dough temperature first.
2. How do I stop cookies from spreading without adding more flour?
Try chilling the dough, using a cool baking sheet, preheating the oven properly, and measuring the ingredients accurately. If the recipe is balanced, these steps may improve the result without requiring additional flour.
3. Does chilling cookie dough make cookies thicker?
Chilling often helps cookies spread less because the fat becomes firmer and the dough has time to hydrate. However, chilling cannot fully correct an unbalanced recipe.
4. Should cookie dough be cold before baking?
Many drop-cookie recipes benefit from chilled dough, but not all recipes require it. Follow the recipe’s instructions and chill the dough when it is too soft or warm to hold its shape.
5. Can melted butter make cookies flat?
Yes, if the recipe calls for softened butter and the melted butter changes the dough’s consistency. However, some recipes specifically use melted butter to create chewy cookies. Use the butter preparation method stated in the recipe.
6. Does more flour always make cookies thicker?
No. More flour can reduce spreading, but too much flour can make cookies dry, dense, or tough. Accurate measurements are better than adding flour without checking the cause of the problem.
7. Why do my cookies spread more on the second tray?
The baking sheet may still be hot, or the remaining dough may have warmed up while waiting. Cool the tray completely and keep unused dough refrigerated when necessary.
8. Can baking soda cause cookies to spread?
Yes, the amount of baking soda can influence spreading, browning, and texture. Too much may create an undesirable result. Measure it carefully and avoid substituting baking soda for baking powder without a tested formula.
9. Why are my cookies flat but still soft?
Cookies may be soft because they contain enough moisture and fat to remain tender, even after spreading. Warm butter, insufficient flour, or a recipe designed for thin cookies may contribute to the shape. Check the recipe and allow the cookies to cool before judging the texture.
10. Why do my cookies spread and become crispy?
Excessive spreading can create thinner cookies that bake more quickly. Too much sugar, an ingredient imbalance, or overbaking may also contribute to crispness. Check the dough proportions and remove the cookies when they reach the intended doneness.
11. Should I use parchment paper to prevent cookies from spreading?
Parchment paper can provide a reliable nonstick surface, but it does not automatically prevent spreading. Dough consistency, ingredient ratios, and oven temperature remain the most important factors.
12. Why do my cookies spread even after chilling?
Chilling is only one part of the process. If the recipe contains too much fat or sugar, too little flour, or an incorrect quantity of leavening, the cookies may still spread excessively. Also check whether the dough warmed up before baking.
13. Can I freeze cookie dough to stop spreading?
Freezing portioned dough can be useful for storage and may help control spreading when baking from a cold state. However, frozen dough may require a different baking time, and not every recipe behaves identically. Follow a tested freezing and baking method.
14. How much space should I leave between cookies?
For many standard drop cookies, approximately 5–7.5 cm (2–3 inches) is a useful starting point. Larger cookies may need more room. Follow the recipe’s instructions whenever available.
15. Why do my cookies look perfect in the recipe photo but spread at home?
Your oven temperature, flour measurement, butter condition, baking sheet, ingredient brands, and dough temperature may differ from those used to develop the recipe. Begin by weighing ingredients, checking the oven, and following the recipe’s method closely.
Final Thoughts
Homemade cookies that spread too much can be frustrating, but the problem is usually manageable. In most cases, the best place to start is by checking the butter temperature, measuring the flour accurately, chilling soft dough, using a cool baking sheet, and confirming that the oven is properly preheated.
Avoid making several ingredient changes at once. Bake a small test batch, observe the results, and adjust one factor at a time. This approach helps you identify the actual cause instead of relying on guesswork.
With accurate measurements, the right baking temperature, and a little practice, you can make cookies that hold their shape, develop golden edges, and deliver the soft or chewy texture you enjoy.