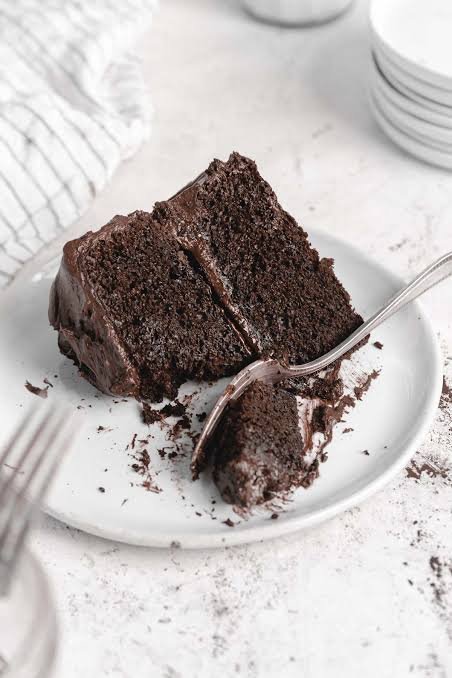

Making a delicious chocolate cake at home does not require an expensive oven, professional baking equipment, or costly ingredients. With a simple cooking pot, a stovetop, flour, sugar, cocoa powder, oil, milk, and a few other everyday ingredients, you can prepare a soft and chocolatey homemade cake for your family.
This budget-friendly homemade chocolate cake recipe without an oven is ideal for beginners, students, families, and anyone who wants to enjoy a homemade dessert without purchasing special equipment. The method uses a covered pot to create a gentle baking environment on the stovetop.
The recipe is flexible, so you can prepare a plain chocolate cake or add a simple homemade chocolate topping when you have extra ingredients available. You can also serve it without frosting, which keeps the recipe affordable while allowing the natural chocolate flavor to shine.
One of the most important parts of stovetop cake baking is controlling the heat. A pot placed directly over a strong flame can burn the bottom of the cake before the center cooks. Using a suitable heatproof stand, a heavy-bottomed pot, and low heat helps distribute the warmth more evenly.
In this complete guide, you will learn how to prepare the batter, choose suitable ingredients, cook the cake without an oven, avoid common mistakes, make inexpensive frosting, and store your homemade chocolate cake properly.
Recipe Overview
| Recipe detail | Information |
|---|---|
| Recipe name | Budget-Friendly Homemade Chocolate Cake Without an Oven |
| Preparation time | 15–20 minutes |
| Cooking time | Approximately 35–50 minutes |
| Cooling time | 30–45 minutes |
| Total time | Approximately 1 hour 20 minutes to 2 hours |
| Servings | 6–8 slices |
| Difficulty | Beginner-friendly |
| Cooking method | Stovetop pot baking |
| Main flavor | Chocolate |
| Special equipment | Heavy-bottomed pot with lid and heatproof stand |
Cooking times are estimates. The actual time depends on your pot, stove, cake tin, batter depth, and heat level.
Why You Will Love This Budget Chocolate Cake
1. No Oven Required
You can prepare this cake on a stovetop using a suitable covered pot. This is helpful for people who do not own an oven but still want to bake at home.
2. Uses Affordable Ingredients
The recipe relies on everyday ingredients such as flour, sugar, oil, milk, and cocoa powder. You do not need expensive chocolate bars or specialty baking products.
3. Easy for Beginners
The batter can be mixed by hand using a bowl and whisk. You do not need a stand mixer, electric beater, or advanced baking skills.
4. Suitable for Family Gatherings
A small chocolate cake is ideal for birthdays, weekend desserts, tea time, and simple family celebrations.
5. Easy to Customize
You can serve the cake plain, dust it with cocoa powder, or prepare a basic chocolate glaze with a few extra ingredients.
6. Flexible for Different Budgets
If you cannot afford frosting ingredients, the cake still tastes good on its own. You can also adjust the decoration according to the ingredients already available in your kitchen.
Ingredients for Homemade Chocolate Cake Without an Oven
The following ingredients make one small cake suitable for approximately 6–8 servings. A cake tin around 6 inches (15 cm) across is a useful starting point, provided it fits inside your pot with enough space around it.

1. All-purpose flour — 1 cup (approximately 125 g)
Flour gives the cake its structure. Measure it carefully so the cake does not become dense or dry.

2. Unsweetened cocoa powder — ¼ cup (approximately 20–25 g)
Cocoa powder gives the cake its chocolate flavor without requiring an expensive chocolate bar.

3. Sugar — ¾ cup (approximately 150 g)
Sugar adds sweetness and helps keep the cake moist. You can adjust it slightly according to your taste, although major changes may affect the texture.

4. Neutral cooking oil — ⅓ cup (approximately 80 ml)
Sunflower or another mild-flavored oil keeps the cake tender and is often convenient for budget baking.

5. Milk — ½ cup (120 ml)
Milk adds moisture and helps bring the batter together. You can use an appropriate unsweetened plant-based milk if needed.

6. Baking powder — 1 teaspoon
Baking powder helps the cake rise. Use a fresh product for reliable results.

7. Egg — 1 large
The egg helps bind the ingredients and supports the cake’s structure. For an egg-free version, see the substitution section below.

8. Vanilla extract — 1 teaspoon (optional)
Vanilla complements the cocoa and adds a pleasant aroma. The recipe can be made without it.

9. Salt — a small pinch
Salt balances the sweetness and enhances the chocolate flavor.
Optional Ingredients for a Simple Chocolate Topping
If you want to decorate the cake, keep these extra ingredients ready:
- 2 tablespoons cocoa powder.
- 3 tablespoons sugar.
- 3 tablespoons milk.
- 1 teaspoon cooking oil or butter, optional.
These ingredients make a simple stovetop chocolate sauce. You can skip the topping entirely to reduce the cost.
Equipment Needed to Bake a Cake on the Stovetop

Before preparing the batter, make sure you have suitable equipment.
- A heavy-bottomed pot with a well-fitting lid.
- A heatproof metal stand or trivet that fits inside the pot.
- A cake tin approximately 6 inches across.
- A mixing bowl.
- A whisk, fork, or hand mixer.
- Measuring cups and spoons.
- A sieve for the flour and cocoa powder.
- Baking paper or a small amount of oil for the cake tin.
- Oven mitts or suitable heat-resistant gloves.
- A toothpick or thin skewer for testing doneness.
Important safety note: The cake tin must sit securely on a heatproof stand and must not touch the bottom of the pot directly. Use cookware intended for stovetop cooking, keep the flame low, and follow the manufacturer’s instructions. Never seal a pot under pressure for this method, and do not use an empty pot in a way that exceeds its safe heating instructions.
Step-by-Step Instructions for Making Chocolate Cake Without an Oven
Step 1: Prepare the Pot and Cake Tin
Choose a heavy-bottomed pot large enough to accommodate the cake tin and its stand. The lid should close securely without touching the cake tin.
Place the heatproof stand inside the pot. Check that it is stable and does not wobble.
Prepare the cake tin by lightly greasing the base and sides with oil. If you have baking paper, line the base to make removing the cake easier.
Do not pour batter directly into the cooking pot. A separate cake tin makes the cake easier to remove and reduces the risk of burning.
Step 2: Prepare the Dry Ingredients
Measure the flour, cocoa powder, sugar, baking powder, and salt.
Sift the flour and cocoa powder into a mixing bowl if possible. Cocoa powder can form small lumps, and sifting helps distribute it evenly.
Add the sugar, baking powder, and salt. Mix the dry ingredients thoroughly with a whisk or spoon.
This step is important because unevenly distributed baking powder can cause the cake to rise inconsistently.
Step 3: Mix the Wet Ingredients
In a separate bowl, add the egg, milk, cooking oil, and vanilla extract.
Whisk until the ingredients are evenly combined. You do not need to beat the mixture until it becomes fluffy; the goal is simply to blend the wet ingredients.
If you are using an egg-free alternative, prepare it according to the instructions in the substitution section before mixing the wet ingredients.
Step 4: Combine the Wet and Dry Mixtures
Pour the wet mixture into the bowl of dry ingredients.
Stir gently with a whisk or spatula until a smooth batter forms. Scrape the sides and bottom of the bowl to ensure no dry flour remains.
Avoid prolonged mixing once the flour has been incorporated. Overmixing can make the cake tough rather than tender.
The batter should be pourable but not watery. If it appears unusually thick, check your measurements before adding a little extra milk.
Step 5: Pour the Batter into the Cake Tin
Pour the batter into the prepared cake tin.
Gently tap the tin on the counter once or twice to release large air bubbles. Do not bang it forcefully, because excessive movement can affect the batter.
The tin should not be filled too close to the rim. Leave enough room for the cake to rise.
Wipe any batter from the outside of the tin before placing it in the pot.
Step 6: Preheat the Pot Carefully
Cover the pot and warm it over low heat for several minutes, following your cookware’s instructions.
Do not use a high flame to speed up the process. Excessive heat can cause the bottom of the cake to burn before the center cooks.
The pot should provide a gentle, enclosed cooking environment rather than intense direct heat.
If your cookware manufacturer advises against preheating an empty pot, follow those instructions and use an appropriate alternative setup.
Step 7: Place the Cake Tin Inside the Pot

Using oven mitts, carefully place the cake tin on the heatproof stand inside the pot.
Ensure that the tin is stable and does not touch the bottom of the pot. Close the lid.
Cook over the lowest practical heat. The exact cooking time will depend on your stove, pot, cake tin, and batter depth.
For a small cake, begin checking after approximately 30–35 minutes, using caution when opening the lid. Many cakes take around 35–50 minutes in total.
Step 8: Keep the Heat Low and Steady
Stovetop baking requires patience. If the flame is too strong, the bottom of the cake can become dark while the center remains wet.
Keep the heat low and avoid repeatedly opening the lid. Every time you lift it, heat escapes and the cooking process may take longer.
If you notice a strong burning smell, turn off the heat and investigate carefully rather than continuing to cook.
Do not place water in the pot unless you are deliberately following a separate, tested steaming method designed for that purpose.
Step 9: Test Whether the Cake Is Ready
After the initial cooking period, carefully lift the lid away from your face to avoid steam burns.
Insert a clean toothpick or thin skewer into the center of the cake.
- If it comes out with wet batter, cover the pot and continue cooking.
- If it comes out clean or with a few moist crumbs, the cake is generally ready.
- If the top is still visibly liquid, give it additional time over low heat.
Avoid relying only on the cake’s color because cocoa powder makes it difficult to judge browning.
Step 10: Remove and Cool the Cake

Turn off the heat and carefully remove the cake tin using oven mitts.
Allow the cake to rest in its tin for approximately 10–15 minutes. Then loosen the edges with a suitable knife or spatula and turn the cake out onto a plate or cooling rack.
Let it cool completely before adding any frosting or chocolate sauce.
Cutting the cake while it is very hot can cause it to crumble or appear gummy in the center. Cooling gives the crumb time to set.
How to Make a Simple Chocolate Topping on a Budget
A homemade chocolate topping can make a basic cake feel like a special dessert. You do not need expensive chocolate bars or ready-made frosting.
Ingredients
- 2 tablespoons unsweetened cocoa powder.
- 3 tablespoons sugar.
- 3 tablespoons milk.
- 1 teaspoon cooking oil or butter, optional.
Instructions
- Add the cocoa powder and sugar to a small saucepan.
- Pour in the milk gradually while stirring to prevent lumps.
- Place the saucepan over low heat.
- Stir continuously until the sugar dissolves and the mixture becomes smooth.
- Cook gently for a few minutes until the sauce thickens slightly.
- Remove the saucepan from the heat and stir in the oil or butter if using.
- Allow the topping to cool until it is warm rather than hot.
- Pour it over the completely cooled cake and spread it gently with a spoon.
This topping is closer to a chocolate sauce or glaze than a thick buttercream frosting. It will remain softer than traditional frosting, so allow it to cool before serving.
For a thicker topping, you can use less milk and cook the mixture gently for a little longer. Avoid excessive heating because the sugar and cocoa can stick to the bottom of the pan.
How to Make Chocolate Cake Without an Oven and Without Eggs
If you do not eat eggs or have none available, you can adapt the recipe. Egg-free cakes require a little more care because the egg normally contributes structure and helps hold the cake together.
Ingredients for an Eggless Version
- 1 cup all-purpose flour, approximately 125 g.
- ¼ cup unsweetened cocoa powder.
- ¾ cup sugar.
- ½ teaspoon baking powder.
- ½ teaspoon baking soda.
- A pinch of salt.
- ½ cup milk or suitable plant-based milk.
- ⅓ cup neutral cooking oil.
- ½ cup plain yogurt.
- 1 teaspoon vanilla extract, optional.
The yogurt adds moisture and helps provide a tender crumb. If you use a thick yogurt, you may need a little additional milk to achieve a pourable batter.
Method
- Combine the flour, cocoa powder, sugar, baking powder, baking soda, and salt in a bowl.
- Mix the milk, oil, yogurt, and vanilla in another bowl.
- Add the wet mixture to the dry ingredients.
- Stir gently until the batter is smooth.
- Transfer the batter to a greased cake tin.
- Place the tin on a heatproof stand inside a suitable covered pot.
- Cook over low heat, checking after approximately 30–35 minutes.
- Test the center with a clean skewer and continue cooking if wet batter remains.
- Remove the cake carefully and let it cool before serving.
The eggless version uses baking soda together with yogurt to help the cake rise. Do not omit the baking soda without adjusting the recipe, as it plays a different role from baking powder.
The final texture may be slightly different from the egg-based version, but careful measuring and gentle cooking can produce a soft, enjoyable chocolate cake.
How to Make the Cake Without Milk
If you want to avoid dairy milk, use an unsweetened plant-based alternative or water.
Water is the simplest budget option, although the cake may have a less rich flavor.
For the standard recipe:
- Replace the ½ cup milk with ½ cup water.
- Keep the oil and other ingredients the same.
- Mix the batter as directed.
- Cook using the same low-heat stovetop method.
- Check doneness with a skewer rather than relying only on the cooking time.
For an eggless version, choose a plant-based milk or a tested water-based formulation that suits the recipe. The liquid balance and texture may need adjustment.
Always check ingredient labels if the cake is being prepared for someone with a dairy allergy.
Tips for Making Your Chocolate Cake Soft and Moist

A soft cake depends on the ingredient ratios, mixing method, cooking temperature, and cooling time. These practical tips can help you improve your results.
1. Measure the Flour Correctly
Too much flour is a common reason cakes turn out dry or dense.
If you are using measuring cups, spoon the flour into the cup and level it without packing it down. A kitchen scale provides more consistent measurements.
2. Do Not Add Too Much Cocoa Powder
Cocoa powder provides chocolate flavor but also absorbs moisture. Adding extra cocoa without adjusting the liquid can make the cake dry.
Use the specified quantity for the first attempt. If you want a stronger chocolate flavor, experiment in small increments on later batches.
3. Mix the Batter Gently
Once the flour is added, mix only until the ingredients are combined.
Excessive mixing can develop gluten and create a tougher cake. A few small bubbles or minor surface imperfections are not a reason to continue mixing for a long time.
4. Keep the Stovetop Heat Low
This is especially important when baking without an oven.
A strong flame heats the bottom of the pot too quickly. Low, steady heat gives the center more time to cook before the bottom becomes overdone.
A heavy-bottomed pot and a suitable heatproof stand can help reduce direct heat exposure.
5. Avoid Opening the Lid Repeatedly
Every time you open the pot, heat escapes. This may slow the cooking process and lead to uneven results.
Wait until the cake has cooked for a reasonable initial period before checking it.
6. Do Not Cut the Cake Too Early
A freshly cooked cake is delicate. Let it rest in the tin, remove it carefully, and allow it to cool before slicing.
Cooling helps the structure settle and makes the slices cleaner.
7. Use Fresh Leavening Ingredients
Old baking powder may lose effectiveness, which can result in a cake that rises poorly.
Store baking powder in a dry, tightly closed container and follow the package’s storage guidance.
8. Prepare the Cake Tin Properly
Grease the tin lightly and line the base with baking paper if available.
A properly prepared tin makes it easier to remove the cake without breaking it.
Common Mistakes to Avoid When Baking Without an Oven
Mistake 1: Using High Heat
A high flame may burn the bottom while leaving the center undercooked.
Solution: Use low heat and a heatproof stand. Give the cake enough time to cook through.
Mistake 2: Placing the Tin Directly on the Pot’s Bottom
Direct contact with the hottest surface can lead to scorching.
Solution: Use a stable metal trivet or another suitable heatproof stand designed for the cookware.
Mistake 3: Using a Pot That Is Too Small
A small pot may not leave enough room for the cake tin, heat circulation, or safe handling.
Solution: Choose a pot large enough to hold the tin securely with adequate clearance. Never force the lid closed against the tin.
Mistake 4: Making the Batter Too Thick
Too much flour or too little liquid can produce a dense cake.
Solution: Measure accurately and check that the batter is pourable. Make small adjustments rather than adding large quantities of milk.
Mistake 5: Adding Extra Sugar Without Adjusting the Recipe
Excess sugar may change the cake’s structure and cooking behavior.
Solution: Follow the measurements first. Adjust sweetness modestly after testing the original recipe.
Mistake 6: Removing the Cake Too Soon
A cake may look cooked on top while the center is still wet.
Solution: Test the center with a clean skewer. Continue cooking if wet batter remains.
Mistake 7: Leaving the Cake in the Pot for Too Long After Cooking
The remaining heat can continue cooking the bottom of the cake.
Solution: Once the cake is done, turn off the heat and carefully remove the tin.
Mistake 8: Frosting a Warm Cake
Warm cake can melt the topping and make it slide off.
Solution: Let the cake cool completely before decorating.
How to Store Homemade Chocolate Cake
Proper storage helps maintain the cake’s moisture and quality.
At Room Temperature
If the cake is plain and your kitchen is cool, it may be suitable for short-term room-temperature storage in a clean, airtight container.
However, warm or humid conditions can accelerate spoilage. In hot weather, refrigeration is generally the safer choice.
In the Refrigerator
Store the cooled cake in an airtight container to prevent it from drying out or absorbing odors from other foods.
For best quality, aim to consume it within approximately 3–4 days. Cakes containing dairy-based frosting or other perishable toppings should be refrigerated promptly.
In the Freezer
You can freeze portions of plain chocolate cake for longer storage.
- Allow the cake to cool completely.
- Cut it into individual portions.
- Wrap the portions securely or place them in a freezer-safe container.
- Label the container with the date.
- Freeze for best quality for approximately two to three months.
Thaw the cake in the refrigerator or according to a suitable food-safety method. Keep it protected from excess moisture during thawing.
Discard cake that develops mold, unusual odors, or other signs of spoilage. Do not rely on smell alone to determine whether improperly stored food is safe.
How to Make This Recipe More Affordable
A homemade chocolate cake can be economical when you use ingredients carefully and avoid unnecessary decorations.
Choose a small cake size. A 6-inch cake provides several slices without requiring a large quantity of ingredients.
Use cocoa powder instead of chocolate bars. Unsweetened cocoa powder can provide a strong chocolate flavor without the cost of a large amount of chocolate.
Skip expensive frosting. The cake can be served plain, with a light dusting of cocoa powder, or with a small quantity of homemade chocolate sauce.
Use ingredients already available. If you already have flour, sugar, oil, and baking powder, you may only need to purchase cocoa powder or milk.
Measure carefully. Accurate measurements help avoid wasted ingredients and failed batches.
Compare the full cost. Include the cost of ingredients, cooking fuel, and any optional toppings when estimating your cost per slice.
Actual savings depend on local prices, your equipment, and how many servings you make.
Serving Ideas for Homemade Chocolate Cake
A simple chocolate cake can be served in several ways without increasing the cost significantly.
Serve It Plain
Allow the cake to cool and cut it into slices. Plain chocolate cake is convenient for everyday desserts and tea time.
Add Homemade Chocolate Sauce
Use the inexpensive cocoa, sugar, and milk topping described above. Pour it over the cake shortly before serving.
Serve with Fresh Fruit
A few slices of banana or strawberries can complement the chocolate flavor. Fruit is optional and should be chosen according to your budget and availability.
Pair with Tea or Coffee
Chocolate cake works well as an afternoon snack with tea, coffee, or milk.
Make Simple Birthday Cake Slices
For a basic celebration, spread a thin layer of homemade chocolate sauce over the cake and add a small amount of suitable decoration.
You do not need professional piping equipment to make a homemade cake look appealing.
Frequently Asked Questions
1. Can I make chocolate cake without an oven?
Yes. A suitable heavy-bottomed pot with a lid and a heatproof stand can provide a stovetop baking environment. Use low heat and check the cake’s center for doneness.
2. How long does chocolate cake take to cook without an oven?
A small cake may take approximately 35–50 minutes, but the exact time varies with the pot, flame, cake tin, and batter depth.
3. Why is the bottom of my cake burning?
The heat may be too high, or the cake tin may be too close to the bottom of the pot. Use a suitable stand and reduce the heat.
4. Can I make this cake without eggs?
Yes. Use the eggless variation with yogurt, baking powder, and baking soda. Its texture may differ slightly from the standard version.
5. Can I make chocolate cake without milk?
Yes. Water or an appropriate plant-based milk can replace dairy milk. Water may produce a less rich flavor.
6. Can I use drinking chocolate instead of cocoa powder?
Drinking chocolate often contains sugar and other ingredients, so it is not a direct substitute for unsweetened cocoa powder. If you use it, the sweetness and chocolate flavor will change.
7. Why is my cake dense?
Possible reasons include too much flour, overmixing, old baking powder, or an incorrect balance of wet and dry ingredients.
8. How can I tell whether the cake is cooked in the center?
Insert a clean toothpick or thin skewer into the center. If it comes out without wet batter, the cake is generally ready.
9. Can I make frosting without butter?
Yes. A simple cocoa, sugar, and milk sauce can be prepared without butter. It will be softer and thinner than traditional buttercream.
10. Can I reduce the sugar?
You can try a modest reduction, but sugar affects moisture and structure as well as sweetness. Make small changes and check the final texture.
11. Can I use whole-wheat flour?
Yes, but the cake may be denser and have a stronger wheat flavor. You may need to adjust the liquid slightly.
12. What size cake tin should I use?
A 6-inch tin is a useful starting point for this recipe. Make sure it fits inside your pot with sufficient clearance and that the batter does not fill the tin too close to the rim.
13. Can I bake this cake in a pressure cooker?
Only use a pressure cooker according to its manufacturer’s specific instructions for baking. Never seal it under pressure for the stovetop pot method described here.
14. How should I store leftover chocolate cake?
Store it in a clean, airtight container. Refrigerate it when conditions are warm or when the cake contains perishable toppings.
15. Is homemade chocolate cake healthier than store-bought cake?
Not automatically. Homemade cake gives you more control over ingredients and portion sizes, but it can still contain considerable sugar and fat.
Conclusion
Budget-friendly homemade chocolate cake without an oven is a practical dessert for anyone who wants to bake with simple ingredients and basic kitchen equipment. With flour, cocoa powder, sugar, oil, milk, and the right leavening ingredients, you can prepare a chocolate cake without purchasing an oven or expensive baking products.
The most important part of stovetop baking is using a suitable pot, keeping the heat low, and giving the cake enough time to cook through. Accurate measurements and gentle mixing also help create a soft texture.
You can serve the cake plain, add a simple homemade chocolate topping, or adapt the recipe to avoid eggs or dairy milk. Once you become comfortable with the basic method, you can experiment with different flavors and decorations while keeping your baking costs under control.