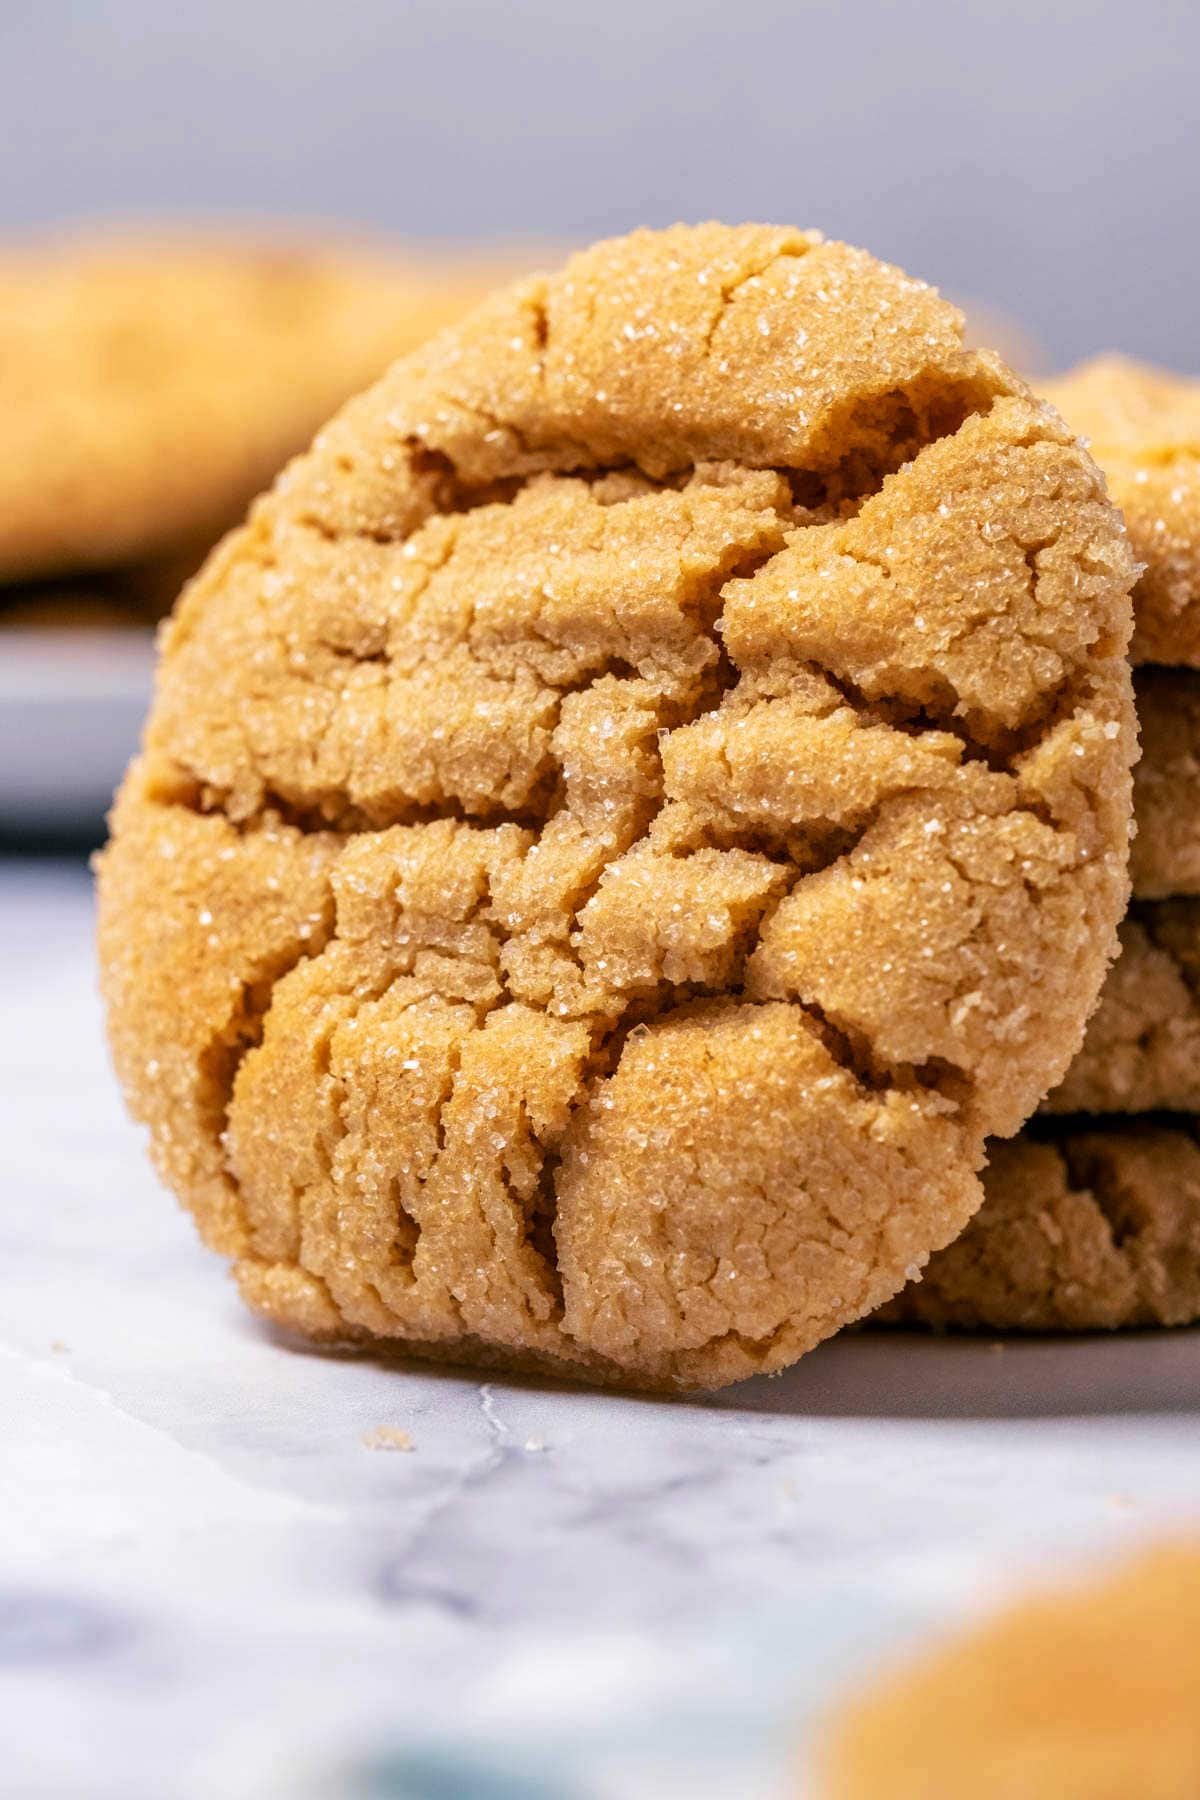

Peanut butter cookies are a delicious homemade treat with a rich nutty flavor, a slightly crisp outside, and a soft, tender center. They are perfect for afternoon snacks, lunchboxes, family gatherings, and anyone who loves the taste of roasted peanuts. The best part is that you can make them without an electric mixer or expensive baking equipment.
This easy peanut butter cookies recipe without a mixer uses simple ingredients and straightforward instructions. You can mix everything by hand with a bowl, a spoon, and a fork. Whether you are a beginner baker, a student living away from home, or someone who wants to prepare a quick homemade dessert, this recipe is an excellent place to start.
Many people assume that making cookies requires a stand mixer or electric beater. However, peanut butter already contains fat that helps create a rich cookie texture, and softened butter can be combined with sugar using an ordinary spoon. With the right ingredient measurements and baking time, you can prepare delicious cookies using basic kitchen tools.
In this complete guide, you will learn how to make peanut butter cookies from scratch, which ingredients work best, how to mix the dough by hand, how to achieve the classic fork pattern, and how to avoid common baking mistakes. You will also find storage instructions, ingredient substitutions, recipe variations, serving suggestions, and frequently asked questions.
Quick Recipe Overview
- Recipe name: Easy Peanut Butter Cookies Without a Mixer
- Preparation time: 15 minutes
- Baking time: 9–12 minutes per batch
- Total time: Approximately 30–40 minutes
- Difficulty: Easy
- Yield: Approximately 18–22 cookies
- Equipment: Mixing bowl, spoon, fork, baking tray, and measuring tools
- Main flavor: Rich peanut butter
- Texture: Lightly crisp edges with soft centers
- Best for: Snacks, tea time, lunchboxes, parties, and homemade gifts
These cookies are convenient because you do not need to spend time setting up or cleaning an electric mixer. You can prepare the dough, shape the cookies, and bake them with minimal equipment.
Why You Will Love This Peanut Butter Cookie Recipe
1. No Electric Mixer Required
You can prepare the entire recipe by hand. A wooden spoon or sturdy spatula is enough to combine the softened butter, sugar, peanut butter, and egg.
This makes the recipe especially useful if you do not own a mixer or prefer a simple baking method.
2. Simple Everyday Ingredients
Most ingredients are common baking staples. Peanut butter provides the main flavor, while flour, sugar, butter, and an egg help create the structure and texture.
You do not need specialty ingredients to make a satisfying batch of cookies.
3. Rich Peanut Flavor
Peanut butter gives these cookies their distinctive nutty taste. It also contributes fat and helps create a tender texture.
For a classic flavor, use creamy peanut butter. If you enjoy more texture, you can use a crunchy variety.
4. Easy to Shape
The dough can be rolled into small balls and pressed with a fork to create the traditional crisscross design.
This step is simple enough for beginner bakers and can also be a fun activity for children when an adult supervises the baking.
5. Suitable for Different Occasions
Peanut butter cookies work well as an everyday snack, an addition to a dessert platter, or a homemade gift.
You can also customize them with chocolate chips, cinnamon, or a light chocolate coating.
Ingredients for Easy Peanut Butter Cookies Without a Mixer
The following recipe makes approximately 18–22 medium-sized cookies, depending on the size of each dough portion.
| Ingredient | Amount | Purpose |
|---|---|---|
| Creamy peanut butter | ½ cup (about 125 g) | Provides peanut flavor and richness |
| Unsalted butter | ¼ cup (57 g), softened | Adds tenderness and improves texture |
| Granulated sugar | ½ cup (100 g) | Adds sweetness and helps with browning |
| Brown sugar | ¼ cup (50 g) | Adds moisture and a deeper flavor |
| Large egg | 1 | Binds the ingredients |
| All-purpose flour | 1¼ cups (about 155–160 g) | Provides structure |
| Baking soda | ½ teaspoon | Helps the cookies spread and brown |
| Vanilla extract | 1 teaspoon | Enhances the flavor |
| Salt | ¼ teaspoon, optional | Balances sweetness |
Although this recipe has several ingredients, each has a specific purpose. The absence of an electric mixer does not require you to change the ingredients.
Choosing the Right Peanut Butter
Creamy peanut butter is generally the easiest option for a smooth, evenly mixed dough.
Conventional commercial peanut butter often produces predictable results because its consistency is relatively uniform. Natural peanut butter can also work, but the oil separation and variation in texture may affect the dough.
If you use natural peanut butter, stir it thoroughly before measuring. Avoid using peanut butter with a large pool of separated oil on top.
Crunchy peanut butter is another option. It adds small peanut pieces and creates a more textured cookie.
Why Use Both White and Brown Sugar?
Granulated sugar contributes sweetness and helps the cookies develop lightly crisp edges.
Brown sugar contains molasses, which contributes moisture and a deeper caramel-like flavor. Using both creates a balanced cookie with a tender center.
If you do not have brown sugar, you can use granulated sugar instead, although the flavor and texture may be slightly different.
Why Is an Egg Important?
The egg helps bind the ingredients and contributes moisture and structure.
Use a large egg for the quantities listed. If the egg is unusually small or large, the dough consistency may change.
Can You Use Salted Butter?
Yes. If you use salted butter, omit the additional salt or reduce it according to your taste.
Peanut butter itself may also contain salt, so the best adjustment depends on the brand you use.
Equipment Needed
You do not need specialized equipment for this recipe.
- One large mixing bowl.
- One wooden spoon or sturdy spatula.
- One fork for making the crisscross pattern.
- Measuring cups and spoons or a kitchen scale.
- One baking tray.
- Baking parchment paper.
- A spoon or cookie scoop.
- A cooling rack, if available.
A whisk can help combine the dry ingredients, but it is optional. You can also use a second bowl and an ordinary spoon.
Step-by-Step Instructions for Peanut Butter Cookies Without a Mixer
Follow these instructions to create cookies with a balanced peanut flavor and a tender texture.
Step 1: Preheat the Oven
Preheat your oven to 350°F (175°C).
Allow it to reach the correct temperature before baking. An oven that is not fully preheated can affect the way cookies spread and brown.
Line a baking tray with parchment paper to prevent sticking and make cleanup easier.
If you do not have parchment paper, use a clean baking tray suitable for cookies. Lightly grease it only if needed.
Step 2: Combine the Dry Ingredients
In a medium bowl, combine:
- 1¼ cups all-purpose flour
- ½ teaspoon baking soda
- ¼ teaspoon salt, if using
Stir with a spoon or whisk until the ingredients are evenly distributed.
Set the bowl aside while you prepare the wet ingredients.
Mixing the dry ingredients separately helps prevent concentrated pockets of baking soda in the finished cookies.
Step 3: Soften the Butter
Place ¼ cup of unsalted butter in a large mixing bowl.
The butter should be soft enough to press with a spoon but not melted or oily.
If it is too cold, cut it into small pieces and let it stand at room temperature until softened.
Do not melt the butter completely, because liquid butter may cause the cookies to spread more than expected.
Step 4: Mix the Butter and Sugars by Hand
Add ½ cup granulated sugar and ¼ cup brown sugar to the softened butter.
Use a wooden spoon to press and stir the mixture until it looks creamy and well combined.
This may take approximately 2–4 minutes, depending on the softness of the butter and the strength of your spoon.
Scrape the sides of the bowl occasionally to incorporate the ingredients evenly.
The mixture does not need to become as fluffy as it would with an electric mixer. The important thing is to distribute the butter and sugar throughout the mixture.
Step 5: Add the Peanut Butter
Add ½ cup of peanut butter to the bowl.
Stir until it is thoroughly combined with the butter and sugar mixture.
At first, the mixture may look thick and sticky. Continue pressing and folding it with the spoon until the peanut butter is evenly distributed.
If you are using crunchy peanut butter, the small peanut pieces will remain visible. This is normal and adds texture to the finished cookies.
Step 6: Add the Egg and Vanilla
Add one large egg and 1 teaspoon of vanilla extract.
Mix with the spoon until the egg is incorporated and the mixture looks uniform.
Scrape the sides and bottom of the bowl to make sure no pockets of egg remain.
Do not add extra milk or water at this stage. The egg and peanut butter provide moisture for the dough.
Step 7: Add the Dry Ingredients
Gradually add the flour mixture to the wet ingredients.
Stir gently after each addition until a soft cookie dough forms.
Stop mixing when no visible patches of dry flour remain. Excessive mixing after adding the flour may make the cookies tougher.
The dough should be firm enough to shape into balls. If it feels a little sticky, let it stand for a few minutes before shaping.
If it is extremely soft, check whether the butter was too warm or whether the ingredients were measured accurately.
Step 8: Shape the Cookie Dough
Scoop approximately 1 tablespoon of dough for each cookie.
Roll each portion gently between your palms to form a ball.
Arrange the balls on the prepared baking tray, leaving approximately 2 inches (5 cm) between them to allow for spreading.
Try to make the portions similar in size. This helps all the cookies bake at approximately the same rate.
Step 9: Create the Classic Fork Pattern
Take a clean fork and gently press down on each dough ball.
Rotate the fork approximately 90 degrees and press again to create a crisscross pattern.
Do not press so hard that the dough becomes paper-thin. The goal is to flatten the ball slightly while creating the familiar decorative design.
Peanut butter dough can be thicker than ordinary sugar cookie dough, so this step also helps the cookies bake more evenly.
Step 10: Bake the Cookies
Place the tray on the center rack of the preheated oven.
Bake for approximately 9–12 minutes.
Begin checking the cookies around the 9-minute mark. The edges should look set, while the centers may remain slightly soft.
The cookies should not have wet-looking raw dough in the middle, but they also do not need to become completely firm inside the oven.
Remember that they will continue to set as they cool.
If your cookies are unusually large or thick, they may require additional baking time.
Step 11: Cool the Cookies
Remove the baking tray from the oven and place it on a heat-resistant surface.
Allow the cookies to rest on the tray for approximately 5–10 minutes.
They may feel soft immediately after baking, so avoid lifting them too soon.
Once they have firmed up, transfer them to a cooling rack or cool plate.
Step 12: Serve and Enjoy
Allow the cookies to cool enough to handle comfortably.
Serve them with milk, tea, coffee, or hot chocolate. Their rich peanut flavor also pairs well with sliced bananas and other simple snacks.
For a special dessert, serve one or two cookies alongside vanilla ice cream.
How to Make Peanut Butter Cookies Soft and Chewy
The texture of homemade peanut butter cookies depends on ingredient proportions, mixing technique, and baking time.
Use the Right Peanut Butter
A consistent, creamy peanut butter usually produces predictable results.
If you use natural peanut butter, mix it thoroughly so that the oil and solids are evenly distributed before measuring.
Avoid Adding Too Much Flour
Excess flour can make the cookies dry, dense, or crumbly.
Weighing the flour is the most reliable approach. If you use measuring cups, spoon the flour into the cup and level it off without packing it down.
Use Brown Sugar for Extra Tenderness
Brown sugar helps retain moisture and gives the cookies a deeper flavor.
The combination of white and brown sugar in this recipe creates a balance between sweetness, tenderness, and lightly crisp edges.
Do Not Overmix the Dough
Once the flour is added, stir only until the dough comes together.
Excessive mixing can develop gluten and make the cookies less tender.
Avoid Overbaking
Overbaking is a common reason peanut butter cookies turn out hard.
Remove them when the edges are set and the centers still look slightly soft. Allowing them to rest on the tray helps them finish setting.
Keep the Cookie Sizes Consistent
Uniform dough portions help the entire batch bake evenly.
If some cookies are much smaller than others, the smaller ones may dry out before the larger ones are done.
Common Mistakes to Avoid
Even a simple recipe can produce disappointing results if a few details are overlooked.
| Mistake | Why it happens | How to fix it |
|---|---|---|
| Cookies spread too much | Butter was too warm or peanut butter was unusually oily | Use softened butter and thoroughly mixed peanut butter |
| Cookies are dry | Too much flour or excessive baking | Measure flour accurately and check early |
| Cookies are hard | Overbaking or excessive mixing | Remove them when the edges are set |
| Dough is too sticky | Ingredients are too warm or proportions are inaccurate | Let the dough stand briefly and check measurements |
| Cookies fall apart | They were moved while hot or the dough was too dry | Let them cool on the tray and check flour quantity |
| Fork marks disappear | The dough was pressed too lightly or spread excessively | Press the dough balls more clearly before baking |
| Cookies brown too quickly underneath | Dark tray or excessive bottom heat | Use a lighter tray and check the oven temperature |
Easy Variations of Peanut Butter Cookies
Once you understand the basic recipe, you can experiment with additional ingredients to create new flavors.
1. Chocolate Chip Peanut Butter Cookies
Add approximately ½ cup of chocolate chips to the dough after combining the flour.
Milk chocolate produces a sweeter result, while dark chocolate provides a stronger contrast with the peanut butter.
Mini chocolate chips work particularly well because they distribute evenly throughout small cookies.
2. Peanut Butter and Banana Cookies
Mash a small amount of ripe banana and incorporate it into a recipe specifically adjusted for the additional moisture.
Because banana can significantly soften cookie dough, avoid simply adding a large quantity to this recipe without changing the flour and other ingredients.
The flavor combination is excellent, especially for people who enjoy peanut butter and banana sandwiches.
3. Chocolate-Dipped Peanut Butter Cookies
Bake the cookies according to the recipe and let them cool completely.
Dip half of each cookie into melted chocolate, then place it on parchment paper until the chocolate sets.
This variation is suitable for parties, dessert platters, and homemade gifts.
4. Cinnamon Peanut Butter Cookies
Add approximately ½ teaspoon of ground cinnamon to the dry ingredients.
Cinnamon adds warmth and complements the roasted peanut flavor.
Start with a small quantity so that it does not overpower the peanut butter.
5. Crunchy Peanut Butter Cookies
Replace the creamy peanut butter with crunchy peanut butter.
The peanut pieces add texture and make the cookies feel more substantial.
Make sure the peanut butter is thoroughly stirred before measuring, especially if it is a natural variety.
6. Peanut Butter Sandwich Cookies
Bake the cookies and allow them to cool completely.
Spread a thin layer of chocolate spread or peanut butter between two cookies and press them together gently.
If you use a perishable filling, follow its storage requirements.
7. Peanut Butter and Oat Cookies
Add a modest quantity of rolled oats to a tested variation of the dough.
Oats absorb moisture and alter the cookie structure, so the dough may need adjustment. The result can be a more textured cookie with a slightly heartier bite.
8. Peanut Butter Cookies With Sea Salt
Sprinkle a very small amount of flaky salt over the dough balls before baking.
The salt contrasts with the sweetness and can make the peanut flavor more pronounced.
Use this variation carefully if the peanut butter is already salty.
Ingredient Substitutions and Alternatives
If you are missing an ingredient, some substitutions may work, but they can affect the finished texture.
| Original ingredient | Possible alternative | Expected difference |
|---|---|---|
| Creamy peanut butter | Crunchy peanut butter | More texture and peanut pieces |
| Brown sugar | Additional granulated sugar | Less molasses flavor and potentially a different texture |
| Unsalted butter | Salted butter | Similar texture; adjust the added salt |
| Vanilla extract | A small amount of almond extract | Different flavor profile |
| All-purpose flour | One-to-one gluten-free baking blend | Texture may become more delicate |
Can You Use Natural Peanut Butter?
Yes, but natural peanut butter can behave differently because its oil may separate.
Stir it thoroughly before measuring. If the peanut butter is exceptionally runny, the dough may become softer and the cookies may spread more.
Can You Make These Cookies Without Brown Sugar?
Yes. Replace the brown sugar with an equal weight of granulated sugar.
The cookies will still work, but they may have a slightly different flavor and texture.
Can You Make Peanut Butter Cookies Without Eggs?
An egg substitute may work, but the result depends on the product and the recipe’s moisture balance.
For reliable egg-free cookies, use a recipe specifically developed without eggs rather than assuming that any replacement will behave identically.
Can You Make Them Gluten-Free?
A one-to-one gluten-free flour blend intended for baking is a reasonable starting point.
Different blends absorb moisture differently, so the dough may require adjustments. If baking for someone with celiac disease, check ingredient labels and prevent cross-contact with gluten.
How to Store Homemade Peanut Butter Cookies
Correct storage helps the cookies retain their flavor and texture.
Room-Temperature Storage
Allow the cookies to cool completely before placing them in an airtight container.
Store the container in a cool, dry place away from direct sunlight. For the best quality, aim to eat them within approximately 4–7 days.
Warm or humid environments may shorten the period during which they retain their best texture.
Refrigerating Peanut Butter Cookies
Plain peanut butter cookies generally do not need refrigeration.
Refrigeration can make them firmer, and repeated temperature changes may affect their texture.
If the cookies contain a perishable filling or topping, follow the food-safety guidance for that ingredient.
Freezing Baked Cookies
You can freeze baked cookies for future use.
- Cool the cookies completely.
- Place them in a freezer-safe airtight container.
- Separate layers with parchment paper.
- Seal the container and label it with the date.
- Freeze for approximately 2–3 months for good quality.
To serve, thaw the cookies at room temperature in their covered container.
Freezing the Cookie Dough
Shape the dough into balls and place them on a tray in the freezer until firm.
Transfer the frozen portions to a sealed freezer-safe bag or container.
When ready to bake, place the portions on a baking tray and follow the original baking temperature. Frozen dough may need additional time, so check the cookies carefully.
Serving Ideas for Peanut Butter Cookies
Peanut butter cookies can be enjoyed in several simple ways.
With milk: Serve a couple of cookies with a glass of cold milk for a classic snack.
With tea or coffee: Their rich, nutty flavor pairs well with black tea, coffee, and cappuccino.
With ice cream: Add a cookie or two beside vanilla or chocolate ice cream for a simple dessert.
As a homemade gift: Pack completely cooled cookies in a food-safe tin or box lined with parchment paper.
On a dessert platter: Combine them with brownies, chocolate pieces, fresh fruit, or other homemade cookies.
As a lunchbox treat: Pack a cookie in a suitable container, keeping in mind any school or household rules about peanut allergies.
Peanut Butter Allergy and Food Safety
Peanut butter is the defining ingredient in this recipe, but peanuts are a major food allergen.
Never serve these cookies to someone with a peanut allergy unless they have confirmed that the ingredients and preparation are safe for their situation. Simply removing visible peanuts is not sufficient.
If you are preparing cookies for school, a shared workplace, or a gathering, ask about allergy requirements in advance. Use clean equipment and avoid cross-contact with other foods.
Raw cookie dough should not be eaten because it contains uncooked flour and egg. Bake the cookies thoroughly before serving.
Nutrition Information
The following figures are estimates, not laboratory-tested values. Actual nutrition will depend on your peanut butter brand, cookie size, and ingredient measurements.
| Nutrient | Approximate amount per cookie |
|---|---|
| Calories | 110–140 |
| Carbohydrates | 12–16 g |
| Fat | 6–8 g |
| Protein | 2–3 g |
| Sugar | 7–10 g |
Estimate assumes approximately 20 medium cookies from the listed ingredients.
These cookies are a dessert or snack rather than a complete meal. Enjoy them in portions that suit your dietary needs.
Frequently Asked Questions
1. Can I make peanut butter cookies without an electric mixer?
Yes. A wooden spoon or sturdy spatula is enough. Use softened butter and mix the ingredients thoroughly by hand before adding the flour.
2. Why are my peanut butter cookies dry?
Too much flour or excessive baking is a common cause. Measure flour accurately, mix the dough gently, and check the cookies early.
3. Do I have to use brown sugar?
No. You can use granulated sugar instead, although the flavor and texture may be slightly different.
4. Why do peanut butter cookies have fork marks?
The fork pattern is traditional and decorative, but it also flattens the dough so the cookies bake more evenly.
5. How long should I bake peanut butter cookies?
Bake at 350°F (175°C) for approximately 9–12 minutes. Cookie size, dough temperature, and oven performance affect the final timing.
6. How do I know when peanut butter cookies are ready?
Look for set edges and centers that are no longer wet-looking. They may still feel soft when removed from the oven, but they will firm up as they cool.
7. Can I use crunchy peanut butter?
Yes. Crunchy peanut butter creates a more textured cookie with small pieces of peanut throughout.
8. Can I make the dough ahead of time?
Yes. Store the covered dough in the refrigerator if preparing it in advance. It will become firmer, so allow it to soften enough to shape comfortably before baking.
9. Can I freeze peanut butter cookies?
Yes. Baked cookies can be frozen in an airtight freezer-safe container for approximately 2–3 months for good quality.
10. Can I make these cookies without vanilla extract?
Yes. The vanilla enhances the flavor but is not essential for the dough to work.
11. Why did my cookies spread too much?
Possible causes include very warm butter, oily peanut butter, inaccurate measurements, or a baking tray that was still hot from a previous batch.
12. Are peanut butter cookies suitable for children?
They can be enjoyed by children who can safely eat peanuts. Always consider allergy risks, supervise young children in the kitchen, and keep hot trays and ovens away from them.
13. Can I use a different flour?
A suitable one-to-one gluten-free baking blend may work, although the texture can change. Other flours, such as coconut or almond flour, behave differently and should not be substituted in equal amounts without adapting the recipe.
14. Can I make the cookies less sweet?
You can experiment with a modest reduction in sugar, but sugar affects the texture and spread of cookies as well as their sweetness.
15. What is the best way to keep peanut butter cookies soft?
Let them cool completely and store them in an airtight container in a cool, dry place. Avoid leaving them exposed to air for long periods.
Final Thoughts
This easy peanut butter cookies recipe without a mixer proves that delicious homemade baking does not require expensive equipment or complicated techniques. With peanut butter, butter, sugar, flour, an egg, and a few supporting ingredients, you can create cookies with a rich nutty flavor and tender centers.
The most important steps are using properly softened butter, measuring the flour accurately, mixing the dough gently, shaping evenly sized portions, and avoiding overbaking.
Once you master the basic recipe, try chocolate chips, cinnamon, crunchy peanut butter, or a chocolate coating to create your own variations.
Make a batch of these easy homemade peanut butter cookies whenever you want a simple, satisfying treat that can be prepared entirely by hand.