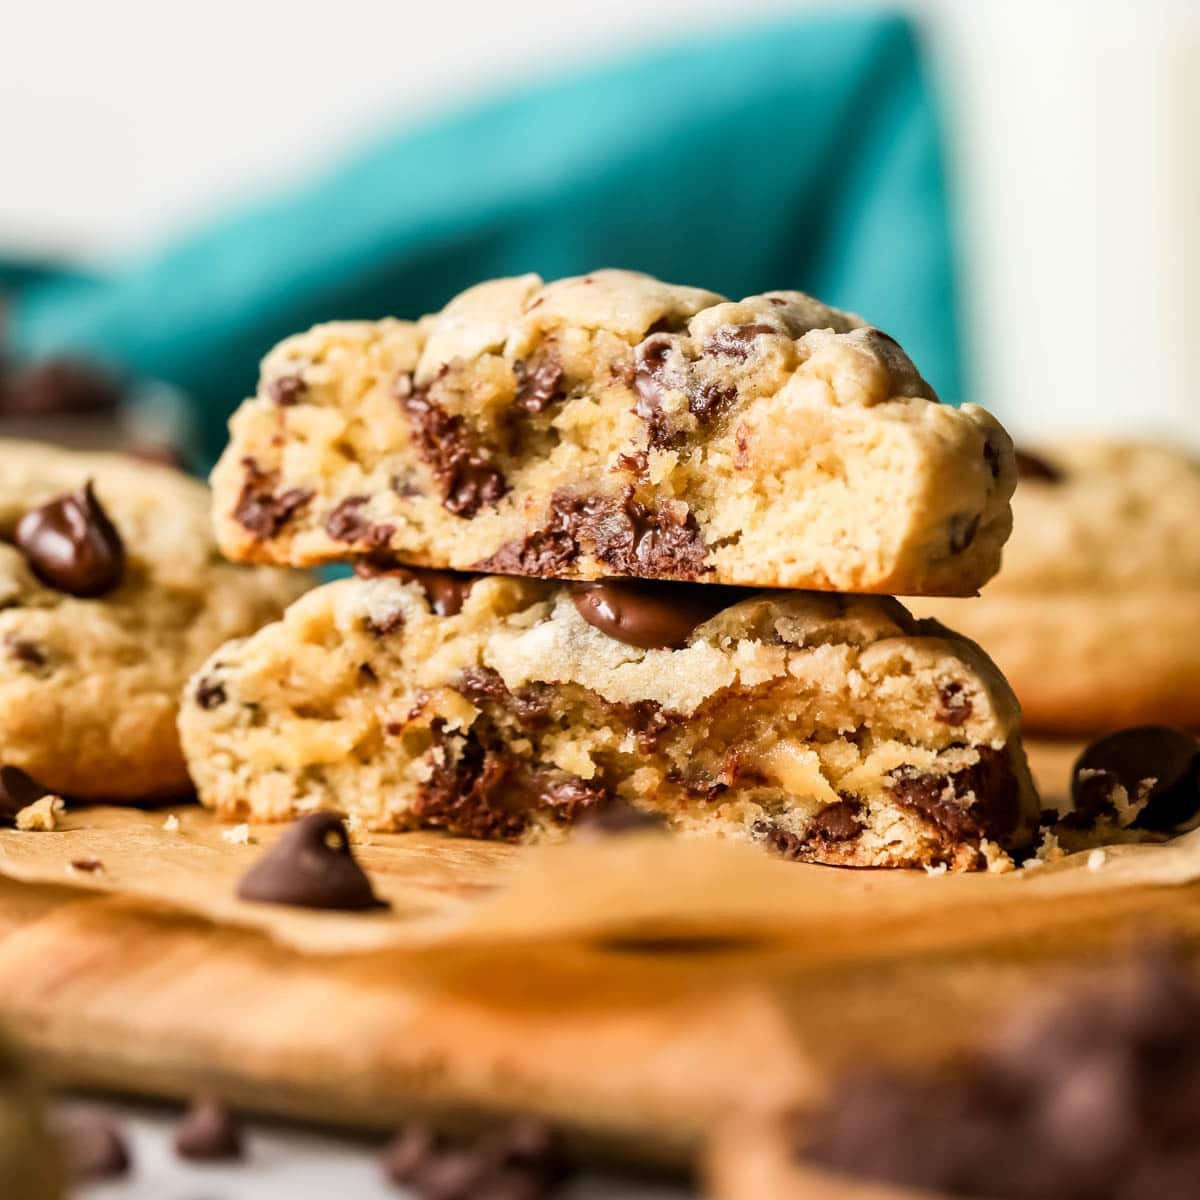
Thick and chewy chocolate chip cookies are famous for their rich buttery flavor, golden edges, soft centers, and generous amounts of melted chocolate. Unlike thin and crispy cookies, bakery-style chocolate chip cookies have a satisfying bite, a slightly gooey middle, and a beautiful appearance that makes them look as if they came straight from an American bakery.
The good news is that you can recreate this style at home with ordinary baking ingredients. You do not need professional bakery equipment or expensive ingredients. The most important factors are the correct balance of butter, flour, brown sugar, and white sugar, along with proper dough chilling and careful baking.
This recipe is designed for people who want thick, chewy cookies that hold their shape instead of spreading into thin discs. It explains every step, from choosing ingredients to troubleshooting common problems, so you can make consistent cookies even if you are new to baking.
Whether you are preparing cookies for your family, a celebration, a homemade dessert business, or simply a weekend treat, this guide will help you understand how to achieve that classic American bakery-style texture.
What Makes American Bakery-Style Cookies Different?
American bakery-style chocolate chip cookies are often larger and thicker than ordinary homemade cookies. They usually have golden edges, soft centers, visible chocolate chunks, and a rich buttery taste.
Several factors contribute to their distinctive texture.
Thick Shape
Bakery-style cookies are generally made with larger portions of dough. The dough is often chilled before baking, which helps the cookies maintain their shape as the butter melts.
The dough portions may also be shaped taller rather than flattened into thin discs.
Soft and Chewy Centers
Brown sugar is an important ingredient in chewy cookies because its molasses content contributes moisture and flavor. The ratio of brown sugar to white sugar influences the final texture.
Careful baking is equally important. Cookies removed when the edges are set but the centers remain soft will usually become chewy as they cool.
Golden Edges
The combination of sugar, butter, and oven heat helps the edges brown. White sugar contributes to spreading and crispness, while brown sugar adds moisture and a deeper flavor.
The goal is to bake the edges until they are lightly golden without drying out the middle.
Generous Chocolate Pieces
Many bakery-style cookies contain both chocolate chips and larger chocolate chunks. These create a mixture of small chocolate pieces and larger melted pockets.
You can use semi-sweet chocolate chips, dark chocolate, milk chocolate, or a combination to achieve your preferred flavor.
Rich Buttery Flavor
Butter gives cookies their familiar aroma and richness. Using the right amount is essential because too much butter can cause excessive spreading, while too little may produce a dry or crumbly cookie.
For this recipe, softened butter is combined with the sugars before the flour is added.
Thick and Chewy Chocolate Chip Cookies Recipe Overview

Preparation time
20 minutes
Chilling time
At least 1 hour; overnight for convenience
Baking time
12–16 minutes per batch, depending on size
Yield
About 12 large cookies or 16 medium cookies
Difficulty
Easy to intermediate
The yield depends on the amount of dough used for each cookie. Large portions create a more substantial bakery-style cookie, while medium portions bake faster and are easier to serve in larger quantities.
Ingredients for Thick and Chewy Chocolate Chip Cookies
The following ingredients are chosen to create cookies with a sturdy shape, a chewy middle, and rich chocolate flavor.
Dry Ingredients
| Ingredient | Quantity | Purpose |
|---|---|---|
| All-purpose flour | 2¼ cups, about 280 g | Creates structure |
| Baking soda | 1 teaspoon | Helps with spreading and browning |
| Salt | ½ teaspoon | Balances sweetness |
| Cornstarch | 1 teaspoon, optional | Helps produce a tender texture |
All-purpose flour is a practical choice for home baking. Measuring it accurately is essential because too much flour can make the cookies dry, while too little may cause excessive spreading.
Baking soda supports browning and affects the way the dough spreads. Measure it carefully, as too much can create an unpleasant taste.
Cornstarch is optional. A small amount can help create a more tender bite, but the recipe can work without it.
Wet Ingredients
| Ingredient | Quantity | Purpose |
|---|---|---|
| Unsalted butter, softened | ¾ cup, about 170 g | Provides richness |
| Brown sugar | 1 cup, about 200 g | Adds moisture and chewiness |
| Granulated white sugar | ½ cup, about 100 g | Supports browning and crisp edges |
| Large egg | 1 | Provides structure and moisture |
| Egg yolk | 1 | Adds richness and tenderness |
| Vanilla extract | 2 teaspoons | Enhances flavor |
The additional egg yolk is an important feature of this recipe. The yolk contains fat and helps create a rich, tender cookie.
If you prefer an egg-free recipe, this particular formula would need adjustments rather than simply omitting the egg and yolk.
Chocolate Ingredients
| Ingredient | Quantity |
|---|---|
| Semi-sweet chocolate chips | 1 cup, about 170 g |
| Chopped dark or semi-sweet chocolate | ½ cup, about 85 g |
| Extra chocolate pieces for the tops | 2–3 tablespoons, optional |
Using a mixture of chips and chopped chocolate creates a more varied texture than using only small chips.
Semi-sweet chocolate is a balanced choice, but you can use dark chocolate for a more intense flavor. Milk chocolate works well if you prefer sweeter cookies.
Ingredient Notes
Butter: Use softened butter, not melted butter, for the creaming method in this recipe.
Brown sugar: Light brown sugar gives a mild caramel flavor. Dark brown sugar produces a deeper flavor and can contribute additional moisture.
Egg and yolk: Allow them to come close to room temperature before mixing. This helps the ingredients combine more evenly.
Chocolate: Use chocolate that tastes good on its own because it is a major part of the finished cookie.
Equipment You Will Need
Gather the following equipment before preparing the dough:
- A large mixing bowl
- A medium bowl
- An electric hand mixer or sturdy spoon
- A whisk
- Measuring cups and spoons or a kitchen scale
- A baking tray
- Parchment paper
- A cookie scoop or kitchen scale for portioning
- A cooling rack
- Plastic wrap or a covered container for chilling the dough
A kitchen scale makes it easier to measure flour and divide the dough into equal portions. Consistent portions bake more evenly and make it easier to reproduce your results.
Step-by-Step Instructions
Step 1: Measure All the Ingredients
Measure the flour, sugars, butter, eggs, chocolate, and remaining ingredients before you begin.
If possible, weigh the flour rather than relying entirely on measuring cups. Flour can become compacted, so two people using the same cup may measure different quantities.
Prepare the chocolate chips and chop the chocolate into small pieces. Keep some larger pieces aside for decorating the cookies.
Step 2: Combine the Dry Ingredients
In a medium bowl, whisk together the flour, baking soda, salt, and optional cornstarch.
Mix until the ingredients are evenly distributed.
Set the bowl aside. Combining the dry ingredients first helps prevent concentrated pockets of baking soda or salt in the finished cookies.
Step 3: Cream the Butter and Sugars
Place the softened butter in a large mixing bowl.
Add the brown sugar and granulated white sugar. Beat on medium speed until the mixture becomes creamy and relatively uniform, usually around two to three minutes with a hand mixer.
Scrape down the sides of the bowl as needed.
The butter should be soft enough to mix but should not look oily or melted. If it is too warm, the dough may become loose and spread excessively during baking.
Step 4: Add the Egg and Egg Yolk
Add the egg and additional egg yolk to the butter mixture.
Mix until incorporated, scraping the sides of the bowl if necessary.
Add the vanilla extract and mix briefly.
The mixture should look smooth and creamy. If it appears slightly uneven, continue mixing gently until the ingredients are combined.
Avoid excessive beating at this stage. You want a consistent mixture rather than an extremely airy cake batter.
Step 5: Add the Dry Ingredients
Add the flour mixture in two or three additions.
Mix on low speed or stir with a spatula until the flour is almost completely incorporated.
Stop mixing once the dough comes together. Prolonged mixing after adding flour can develop more gluten and make the cookies tougher.
The dough should be thick and relatively easy to handle. It may feel slightly sticky, which is normal.
Step 6: Fold in the Chocolate
Add the chocolate chips and chopped chocolate.
Use a spatula to fold them into the dough until they are distributed evenly.
Reserve a small amount of chocolate for the tops of the cookies.
Using both chips and chunks creates different sizes of chocolate pockets. The smaller pieces spread throughout the cookie, while the larger chunks provide more concentrated chocolate flavor.
Step 7: Portion the Dough
For large bakery-style cookies, divide the dough into portions of approximately 70–85 grams each.
If you do not have a kitchen scale, use a generous scoop of dough and keep the portions as similar as possible.
Shape each portion into a tall mound. Avoid flattening the dough heavily because the goal is to maintain thickness during baking.
Press a few reserved chocolate pieces into the top of each portion.
Place the portions on a lined tray with enough space between them, or arrange them on a separate tray for chilling.
Step 8: Chill the Dough
Cover the dough portions and refrigerate them for at least one hour.
For deeper flavor and convenient preparation, you can chill the dough overnight. The flour absorbs moisture, the butter firms up, and the dough becomes easier to handle.
Chilling is one of the most useful techniques for thick cookies. It helps slow spreading when the dough enters the oven.
Do not leave the dough uncovered, as it may dry out or absorb odors from other foods.
Step 9: Preheat the Oven
Preheat your oven to 350°F (175°C).
Allow it to reach the correct temperature before baking. An oven that is too cool can cause the butter to melt before the cookie structure begins to set.
Line a cool baking tray with parchment paper.
If you have refrigerated the dough on the same tray you plan to bake with, make sure the tray is suitable for oven use and follow the manufacturer’s instructions.
Step 10: Arrange the Dough on the Baking Tray
Place the chilled dough portions on the lined baking tray, leaving approximately two to three inches between them.
Large cookies need more room because they spread during baking.
If the dough portions have become very firm, let them sit briefly while the oven finishes preheating. They should remain cool rather than becoming soft and greasy.
Do not flatten the dough unless you intentionally want thinner cookies.
Step 11: Bake the Cookies
Bake the large cookies for approximately 12–16 minutes.
The exact baking time depends on portion size, oven accuracy, and the material of the baking tray.
Look for lightly golden edges and centers that appear set around the outside but remain soft.
The centers may look slightly underdone when the cookies first come out. This is desirable for a chewy result, provided the cookies are baked appropriately and allowed to set.
Smaller cookies may need less time. Begin checking them early rather than relying solely on the timing provided for large cookies.
Step 12: Shape the Edges if Necessary
For a neat bakery-style appearance, you can gently round the edges immediately after baking.
Place a large round cookie cutter or an appropriately sized heat-safe circular tool around a cookie, leaving enough space for it to move without pressing on the cookie. Carefully move the tool in a small circular motion to guide the edges into a more regular shape.
This step is optional and should be performed carefully while the cookies are still soft.
Step 13: Add Extra Chocolate
If the cookies have visible spaces on top, gently press a few additional chocolate pieces into the surface immediately after baking.
The warmth will soften the chocolate slightly, helping it adhere to the cookie.
This technique gives the cookies a more generous chocolate appearance.
Step 14: Cool the Cookies
Let the cookies rest on the baking tray for approximately 10 minutes.
They are fragile immediately after baking, so avoid lifting them too early.
After they have set, transfer them to a cooling rack and allow them to cool further.
The edges will become firmer while the centers retain a soft, chewy texture.
Step 15: Serve Fresh
Serve the cookies slightly warm if you enjoy melted chocolate and soft centers.
They also taste excellent at room temperature, when the chocolate has set and the texture becomes easier to handle.
Pair them with milk, tea, coffee, or a scoop of vanilla ice cream for a simple dessert.
The Secret to Thick and Chewy Cookies
The recipe provides a good starting point, but understanding the science behind the ingredients will help you produce consistent results.
1. The Right Balance of Flour
Flour provides the structure that allows the cookies to hold their shape.
If you use too little flour, the dough may spread excessively. If you use too much, the cookies can become dense and dry.
Weighing the flour is one of the easiest ways to improve consistency.
2. Brown Sugar for Chewiness
Brown sugar contains molasses, which contributes moisture and a caramel-like flavor.
Using more brown sugar than white sugar encourages a chewy texture, although the exact result also depends on the butter, flour, egg, and baking method.
3. Extra Egg Yolk for Richness
The additional egg yolk contributes fat and helps create a rich, tender interior.
It also affects the dough’s moisture and binding properties, so it should not be removed without adjusting the recipe.
4. Chilled Butter
When the dough is chilled, the butter becomes firmer. It takes longer to melt in the oven, giving the cookie structure more time to develop before spreading occurs.
This is especially helpful for large cookies.
5. Correct Baking Time
Cookies that remain in the oven too long lose moisture and become hard.
Remove them when the edges are set and lightly golden but the centers still look soft. Allow them to finish setting on the tray.
6. Large Dough Portions
Larger dough portions naturally produce a thicker center when prepared and baked correctly.
They also require longer baking than small cookies, so check the edges and centers rather than applying the timing for smaller portions.
How to Prevent Cookies from Spreading Too Much
Excessive spreading is one of the most common problems when making bakery-style chocolate chip cookies.
Several factors can cause it.
Butter Is Too Warm
Softened butter should be pliable but not greasy or liquid.
If the butter has become very soft, chill the dough before baking.
Dough Is Not Chilled
Warm dough tends to spread more quickly. Refrigerating the dough helps maintain its shape.
For this recipe, chill the portions for at least one hour.
Too Much Sugar
Sugar affects both sweetness and spreading. Changing the proportions substantially can alter the finished cookie.
Measure the ingredients carefully and avoid increasing the sugar without considering its effect on texture.
Too Little Flour
An insufficient amount of flour can leave the dough without enough structure.
Weigh the flour if possible, and avoid making large substitutions until you have tested the original recipe.
A Hot Baking Tray
Placing chilled dough on a hot tray can soften the butter before baking begins.
Use a cool tray for each batch. If you are baking multiple batches, allow the tray to cool before adding more dough.
How to Make Cookies Soft in the Middle
A soft center is one of the defining features of a good bakery-style cookie.
Start by using the recommended brown sugar and egg yolk. These ingredients help create a rich, chewy texture.
Chill the dough so it does not spread too quickly. Shape the portions tall, and avoid pressing them flat.
Most importantly, do not overbake. The edges should be set, but the centers can remain soft when the cookies are removed from the oven.
Let the cookies rest on the tray for around 10 minutes. This allows residual heat to finish the baking process while the structure becomes firm enough to handle.
How to Make Cookies Chewier
If you prefer a particularly chewy cookie, focus on moisture balance and baking time.
Use the specified brown sugar, avoid adding unnecessary flour, and measure the butter accurately.
The extra egg yolk contributes richness and tenderness. Chilling the dough also helps create a thicker cookie with a substantial center.
Do not bake the cookies until they are uniformly brown. Once they have cooled, the edges should be firmer while the middle remains pleasantly chewy.
Common Mistakes to Avoid
Mistake 1: Skipping the Chilling Step
Chilling is important for this thick-cookie recipe. If you skip it, the dough may spread more than expected.
If you are short on time, even a shorter chilling period may help, but the results can differ from the recommended method.
Mistake 2: Using Melted Butter
Melted butter changes the structure of the dough and can make the cookies flatter.
Use softened butter for the creaming method described here.
Mistake 3: Measuring Flour Incorrectly
Too much flour can make cookies dry, while too little may make them spread excessively.
A kitchen scale is the most reliable option.
Mistake 4: Overmixing the Dough
Once the flour is added, mix only until the dough comes together.
Excessive mixing can make the texture tougher.
Mistake 5: Baking at the Wrong Temperature
A temperature that is too low may cause excessive spreading before the cookies set. Excessive heat can brown the edges too quickly while leaving the center insufficiently baked.
Preheat the oven and check its accuracy if you regularly experience inconsistent results.
Mistake 6: Moving Cookies Too Soon
Fresh cookies are delicate and may break when lifted immediately.
Let them rest on the baking tray before transferring them to a rack.
Troubleshooting Thick Chocolate Chip Cookies
| Problem | Likely cause | Solution |
|---|---|---|
| Cookies spread into thin discs | Warm dough or insufficient flour | Chill the dough and verify measurements |
| Cookies are dry | Too much flour or overbaking | Weigh flour and reduce baking time |
| Cookies are hard | Excessive baking | Remove when the edges are set and centers remain soft |
| Cookies are cakey | Too much flour or an altered ingredient ratio | Follow the quantities closely |
| Cookies are pale | Low oven temperature or insufficient baking | Check oven temperature and baking time |
| Cookies burn underneath | Dark tray, low rack position, or excessive heat | Use the middle rack and monitor the bottoms |
| Chocolate burns | Exposed chocolate or excessive heat | Use the middle rack and avoid overbaking |
| Centers seem raw | Cookies are too large or baking time is insufficient | Bake longer in short intervals and check the centers |
Why Are My Cookies Flat Even After Chilling?
If chilled cookies still spread too much, check the butter, flour measurement, and oven temperature.
The butter may have been too warm before chilling, the flour quantity may be insufficient, or the oven may not be reaching the intended temperature.
Bake one test cookie before changing the whole batch.
Why Are My Cookies Dry?
Dry cookies often result from too much flour or excessive baking.
Measure flour by weight and remove the cookies when the edges are lightly golden. Remember that the cookies continue to firm after leaving the oven.
Why Are My Cookies Cakey Instead of Chewy?
A cakey texture can result from excess flour or substantial changes to the ingredient proportions.
Use the correct quantities and avoid adding additional flour simply because the dough feels sticky. Chilling is often a better way to make the dough easier to handle.
Variations of Bakery-Style Chocolate Chip Cookies
Double Chocolate Cookies
Replace approximately ¼ cup of flour with unsweetened cocoa powder, keeping the overall dry ingredient balance in mind.
The result will have a richer chocolate flavor and darker color. Because cocoa powder absorbs moisture, the dough may need minor adjustments.
Dark Chocolate Chunk Cookies
Replace the chocolate chips with chopped dark chocolate.
The larger pieces create pockets of melted chocolate and provide a stronger contrast to the sweet cookie dough.
Milk Chocolate Cookies
Use milk chocolate chips for a sweeter, creamier flavor.
You may wish to reduce the white sugar slightly if you find the finished cookies too sweet, but remember that sugar also affects texture.
Walnut Chocolate Chip Cookies
Add approximately ½ cup of chopped walnuts.
For deeper flavor, lightly toast the walnuts and let them cool before mixing them into the dough.
Avoid this variation if anyone eating the cookies has a nut allergy.
Peanut Butter Chocolate Chip Cookies
You can experiment by replacing a small portion of the butter with smooth peanut butter.
This changes the fat balance and flavor, so begin with a small substitution rather than replacing all the butter.
Sea Salt Chocolate Chip Cookies
For a sweet-and-salty finish, sprinkle a very small amount of flaky salt over the cookies immediately after baking.
Use a light hand because too much salt can overpower the chocolate and buttery flavor.
White Chocolate and Cranberry Cookies
Replace some of the chocolate chips with white chocolate chips and add a small quantity of chopped dried cranberries.
The sweetness of the white chocolate contrasts nicely with the fruit’s tart flavor.
How to Store Bakery-Style Cookies
Room-Temperature Storage
Allow the cookies to cool completely before storing them in an airtight container.
Keep the container in a cool, dry place away from direct sunlight. For best quality, try to enjoy the cookies within about three to five days.
Warm cookies should not be sealed in a container because trapped steam can create condensation and make them soggy.
Refrigerating Cookies
Refrigeration is usually unnecessary for plain, fully baked cookies.
If you choose to refrigerate them, use an airtight container to prevent them from absorbing food odors. Refrigeration can make the cookies firmer, so allow them to approach room temperature before serving.
Freezing Baked Cookies
To freeze the baked cookies, allow them to cool completely.
Place them in a freezer-safe container, separating layers with parchment paper. Seal the container and label it with the date.
For good quality, aim to use them within two to three months.
Thaw at room temperature or warm them briefly in an oven before serving.
How to Freeze Cookie Dough
Preparing the dough ahead of time makes it easier to enjoy fresh cookies whenever you want.
Freeze Individual Portions
- Prepare the dough according to the recipe.
- Divide it into equal portions.
- Arrange the portions on a lined tray.
- Freeze them until firm.
- Transfer them to a freezer-safe bag or container.
- Label the container with the date.
When you are ready to bake, arrange the frozen portions on a baking tray. They may need additional baking time compared with refrigerated dough.
Check their appearance during baking and adjust the time as necessary.
Refrigerate Dough for Later
If you intend to bake within a few days, refrigerate the covered dough instead of freezing it.
For best quality, use refrigerated cookie dough within approximately two to three days. Keep it cold and discard it if it develops an unusual appearance or smell.
How to Serve Thick and Chewy Cookies
With Cold Milk
Milk is a classic pairing for chocolate chip cookies. Its mild flavor balances the sweetness of the chocolate and butter.
With Coffee
Serve a large cookie with coffee for an afternoon treat. Unsweetened coffee pairs especially well with cookies made with milk chocolate or a generous amount of brown sugar.
With Tea
Tea is another simple option. Black tea, milk tea, or lightly flavored tea can complement the buttery cookie flavor.
With Ice Cream
Serve a warm cookie with a scoop of vanilla ice cream. The contrast between the warm cookie and cold ice cream creates an easy dessert.
As Ice Cream Sandwiches
Place a scoop of slightly softened ice cream between two completely cooled cookies.
Press gently, serve immediately, or freeze the assembled sandwiches briefly for easier handling.
For Parties and Celebrations
Bake a mixture of large and medium cookies and arrange them on a serving plate.
You can combine dark chocolate, milk chocolate, and walnut variations for variety. Check for food allergies before serving guests.
Frequently Asked Questions
1. What Makes Chocolate Chip Cookies Thick and Chewy?
Thick and chewy cookies depend on the right balance of flour, butter, brown sugar, and moisture. Chilling the dough and using larger portions help reduce spreading and create a substantial center.
2. Why Is Brown Sugar Important?
Brown sugar contains molasses, which contributes moisture and a mild caramel flavor. It helps produce the chewy texture associated with many bakery-style cookies.
3. Should I Melt the Butter?
No. This recipe uses softened butter for the creaming method. Melted butter changes the dough’s structure and can cause the cookies to spread more than expected.
4. How Long Should I Chill the Dough?
Chill the dough for at least one hour. You can refrigerate it overnight for convenience and deeper flavor.
5. Can I Skip Chilling?
You can try baking without chilling, but the cookies may spread more and become thinner. Chilling is recommended when a thick bakery-style shape is the goal.
6. What Temperature Is Best for Baking?
A temperature of 350°F (175°C) is a useful starting point for this recipe. Always preheat the oven and check the cookies based on their appearance.
7. How Long Do Large Cookies Take to Bake?
Large cookies generally need about 12–16 minutes, although the exact time depends on their size and your oven.
Smaller cookies will usually bake faster.
8. Can I Use Only Chocolate Chips?
Yes. You can use only chocolate chips instead of combining chips and chopped chocolate. The texture of the chocolate pockets will be more uniform.
9. Can I Use Dark Brown Sugar?
Yes. Dark brown sugar creates a deeper molasses flavor and can make the cookies taste richer. The texture may differ slightly from cookies made with light brown sugar.
10. Can I Make the Dough Without a Mixer?
Yes. A sturdy spoon or spatula works. Allow the butter to soften properly and mix the butter and sugars until they are evenly combined.
11. Can I Make Smaller Cookies?
Yes. Divide the dough into smaller portions and leave sufficient space between them. Begin checking them earlier because they will bake faster than large cookies.
12. Can I Freeze the Dough?
Yes. Freeze individual portions on a tray until firm, then transfer them to a freezer-safe container. Frozen dough may need additional baking time.
13. How Do I Keep Cookies Soft After Baking?
Allow them to cool completely and store them in an airtight container. Keep them away from direct sunlight and avoid leaving them uncovered for long periods.
14. Why Are My Cookies Hard the Next Day?
The cookies may have been overbaked or exposed to air during storage. Measure the flour accurately, avoid excessive baking, and seal the cooled cookies in an airtight container.
15. Can I Use Whole-Wheat Flour?
You can replace a portion of the all-purpose flour with whole-wheat flour, but the cookies may become denser. Begin with a small substitution and check the dough consistency.
16. Are Bakery-Style Cookies Supposed to Be Gooey Inside?
They are often soft and chewy in the middle, but they should not have visibly raw dough. The centers continue to set as the cookies rest after baking.
17. How Can I Make the Cookies Look Like Bakery Cookies?
Use large, evenly sized portions, chill the dough, and press a few chocolate pieces onto the tops. For a neat shape, gently round the edges immediately after baking.
18. Can I Reduce the Sugar?
You can experiment with reducing the sugar slightly, but large changes may affect spreading, browning, and chewiness. Test small adjustments rather than changing the entire recipe at once.
19. Can I Make These Cookies Dairy-Free?
You can experiment with a suitable plant-based baking butter and dairy-free chocolate chips. Because different substitutes contain different amounts of fat and water, the texture may change.
20. Can I Make These Cookies for a Small Business?
Yes. The recipe can be a starting point for a small homemade cookie business. Before selling, test consistent portion weights, baking times, packaging, shelf life, ingredient costs, and local food-safety requirements.
Final Thoughts
Thick and chewy chocolate chip cookies are a wonderful homemade dessert when you want the rich flavor and substantial texture associated with American bakeries. The key is not a complicated secret ingredient but a careful balance of flour, butter, brown sugar, chocolate, and moisture.
For the best results, measure the ingredients accurately, use softened butter, chill the dough for at least one hour, shape the portions tall, and avoid overbaking. Allowing the cookies to rest on the tray after baking helps the edges firm while the centers remain soft.
Once you have mastered the basic recipe, you can experiment with dark chocolate, walnuts, peanut butter, or a sprinkle of flaky salt. With consistent measurements and careful baking, you can make thick, chocolate-filled cookies at home for everyday snacks, special occasions, or sharing with friends and family.